Configuration#
Estimated time to read: 5 minutes
Before you create the model, review these related pages:
- How to: Create an Instrument
- How to: Add an Instrument to a Resource
- Manage Measurement Capabilities
Info
This tutorial refers to a master data file used to create the model and scenarios and you can download it here.
Step 1: Confirm Lookup Tables#
Go to Administration > Tables > Lookup Tables and confirm that these values exist.
| Lookup Table | Value |
|---|---|
InstrumentType | Caliper |
InstrumentType | Scale |
ResourceResourceType | Instrument |
ResourceResourceType | Measurement Device |
Table: Lookup table values required for the tutorial
Step 2: Create Instrument Resources#
Go to Business Data > Resource > New.
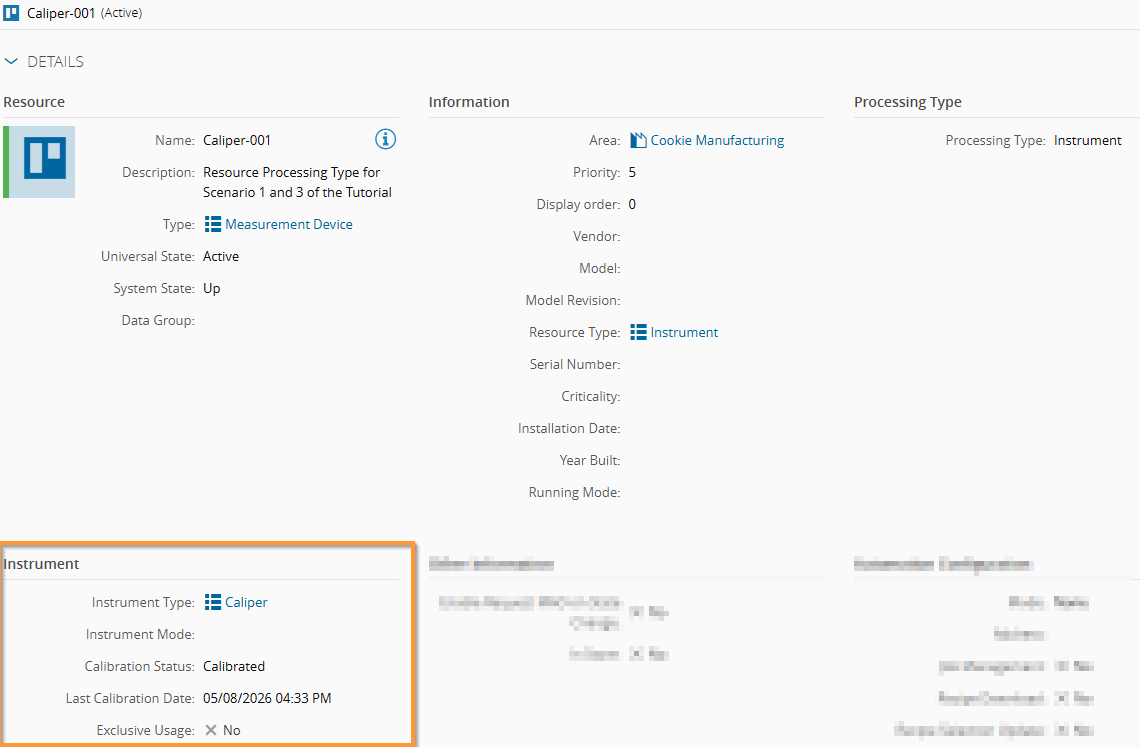
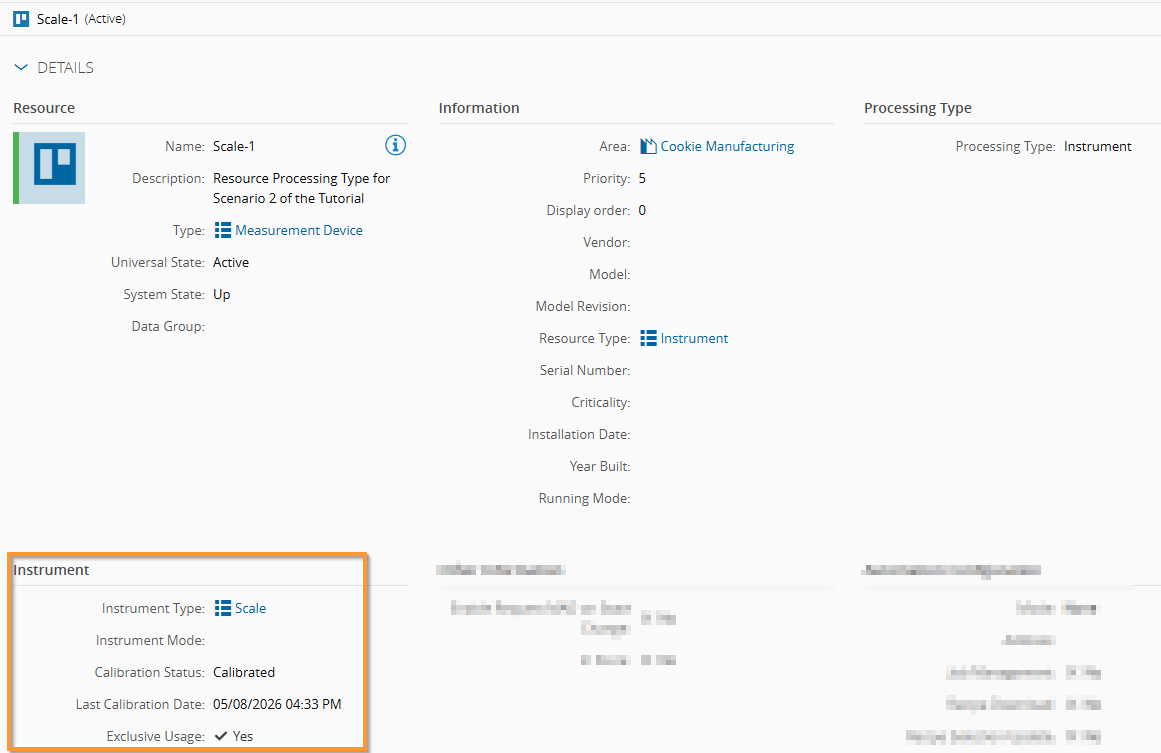
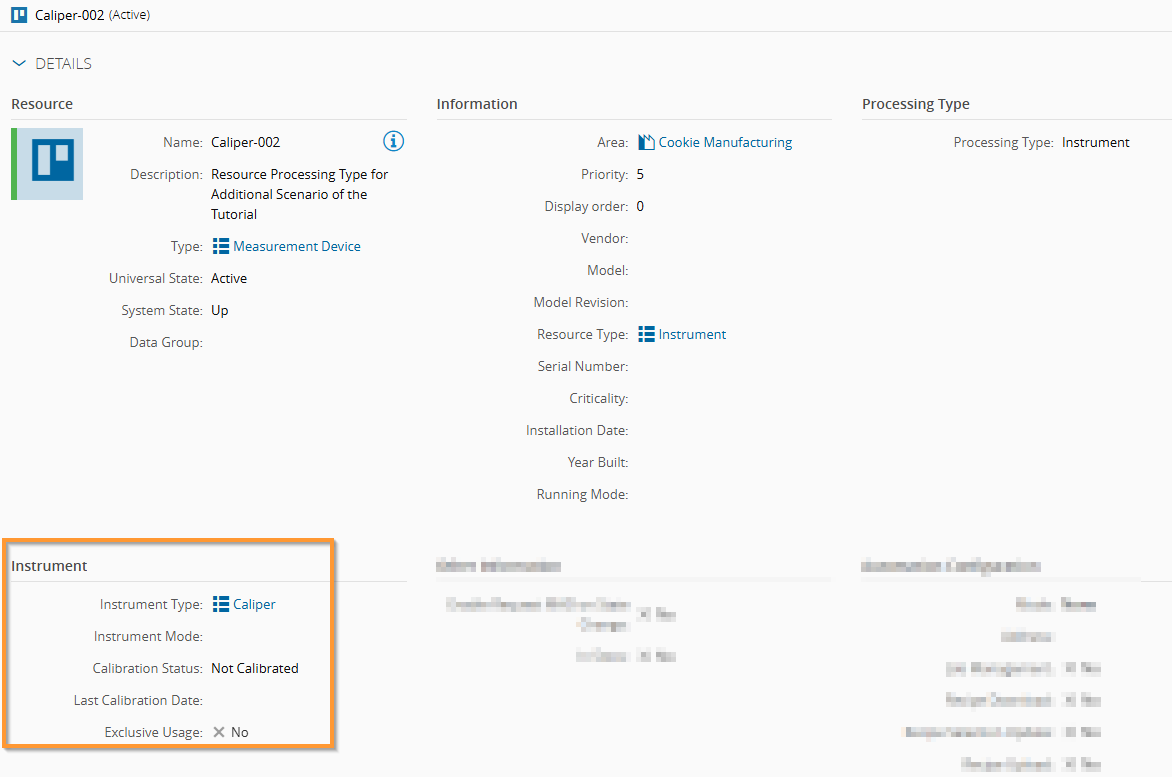
In General Data, set Processing Type to Instrument. The Additional Information tab shows these fields in the Instrument section.
| Field | Description |
|---|---|
| Instrument Type | Type of instrument selected from the InstrumentType lookup table, for example Caliper or Scale. |
| Calibration Status | Current calibration state: Calibrated, In Calibration, or Not Calibrated. |
| Last Calibration Date | Date of the most recent calibration. This field is required with Calibrated status for selection at Track-In. |
| Exclusive Usage | Prevents the Instrument from being associated with more than one process Resource at the same time when enabled. |
Table: Instrument fields used in the tutorial
Use these Instrument Resources in the scenarios.
| Resource | Instrument Type | Calibration Status | Exclusive Usage | Used In |
|---|---|---|---|---|
Caliper-001 | Caliper | Calibrated | No | Scenarios 1 and 4 |
Caliper-002 | Caliper | Not Calibrated | No | Scenario 3 |
Scale-1 | Scale | Calibrated | Yes | Scenario 2 |
Table: Instrument resources used in the tutorial
Step 3: Define Measurement Capabilities#
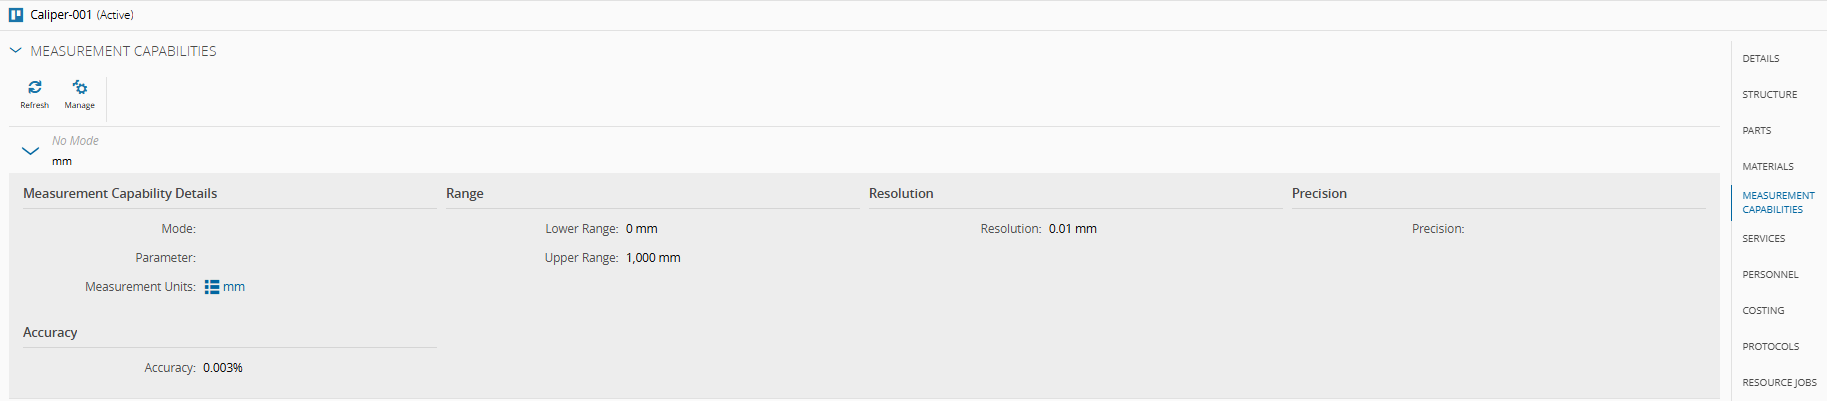
Measurement capabilities define the metrological characteristics of an Instrument. Go to Business Data > Resource > Instrument Name > Measurement Capabilities > Manage.
| Field | Description | Example (Caliper-001) |
|---|---|---|
| Mode | Measurement mode name. Use it only when the Instrument has more than one capability. Leave it empty when there is a single capability. | Empty |
| Parameter | Optional link to an existing Parameter. When set, the system inherits Measurement Units. | Empty |
| Measurement Units | Unit of measurement for the capability. | mm |
| Lower Range | Minimum measurable value. | 0 |
| Upper Range | Maximum measurable value. | 1000 |
| Range Units | Unit used for the range fields. | mm |
| Resolution | Smallest readable value. This field is mutually exclusive with Precision. | 0.01 |
| Precision | Repeatability of the measurement. This field is mutually exclusive with Resolution. | Empty |
| Accuracy (%) | Closeness of the reading to the true value. | 0.003 |
Table: Measurement capability fields
Note
Resolution and Precision are mutually exclusive. Use Resolution when the smallest scale division is known. Use Precision when repeatability test data is available. Fill at least one of Resolution, Precision, or Accuracy.
Instruments of the same type usually share identical characteristics. When you create a new Instrument, you can use Copy All Measurement Capabilities to reuse an existing definition.
When to Use Mode or No Mode#
| Instrument setup | Configuration | Effect in Manage Instruments |
|---|---|---|
| One Instrument measures multiple Parameters with the same characteristics | Create a single measurement capability and leave Mode empty. | Add the Instrument once so it is available for all matching Parameters. |
| One Instrument needs different ranges or resolutions for different measurements | Create one measurement capability per Mode and name each Mode. | Add the Instrument and specify the required Measurement Mode. |
Table: Mode usage guidance
Note
The same Instrument Resource cannot be added twice to the same Resource. When a Resource must measure parameters that need different modes, create one Instrument Resource per mode.
Step 4: Configure the Step#
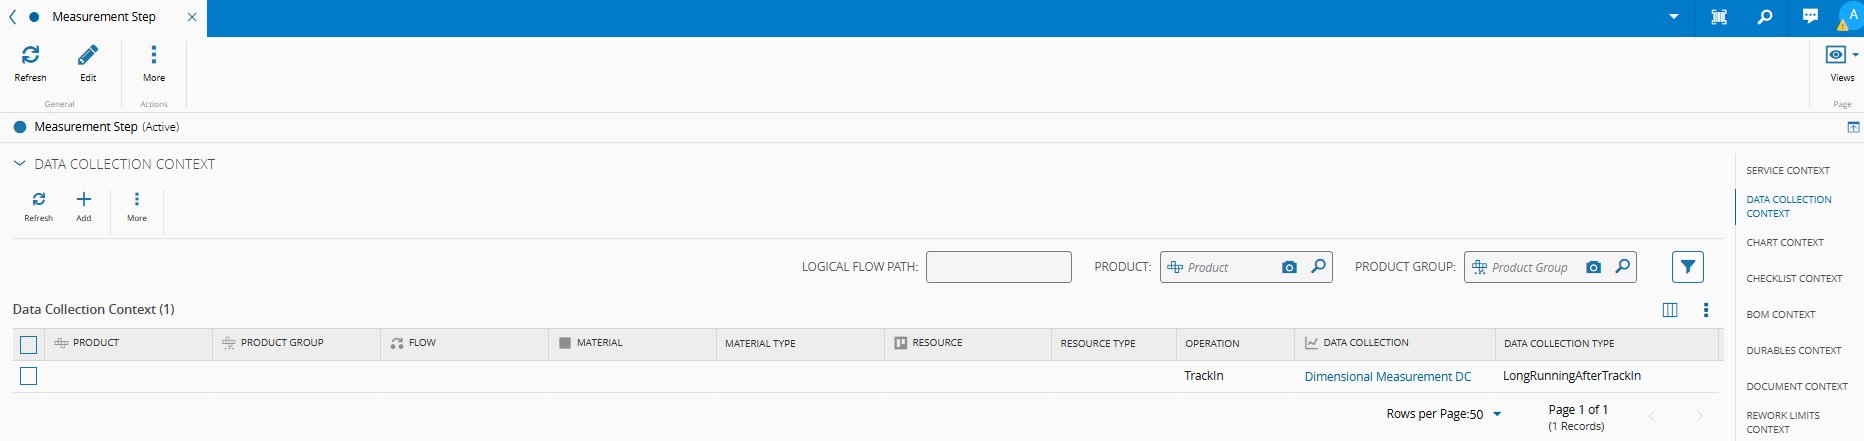
Go to Business Data > Step > Measurement Step and configure these settings.
| Field | Value | Description |
|---|---|---|
| Require Instruments at Track-In | Yes | Adds an Instruments step to the Track-In wizard and blocks Track-In until the operator confirms the Instruments. |
| Disassociate Instruments at Track-Out | No | Keeps the Instruments associated after Track-Out. Set it to Yes only when the instruments must be removed automatically. |
Table: Step settings used in the tutorial
Step 5: Configure the Data Collection#
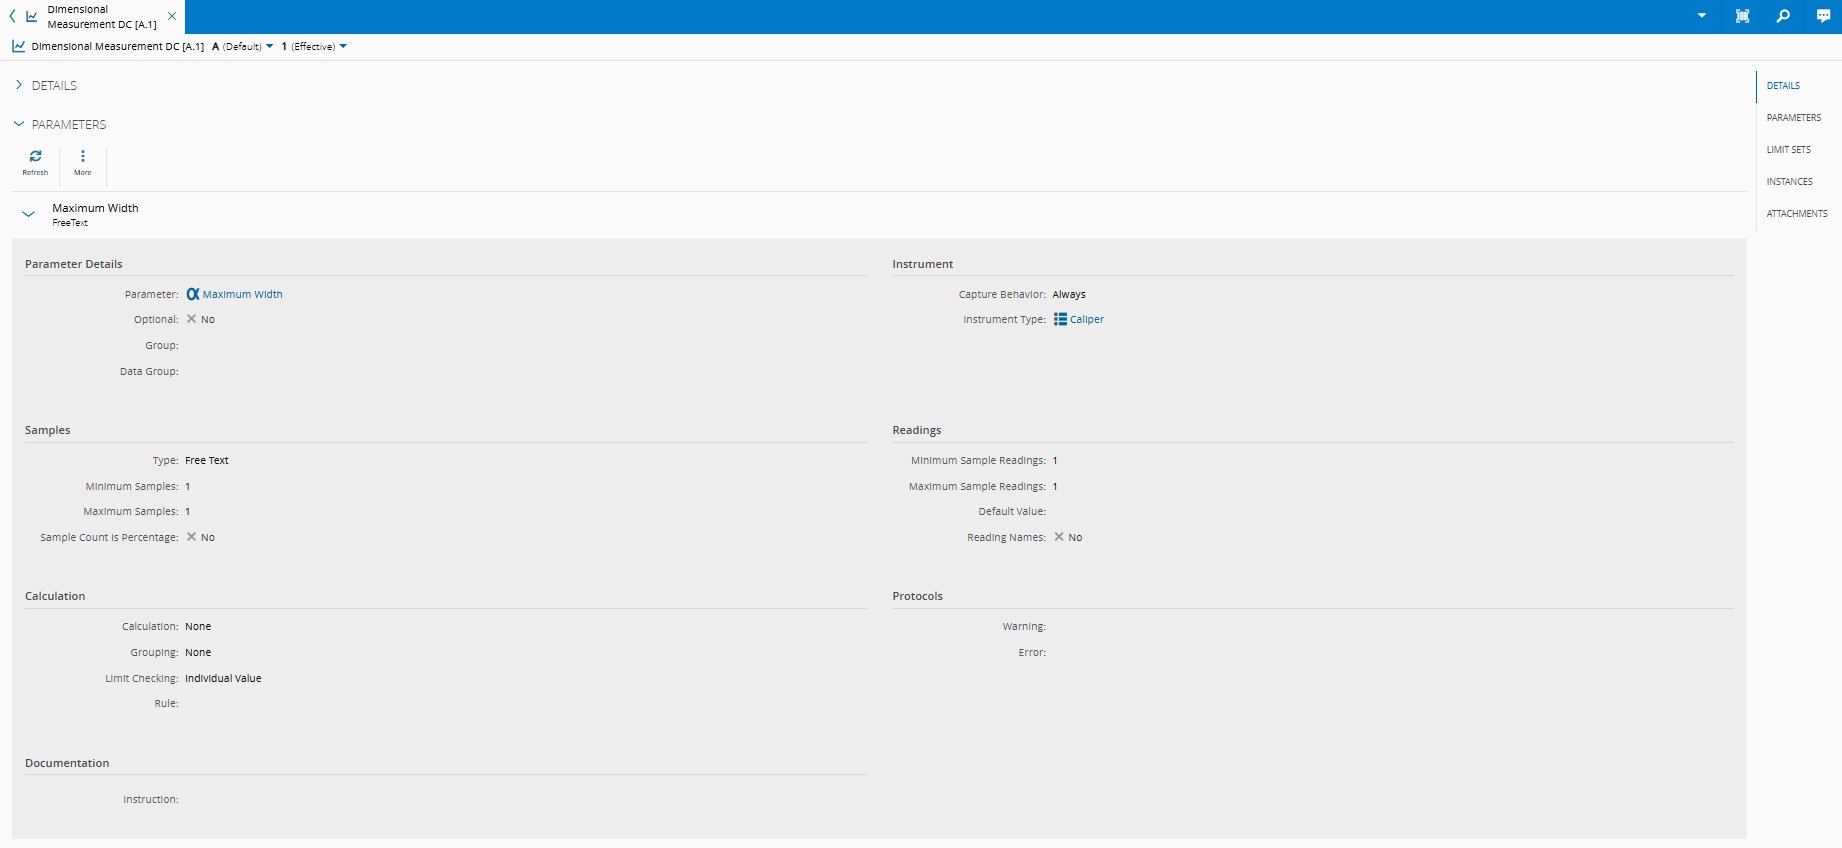
Each Parameter in the Data Collection must have the Instruments section configured. Go to Business Data > Data Collection > Dimensional Measurement DC > Parameters.
| Field | Value | Description |
|---|---|---|
| Capture Behavior | Always | Requires the operator to select an Instrument for every reading. |
| Capture Behavior | On Change | Available for inspection-scope Data Collections. Reuses the same Instrument until the operator changes it. |
| Instrument Type | for example Caliper | Filters the available Instruments to the matching type. |
Table: Data collection parameter settings
Step 6: Manage Resource Instruments#
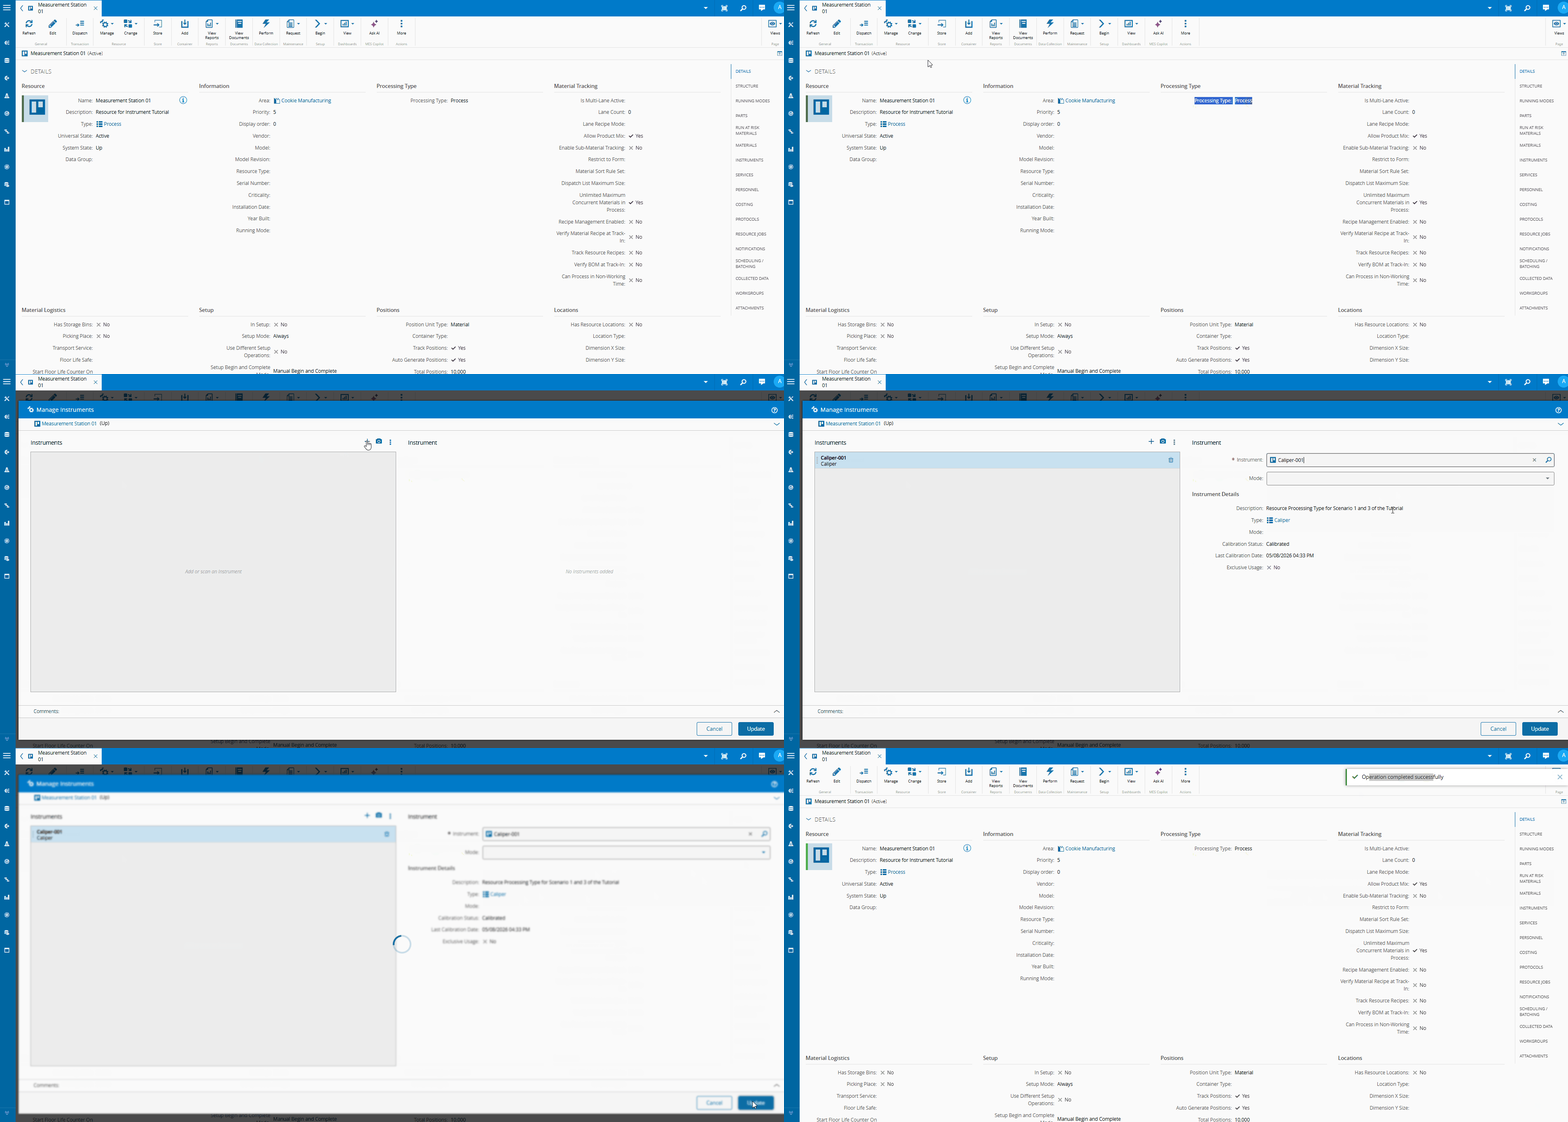
Go to Business Data > Resource > Measurement Station 01. You can access the Instruments section in two ways:
- From the Resource detail page, scroll to the Instruments section on the right-side panel and select Manage.
- From the Resource ribbon, select Manage > Instruments.
In the Manage Instruments wizard, select , choose the Instrument, and select Update.
When the Instrument has a single measurement capability without Mode, one entry covers all compatible Data Collection Parameters.
Instrument Resource System State and Termination#
Warning
When an Instrument Resource is set to Terminated, the system automatically removes it from any resource where it is currently associated. If a data collection instance is open on the affected resource, you cannot close it until another calibrated instrument is associated with the resource and selected.
An Instrument Resource with system state Down or Non-Scheduled is not selectable during Track-In or Data Collection. This is expected system behavior.
Continue to Scenarios.