Create UI Page#
 UIPage.Create
By accessing the UI Pages in Administration, the system displays the available UI Pages.
To create a UI Page you need to select New on the top ribbon and complete the information as described below.
Sequence of Steps#
There are several ways to create a new versioned object. Depending on the level, follow these steps to get started:
- Entity - in the landing page of this entity type in the Business Data menu or in the details page of an existing entity of the same type, select New on the top ribbon. For more information, see Creating Entity Objects.
- Revision - if you want to create a new revision, go to the New dropdown button on the top ribbon and select Revision. For more information, see Revisions.
- Version - if you want to create a version associated to an existing revision, go to the New dropdown button on the top ribbon and select Version. For more information, see Versions.
Step 1: Change Set#
- Choose an existing Change Set or select Create to create a new Change Set. If configured to support implicit Change Sets, it is also possible to check the Use Automatic Change Set option.
- Optionally, select an Approval Role.
- Optionally, set the Make Change Set Items Effective on Approval to
trueso that the Change Set items become effective when the Change Set is approved.
Info
For more information, see Create Change Set.

Step 2: General Data#
- Enter the UI Page name.
- Optionally, enter the Revision.
- Optionally, enter the Description.
-
Select the UI Type:
- Cluster - a special type of page that organizes a navigation menu on the left and an information panel on the right, useful for elements with multiple layers of information.
- Page - an organized set of elements that allow you to interact with the system.
- Step - a specific step to be used in UI Pages of type Wizard.
- Wizard - a set of steps that prepares data to call a system action.
Info
For more information on UI Types Step and Wizard, see Creating Steps and Wizards.
-
The Folder is set to
\Dashboardsby default. -
Select the Scope accordingly.
- Asset Dashboard - use this scope for pages that you want to associate with an asset. UI Pages with scope Asset Dashboard must have a property with the following settings:
- Name:
AssetId - Source:
UrlParameter - Required enabled.
- Name:
- Entity Type - use this scope for pages that you want to associate with an Entity Type. For example, an Area or a Resource. To add the page to the View menu of an entity, enable Pin To Quick Access.
- General - use this scope for general purpose pages. For example, use this type of scope in a UI Page to customize a user home page in MES.
- Menu Entry - use this scope for pages that you want to associate with a menu entry. For example, Business Data or Administration. To add the page to the Dashboard section of a menu entry, enable Pin To Quick Access.
Info
- To understand where you can access the created page according to the selected scope, see Scopes.
- Add properties to a UI Page in the Properties tab of the Page Builder settings wizard. For more information, see Design UI Page.
- Asset Dashboard - use this scope for pages that you want to associate with an asset. UI Pages with scope Asset Dashboard must have a property with the following settings:
-
Optionally, select the Layout:
- Desktop (1536 x 864)
- Desktop (1920 x 1080)
- Laptop (1280 x 720)
- Laptop (1366 x 768)
- Phone (360 x 800)
- Phone (390 x 844)
- Phone (414 x 896)
- Tablet (1280 x 800)
- Tablet (768 x 1024)
Info
You can customize the default values for the Layouts or add new ones by editing the fields in the UIPageLayouts Generic Table.
-
Optionally, enter a comment.
- Select Create.

Note
You can only use a UI Page with Universal State set to Effective. Approve the Change Set before using any UI Page.
After Creation#
After successfully creating the UI Page, start designing your new UI Page. Drag and drop the widgets from the widget panel on the left into the desired areas. For more information, see Design UI Page.
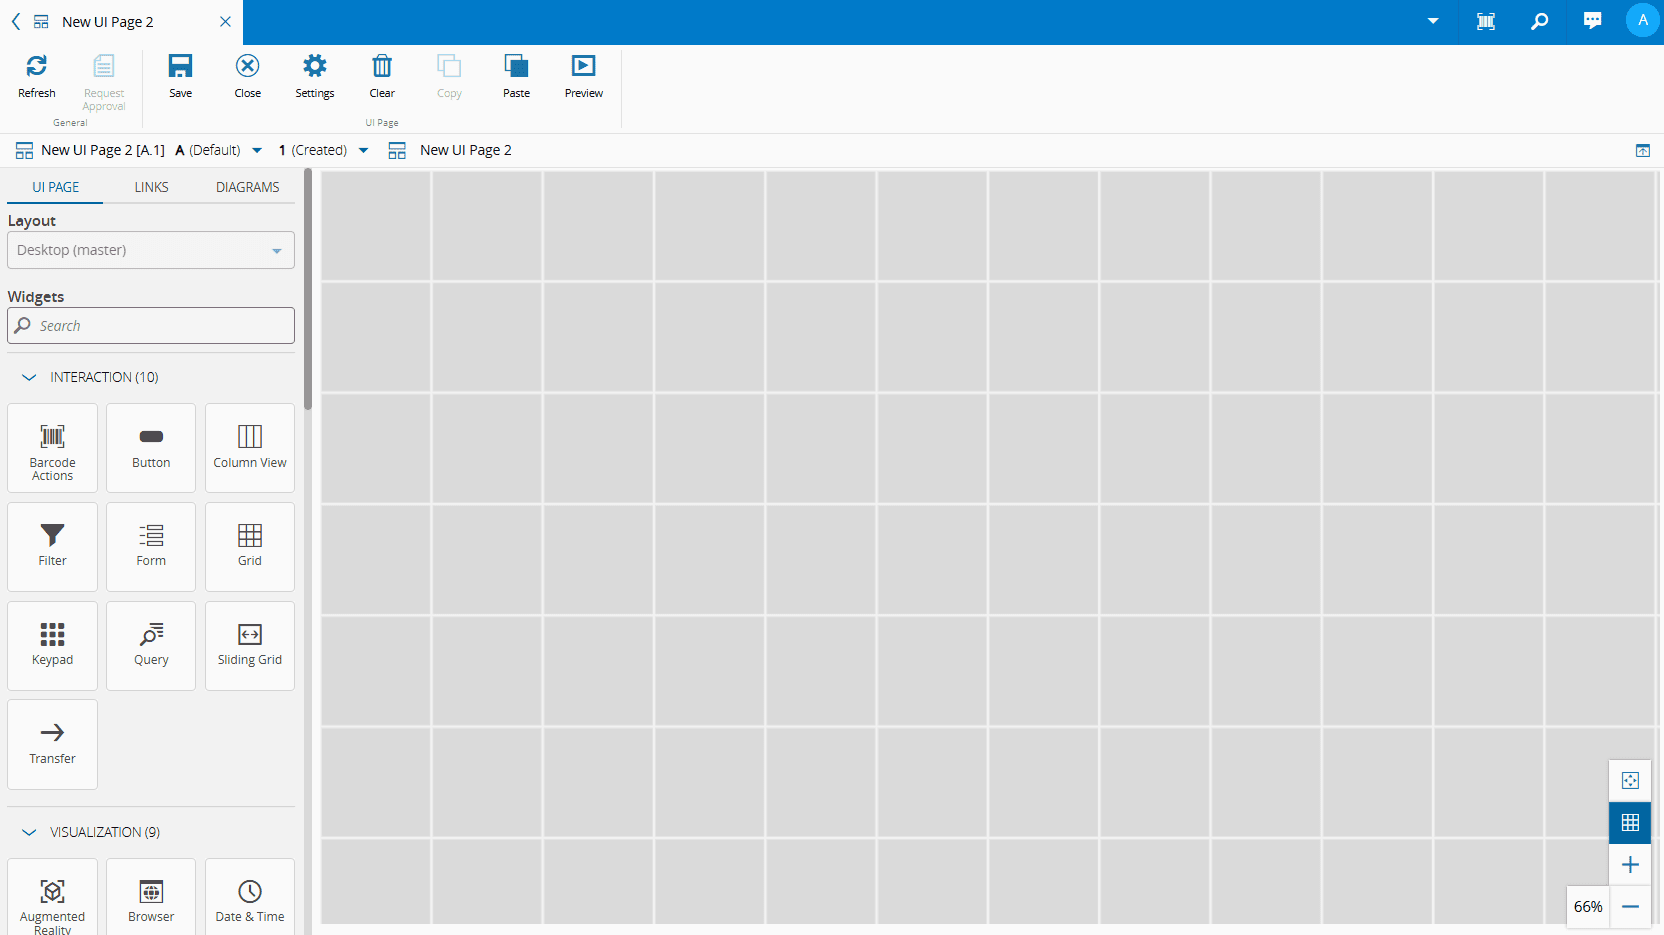
Optionally, select Settings on the top bar to define the UI Page settings. For more information, see Page Builder Settings.

After finishing the design of the UI Page, request its approval to star using it.
Scopes#
Scopes allow you to use UI Pages in the specific context that each scope defines.

Asset Dashboard#
After creating a UI Page with scope Asset Dashboard and a property with the following settings:
- Name set to
AssetId - Source set to
UrlParameter - Required enabled.
Info
Add properties to a UI Page in the Properties tab of the Page Builder settings wizard. For more information, see Design UI Page.

You can use the UI Page you created as a dashboard in an asset.

Warning
If you don't create the property with name AssetId, the UI Page doesn't appear in the dashboard section of assets.
Entity Type#
After creating a UI Page with scope Entity Type and enabling Pin To Quick Access, you can access the page in the view menu of the entity type.

General#
After creating a UI Page with scope General you can add the UI Page to the home of all the users in a role.
Menu Entry#
After creating a UI Page with scope Menu Entry and enabling Pin To Quick Access, you can access the page in the Dashboard section of the menu entry you selected.
