Create a custom workflow#
To create a new workflow for the automation controller, click the plus sign located on the right side of the page. It will create a new workflow with an automatic name, as seen in the image.
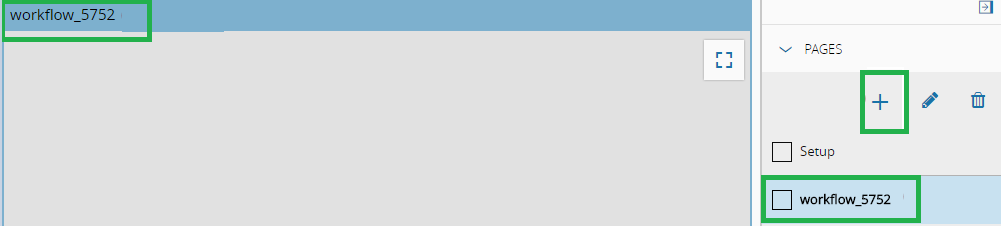
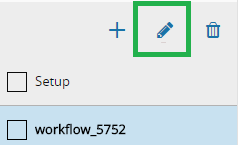
Once the workflow is created, it can be edited by clicking on the pencil icon located on the right of the plus sign.
In the Edit Page pop-up, the name and color can be changed.

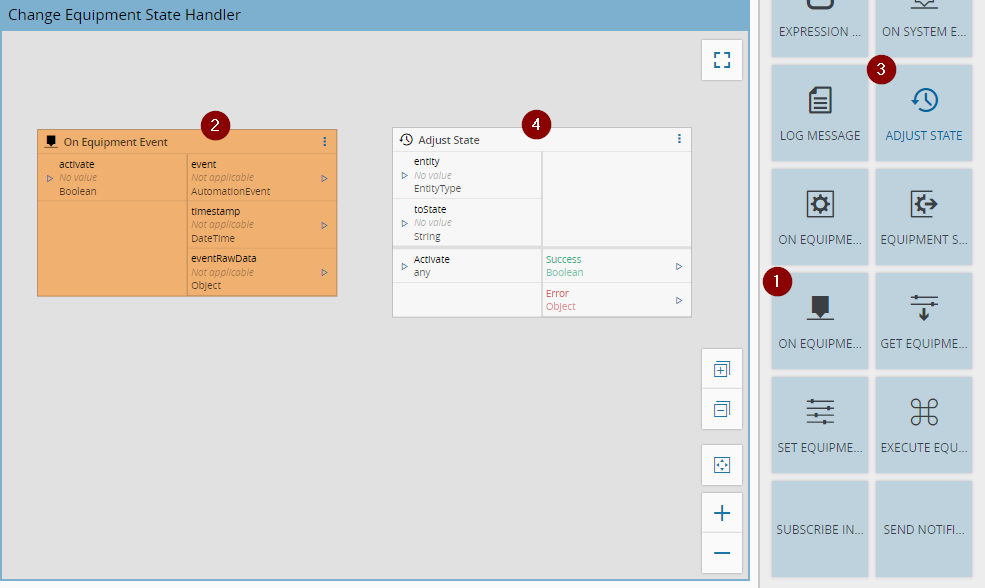
At this time, any task can be added to the workflow to create a new behavior. As an example, we will create a handler for an equipment state change.
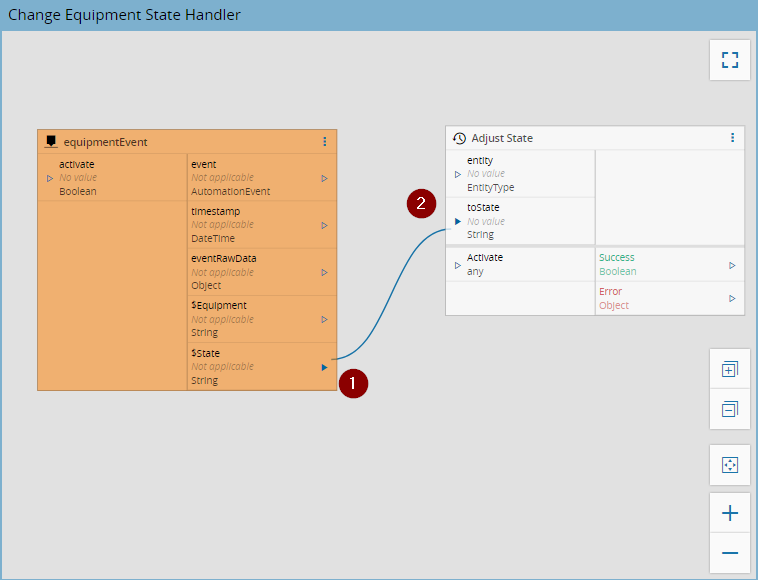
Firstly, add an On Equipment Event (1) task dragging the object to the workflow; a block will be created (2) and displayed in the workflow page. Do the same for the Adjust State (3) task and a block (4) will be created and displayed as well.
Then, it is necessary to perform some configurations.
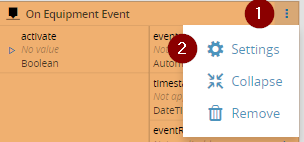
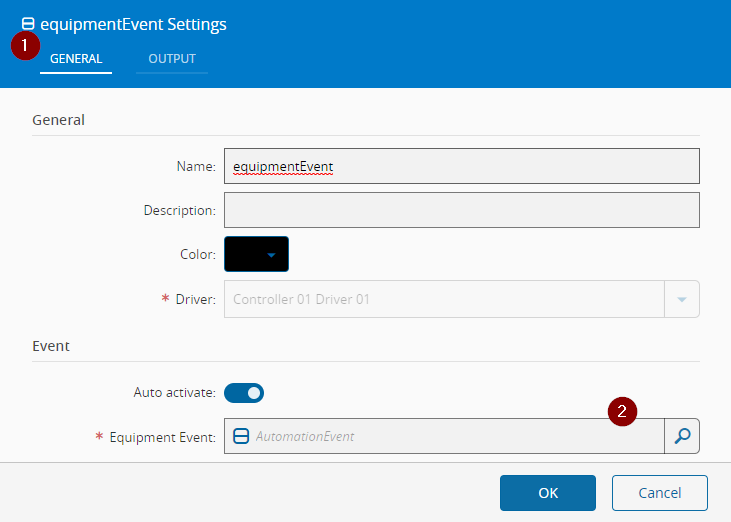
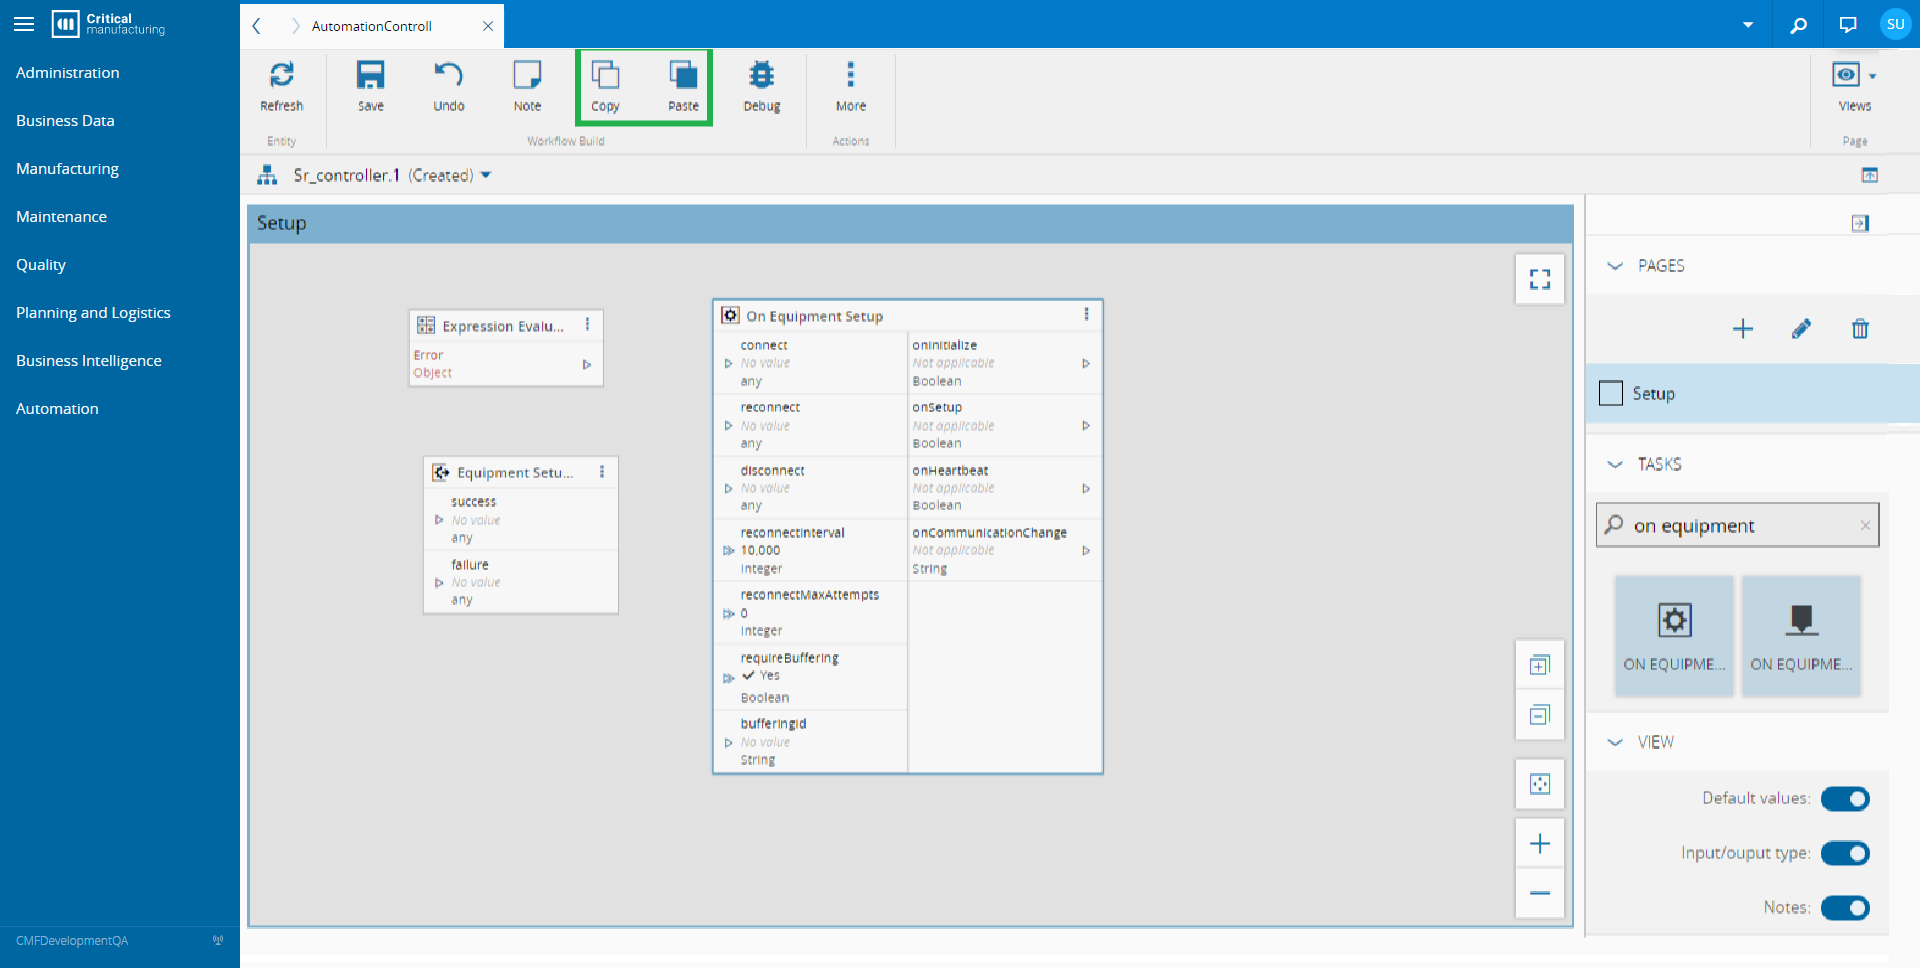
Firstly, the Equipment Event, opening the settings page for the specific block, clicking the button (1) in the image and choosing the Settings (2) option.
In the general (1) tab of the opened pop up window, change the Name and choose the Equipment Event (2) that will trigger this flow.
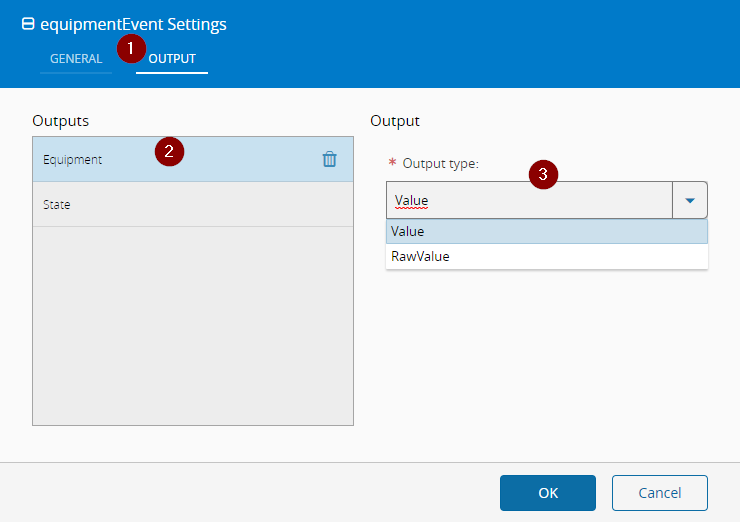
In the output (1) tab, select each output (2) and configure its type (3) to Value, this means that we will use the value of the parameter in the system after the equipment value is converted to system data type, if we want the value before it is converted we should use RawValue.
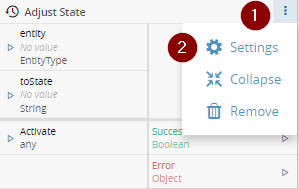
For the adjust state task configurations click the button (1) in the right side of the task and select Settings (2) option.
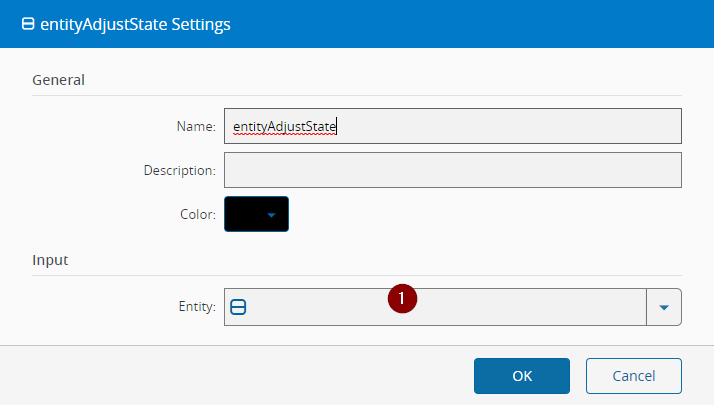
Choose the Input Entity (1) to Resource and choose the Resource Instance to adjust the state to.
Create a new link from the Equipment Event task State (1) output to the Adjust State toState (2) input.
In case you wish to duplicate an existing task, it is possible to use the Copy and Paste buttons, on the top ribbon:
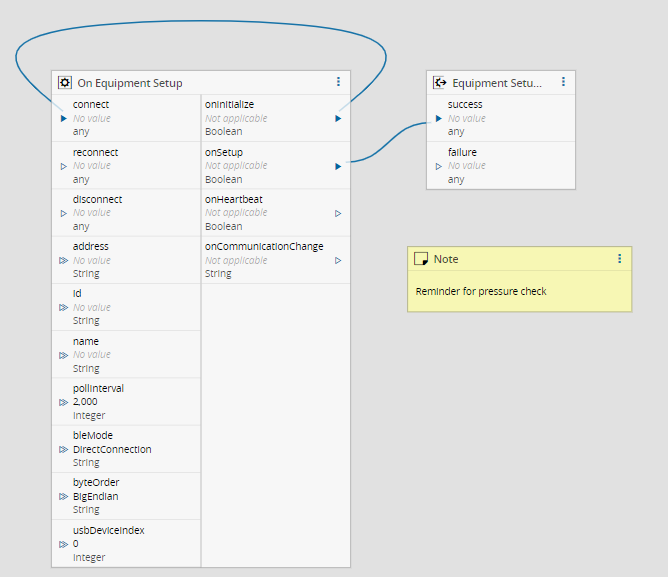
A note can be added to the visual editor in order to comment on a particular situation or need. Just press the Note button on the ribbon and use the Settings button on the created element to edit a rich-text note.
After all is done, save by clicking on the Save button in the upper left side of the page.