Create BOM#
 BOM.Create
BOM.CreateTemplate
BOM.CreateFromTemplate
Overview#
This operation is used to create a BOM.
Setup#
No specific setup is required other than to meet the preconditions of the transaction.
Preconditions#
- The BOM does not currently exist in the system.
Sequence of Steps#
There are several ways to create a new versioned object. Depending on the level, follow these steps to get started:
- Entity - In the landing page of this entity type in the Business Data menu or in the details page of an existing entity of the same type, select New on the top ribbon. For more information see Creating Entity Objects.
- Revision - If you want to create a new revision, go to the New dropdown button on the top ribbon and select Revision. For more information, see Revisions.
- Version - If you want to create a version associated to an existing revision, go to the New dropdown button on the top ribbon and select Version. For more information, see Versions.
Step 1: Change Set#
- Select an existing Change Set or click Create to create a new Change Set. If configured to support implicit Change Sets, it is also possible to check the option Use Automatic Change Set.
- Optionally, select an Approval Role.
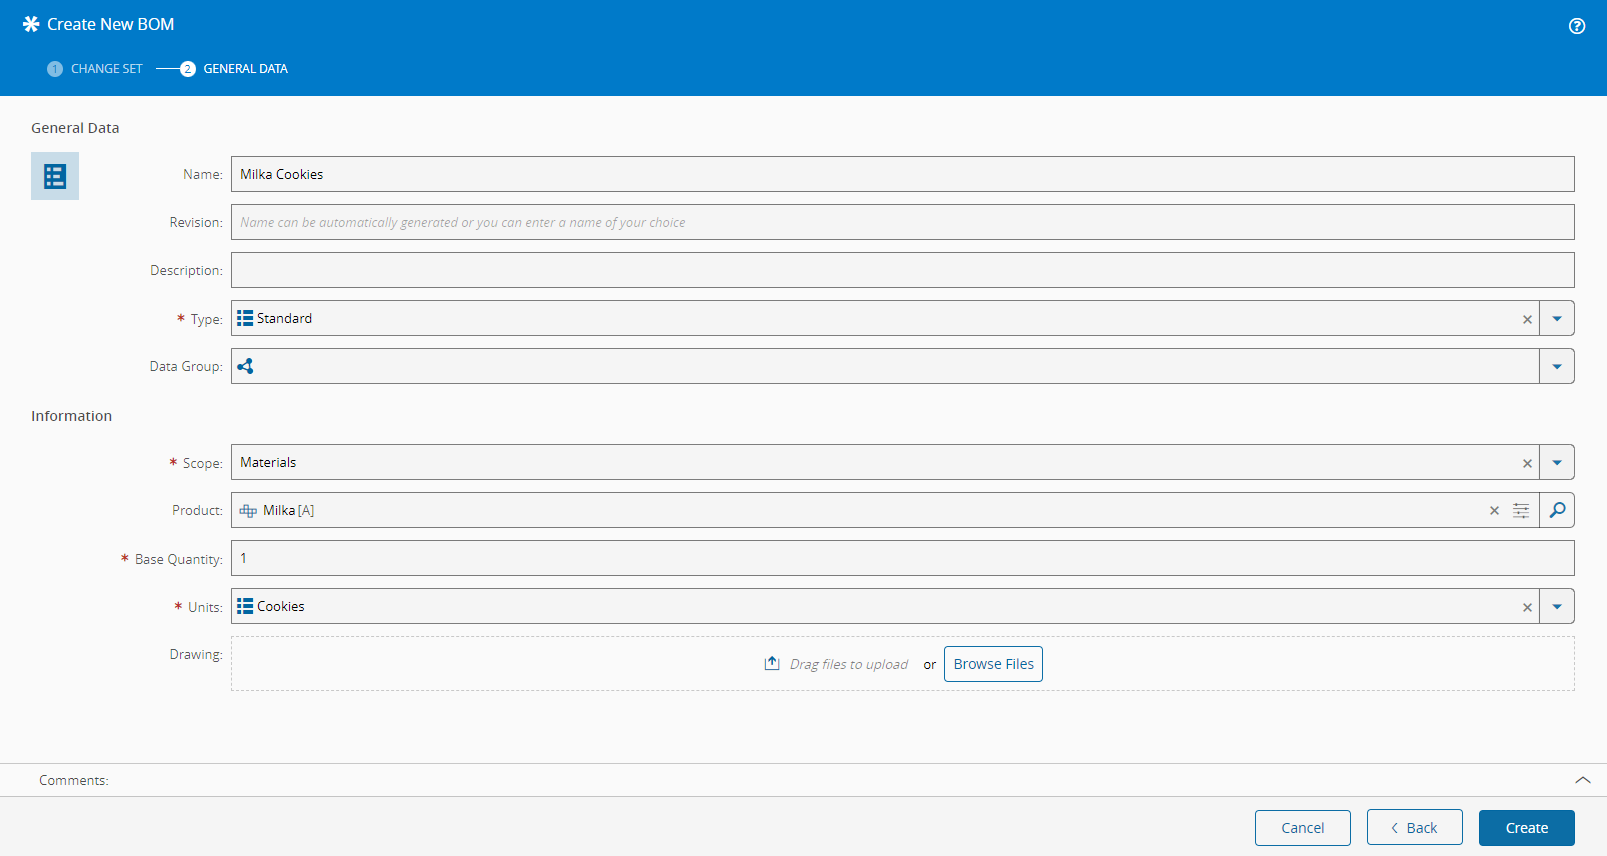
Step 2: General Data#
- Provide a name for the BOM.
- If you are creating a new version, the revision that was selected when you started the process will be the revision to which this version will be associated. If you are creating a new entity or revision (with a new version associated to it), provide a name for the revision or it will be automatically generated for you. For more information on revision naming, see Revision Naming.
- Optionally, provide a description of the BOM.
- Select the BOM type. The list of possible values is taken from the lookup table BOMType.
- Select the scope of the BOM: Durables, Materials, Packing, Parts or WeighAndDispense.
- If the scope of the BOM is Materials, Packing or WeighAndDispense, the selected Product will allow you to link the BOM to that specific Product and to reuse the Product CAD, Drawing, and Schematic files.
- If the scope of the BOM is Materials or Packing, specify the Base Quantity (defaults to 1) for the BOM.
- If the scope of the BOM is Packing, specify the Enforce Package Quantity for the BOM (optional).
- If the scope of the BOM is Materials, Packing or WeighAndDispense, specify the Units of the BOM (from lookup table
Units). The units will be matched against the Material primary or secondary units to determine on which quantity the assemble will take place. - If the scope of the BOM is WeighAndDispense, specify the Printable Document to be used as label.
-
If the scope of the BOM is WeighAndDispense, specify the Formula Type:
- Absolute
- Quantities are entered with absolute values in their respective units. In this case, the sum of BOM quantities can add to any value and tolerances are entered in absolute mode.
- e.g. for a 1000g batch a certain ingredient quantity is defined as 100g with a lower tolerance of 2 (g) and a upper tolerance of 1 (g); if the target batch quantity is 1000g, the valid range of dispensed quantity will be between (100-2 and 100+1), that is between 98g and 101g.
- Quantities are entered with absolute values in their respective units. In this case, the sum of BOM quantities can add to any value and tolerances are entered in absolute mode.
- Relative
- Quantities entered refer to percentages. In this case, the sum of BOM quantities must be within 99 and 101 and tolerances are also entered in a percentage mode.
- e.g. if a certain ingredient quantity is 10 (%) with a lower tolerance of 2 (%) and a upper tolerance of 1 (%); if the target batch quantity is 1000 g, the valid range of dispensed quantity for this ingredient will be (1000g x 10% - 1000g x 10% x 2%) and (1000g x 10% + 1000 x 10% x 1%), that is between 98g and 101g.
- Quantities entered refer to percentages. In this case, the sum of BOM quantities must be within 99 and 101 and tolerances are also entered in a percentage mode.
- Absolute
-
Optionally, specify a BOM drawing (associated with the versioned portion). Select the drawing to import by dragging a file from the file explorer or by pressing the Browse Files button and selecting a file manually. File information will be displayed on screen after the file is loaded and analyzed by the system. Pressing the button on the right hand side of the entry will remove the file from the import queue.
- Select Create to complete the transaction and a new object will be created.