Import Product Information#
 Product.ImportInformation
Overview#
This operation is used to import information for a specific Product.
Setup#
No specific setup is required other than to meet the preconditions of the transaction.
Preconditions#
- The Product exists in the system.
Sequence of Steps#
The Import Product Information wizard can be called from the Product page within the Business Data Group.
Step 1: CAD#
- Select the CAD Type file to import.
- Select the CAD file to import by dragging a file from the file explorer or by selecting the Browse Files button and selecting a file manually. File information will be displayed on screen after the file is loaded and analyzed by the system. Selecting the button on the right hand side of the entry will remove the file from the import queue.
- Select whether the panel type is Single or Double sided.
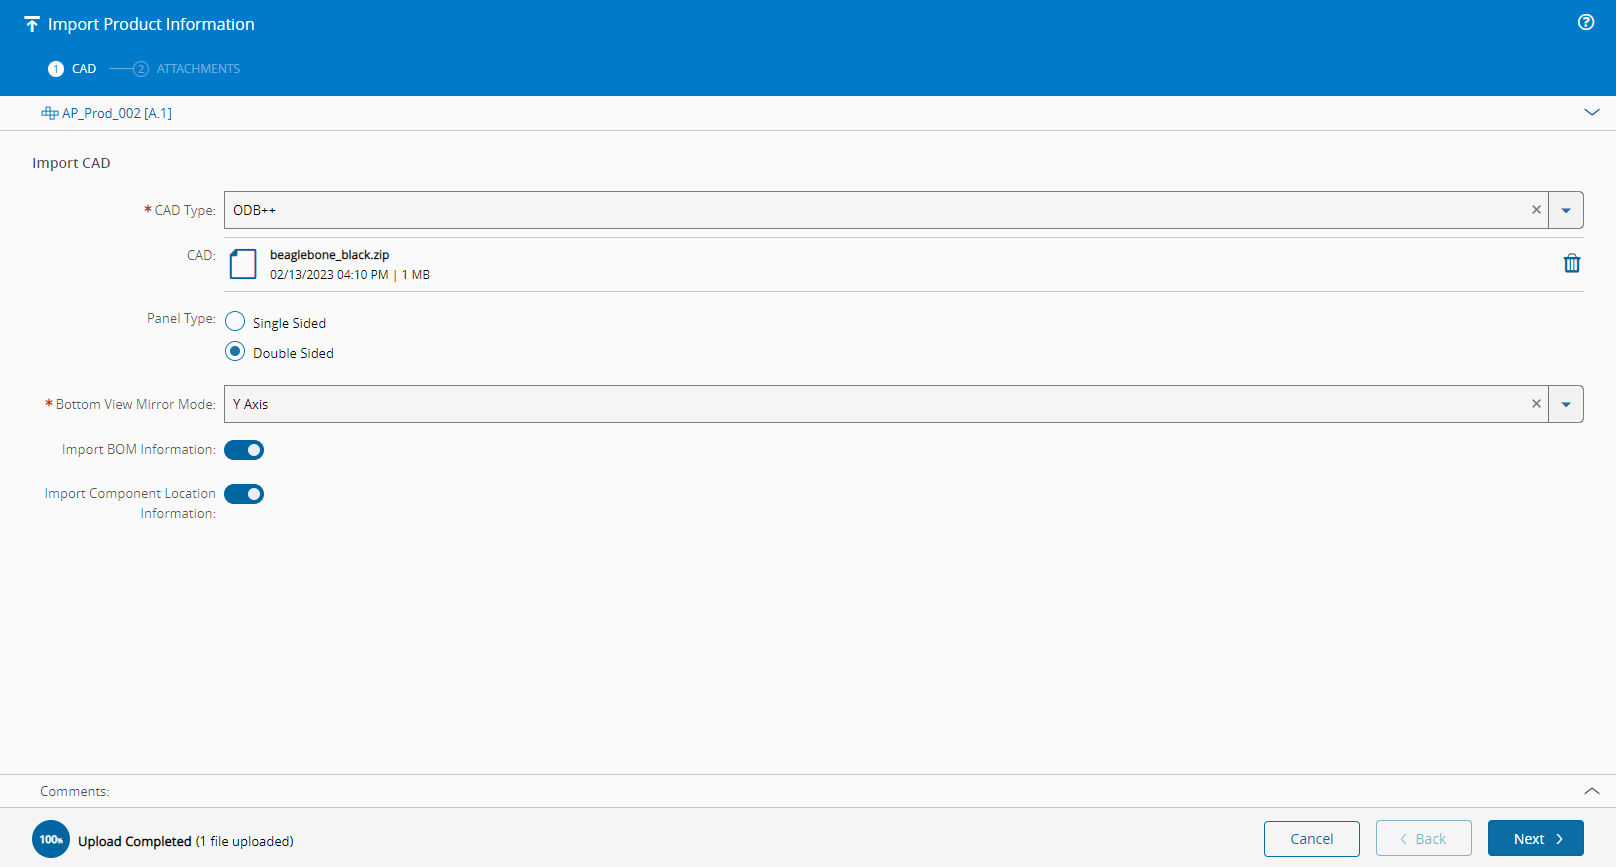
Info
CAD Type is currently limited to ODB++ but will support multiple file types in future versions.
Select Next to continue to the BOM information.
Step 2: BOM#
- Select the BOM file to import by dragging a file from the file explorer or by selecting the Browse Files button and selecting a file manually. File information will be displayed on screen after the file is loaded and analyzed by the system. Selecting the button on the right hand side of the entry will remove the file from the import queue.
- Select the character to use as list separator. Select the Preview button will display the values using the list separator selected.
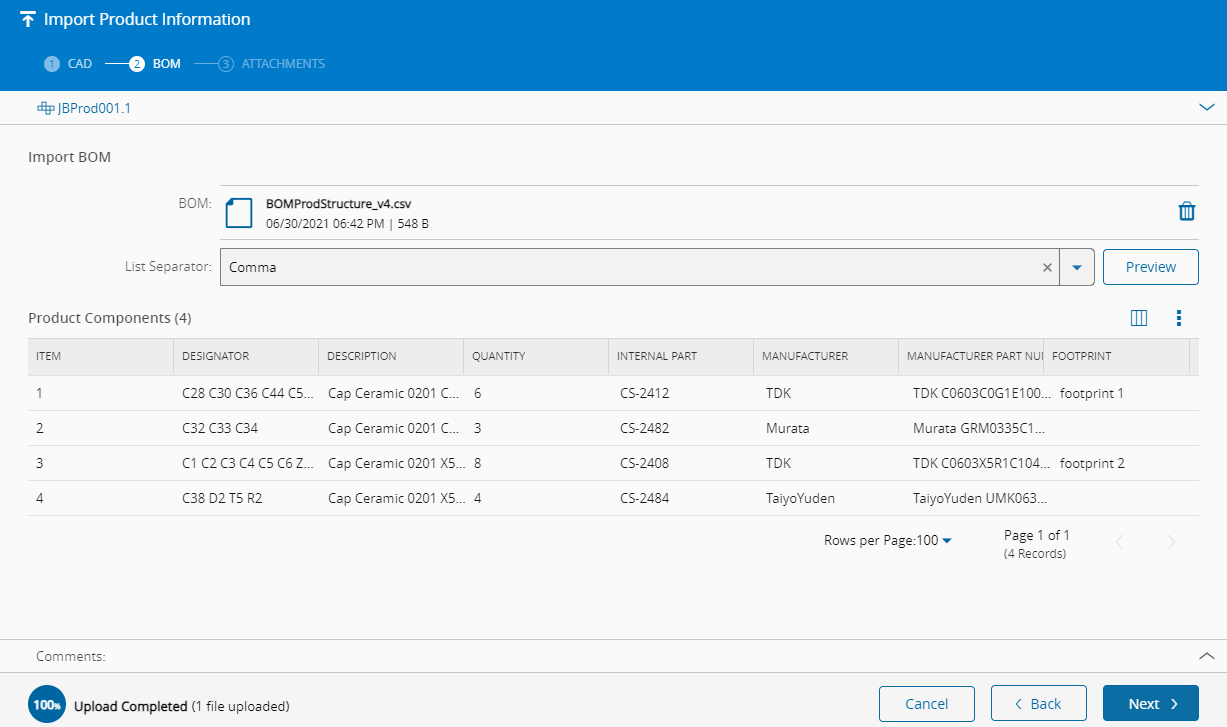
Info
The BOM File is parsed according to the File Import Template Generic Table definition.
Select Next to continue to the next section.
Step 3: Attachments#
- Select the Schematic (a representation of the elements of a system using abstract graphic symbols) files to import by dragging one or more files from the file explorer or by selecting the Browse Files button and selecting a file manually. File information will be displayed on screen after the file is loaded and analyzed by the system. Selecting the button on the right hand side of the entry will remove the file from the import queue.
- Select the Drawing (a type of technical drawing that is used to convey information about an object) files to import by dragging one or more files from the file explorer or by selecting the Browse Files button and selecting a file manually. File information will be displayed on screen after the file is loaded and analyzed by the system. Selecting the button on the right hand side of the entry will remove the file from the import queue.
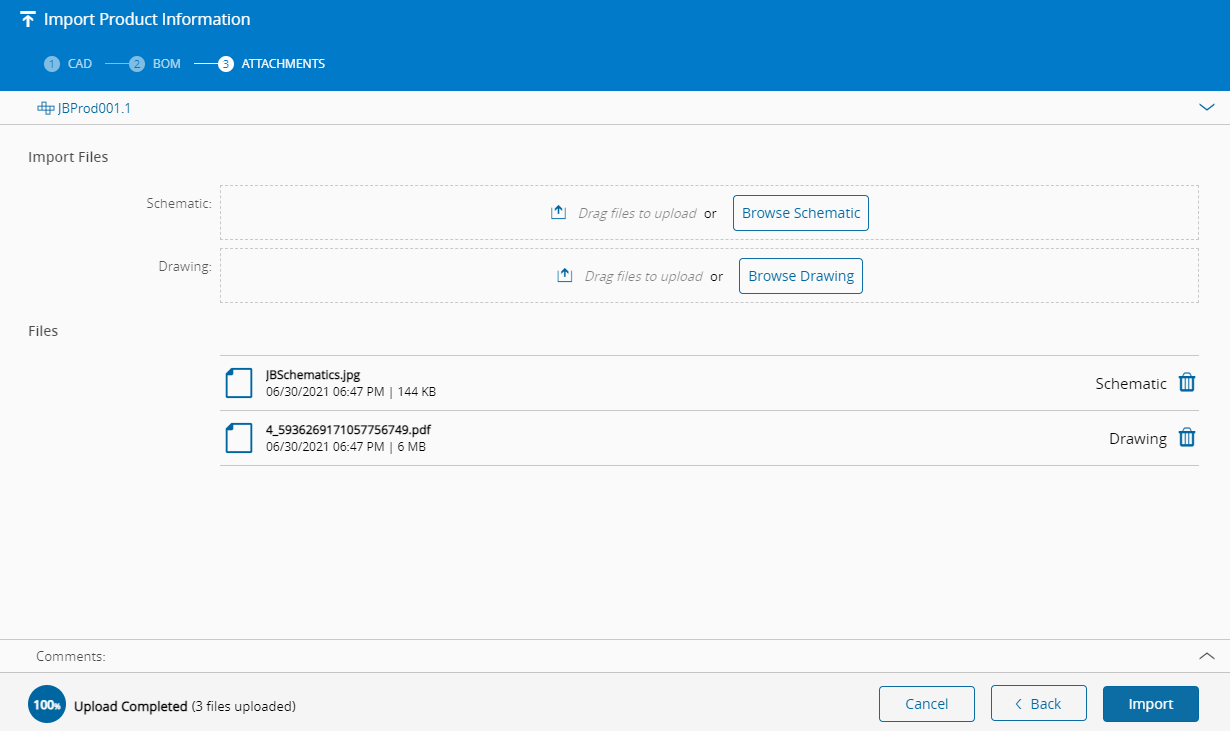
Select Import to start the import process. When the import is completed, the system will navigate back to the Product entity page.
Info
For more information, see the New Product Introduction (NPI) tutorial.