Change Management Tutorial#
Estimated time to read: 12 minutes
Introduction#
This tutorial will introduce the purpose of Change Management in Critical Manufacturing MES.
It will also describe how Change Management helps plan, implement, and approve changes while maintaining stability and transparency in operations.
This will be achieved by highlight scenarios where Change Management is critical, such as with versioned entities and approval workflows.
In Critical Manufacturing MES, Change Management, which is represented by using the Change Set entity, plays a crucial role in ensuring that changes within the manufacturing processes, systems, or operations are implemented effectively, without causing disruptions or introducing risks.
A Change Set is an object which is used to bundle together changes to versioned objects. Bear in mind that the Change Set only refers to the versioned data of the object, so, the global data is not part of the Change Set.
Moreover, a Change Set itself has a system defined state model described in the next figure.
graph TD
    Start -->|Create Change Set| A1
    A1[Created] -->|Request Change Set Approval| A2[In Approval]
    A2 -->|Rework Change Set| A1
    A2 -->|Approve Change Set| L1[Approved]
    A2 -->|Reject Change Set| C1[Rejected]

classDef mermaid_title color:#000, fill:#fafafa, stroke:#fafafa, stroke-width:0x, font-size:100%, font-weight:200;
classDef mermaid_start color:#000, fill:#fafafa, stroke:#fafafa, color:#fafafa, stroke-width:0x, font-size:100%, visibility: hidden;
classDef mermaid_businessdata color:#000, fill:#65CDE8, stroke:#65CDE8, stroke-width:0px, font-size:100%;
classDef mermaid_nonbusinessdata color:#000, fill:#B7DEE8, stroke:#B7DEE8, stroke-width:0px, font-size:100%;
classDef mermaid_entity color:#000, fill:#FB9F53, stroke:#FB9F53, stroke-width:0px, font-size:100%;
classDef mermaid_entitylinked color:#000, fill:#FCD5B5, stroke:#FCD5B5, stroke-width:0px, font-size:100%;
classDef mermaid_context color:#000, fill:#B9CDE5, stroke:#B9CDE5, stroke-width:0px, font-size:100%;
classDef mermaid_optional color:#000, fill:#B7DEE8, stroke:#65CDE8, stroke-width:1px, font-size:100%, stroke-dasharray: 5 5;
classDef mermaid_state color:#000, fill:#d7e4bd, stroke:#000, stroke-width:1px, font-size:100%, font-weight:300;
class Main mermaid_entity
class Start mermaid_start
class A1,A2,A3,A4,A5,A6,A7,A8,A9,A10,A11,A12 mermaid_state
class L1,L2,L3,L4,L5,L6 mermaid_state
class C1,C2,C3,C4,C5,C6 mermaid_context
class N1,N2,N3,N4,N5,N6 mermaid_nonbusinessdata
A Change Set, when created, goes to the state Created. In that state, one can add multiple Change Set Items which are versions of the change-controlled entities. Then the Change Set is sent for approval - at this time, all Change Set Items become frozen, that is, they cannot be changed. The Change Set can then be rejected or approved. In case the Change Set is rejected, all associated Change Set Items are terminated. In case that the Change Set is approved, all Change Set Items become Active. The Change Set contains an additional property - Make Change Set Items effective on approval - which will try to make all Change Set Items effective after the Change Set has been approved.
Note
The Approval Type of State reviewers is as follows:
- Approver - if the Reviewer is set as Approver they must explicitly approve the Change Set at a certain state (this action is mandatory and relevant).
- Observer - if the Reviewer is set as Observer they can add, approve or reject, but the response is not required and not relevant for the Change Set approval, but it will be kept in the historical details of the state transition approval.
Tying Everything Together#
graph TD
    Main[Change Set] -.- A1[Approval Role]
    N1[Approval Workflow] -.- Main
    Main === L1[Change Set Item]
    A1[Approval Role] -.- L1
    L1 ---A3[Product]
    L1 --- A4[Flow]
    L1 --- A5[...]

classDef mermaid_title color:#000, fill:#fafafa, stroke:#fafafa, stroke-width:0x, font-size:100%, font-weight:200;
classDef mermaid_start color:#000, fill:#fafafa, stroke:#fafafa, color:#fafafa, stroke-width:0x, font-size:100%, visibility: hidden;
classDef mermaid_businessdata color:#000, fill:#65CDE8, stroke:#65CDE8, stroke-width:0px, font-size:100%;
classDef mermaid_nonbusinessdata color:#000, fill:#B7DEE8, stroke:#B7DEE8, stroke-width:0px, font-size:100%;
classDef mermaid_entity color:#000, fill:#FB9F53, stroke:#FB9F53, stroke-width:0px, font-size:100%;
classDef mermaid_entitylinked color:#000, fill:#FCD5B5, stroke:#FCD5B5, stroke-width:0px, font-size:100%;
classDef mermaid_context color:#000, fill:#B9CDE5, stroke:#B9CDE5, stroke-width:0px, font-size:100%;
classDef mermaid_optional color:#000, fill:#B7DEE8, stroke:#65CDE8, stroke-width:1px, font-size:100%, stroke-dasharray: 5 5;
class Main mermaid_entity
class A1,A2,A3,A4,A5,A6,A7,A8,A9,A10,A11,A12 mermaid_businessdata
class L1,L2,L3,L4,L5,L6 mermaid_entitylinked
class C1,C2,C3,C4,C5,C6 mermaid_context
class N1,N2,N3,N4,N5,N6 mermaid_nonbusinessdata

click Main "../../business-data/change-set"
click A1 "../../administration/security/roles"
click A3 "../../business-data/product"
click A4 "../../business-data/flow"
For the purpose of this tutorial, the Flow entity will be used for the Basic and Advanced setup examples that follow. For more information, see Create Flow.
Basic Setup#
Roles#
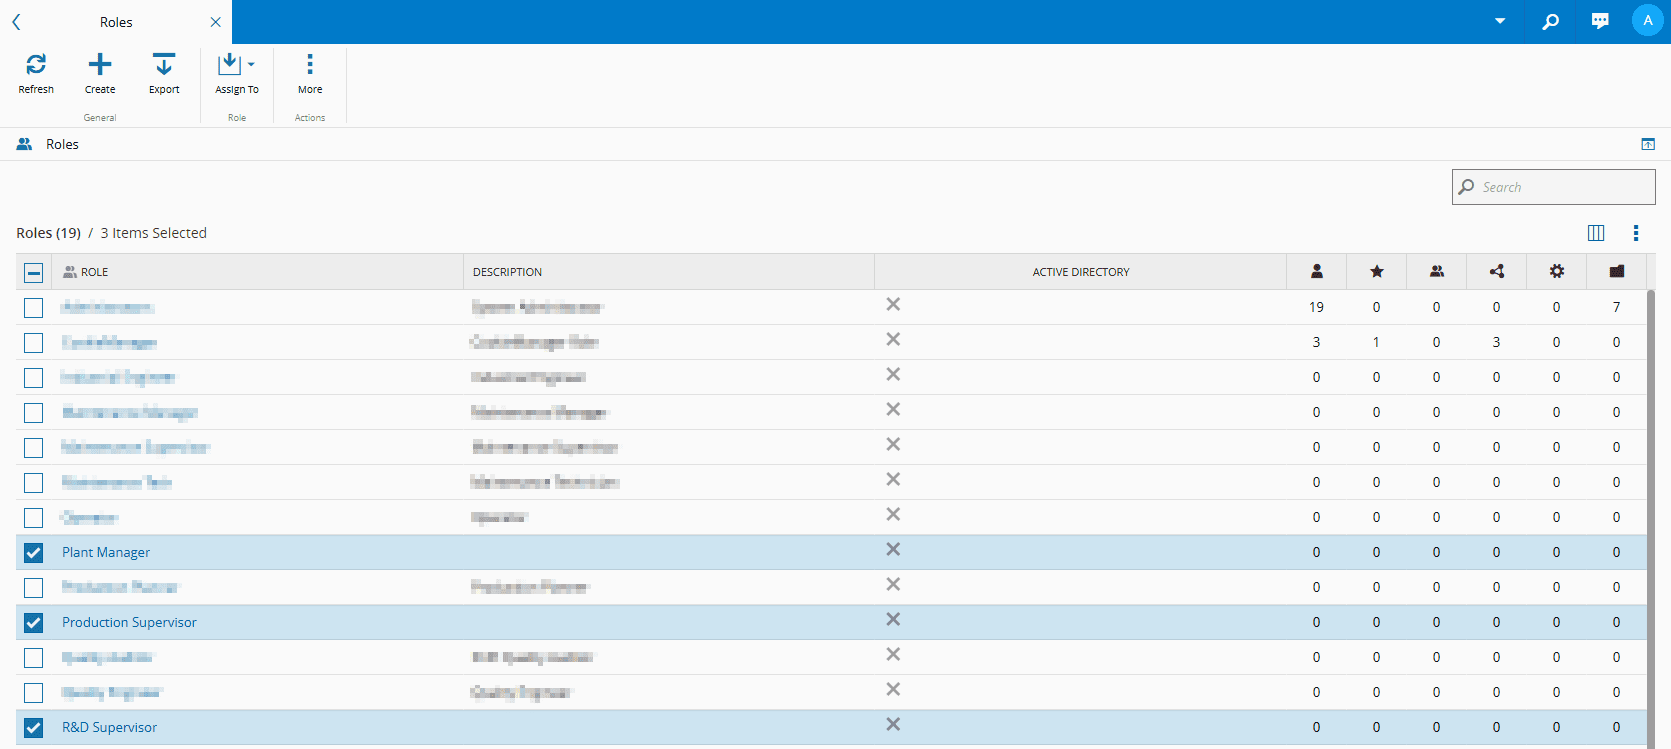
To begin setting up a basic Change Management scenario, you need to create the Roles you will be using.
For the purpose of this tutorial, you should create and use the following Roles:
- R&D Supervisor - will approve changes
- Production Supervisor - will finalize approval
- Plant Manager - will act as an observer
Note
The Roles above were assigned to the Administrator user for the purpose of this tutorial.
For more information, see Roles.
State Model#
After the Roles are created, you need to create a State Model in which your approval workflow will be configured. Remember that the Entity Type to apply to your State Model is Change Set as this is what defines Change Management in Critical Manufacturing MES:

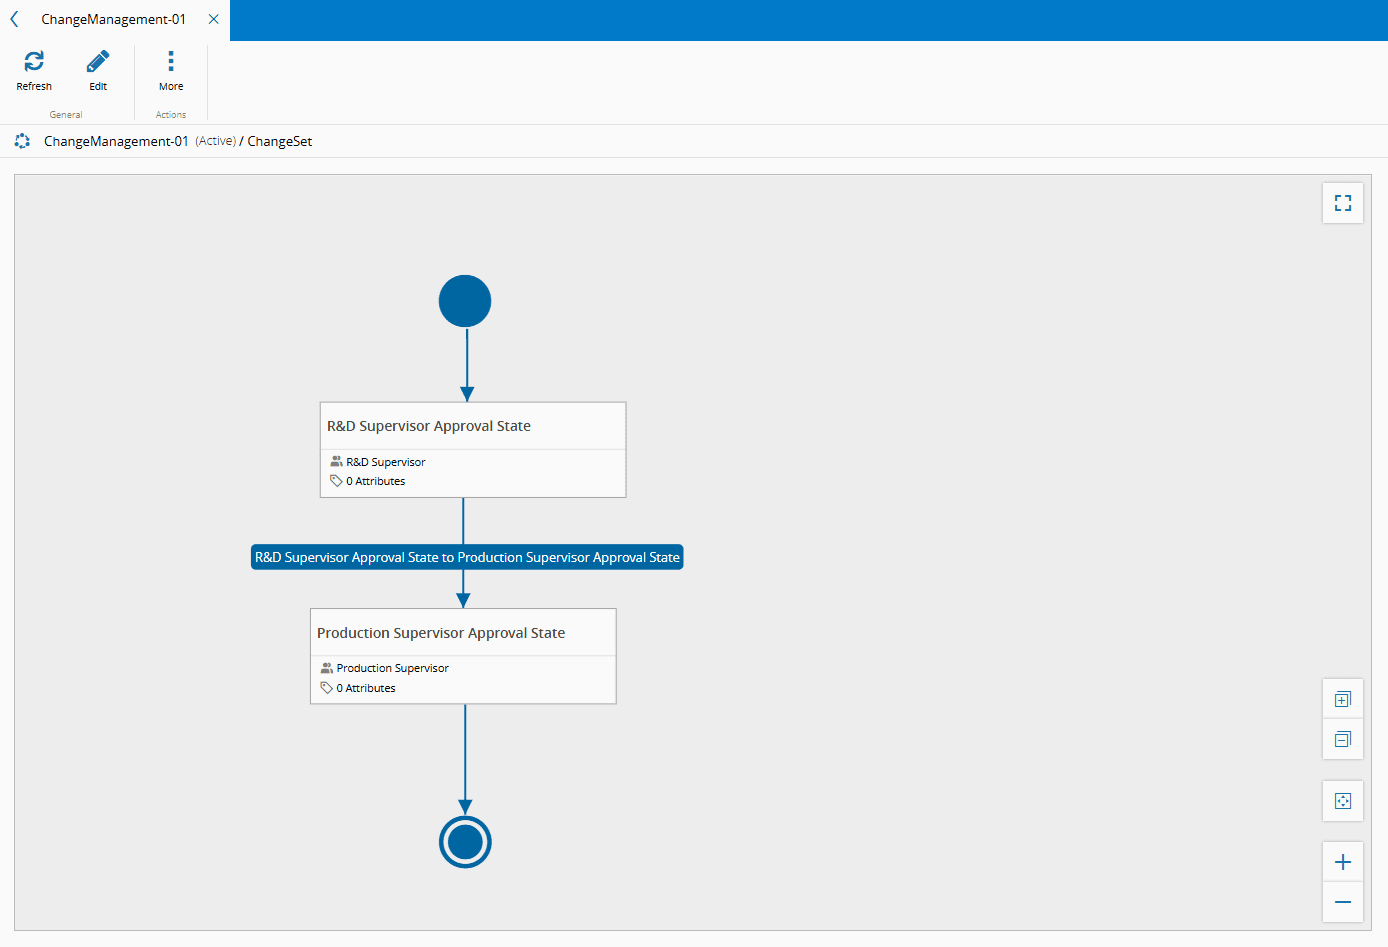
When you select Create, you are taken to the Flowchart view page where by using the Edit button, on the top ribbon, you can create your State Model or approval workflow. When your approval workflow is completed, use the Save button on the top ribbon to keep your changes:
Info
When you Save the approval workflow, the name of the transition is automatically provided.
For more information, see State Models.
Create Versioned Object#
The next step is to create a versioned object for which you will create a Change Set with the configurations set out above.
For this tutorial, the Flow entity was used as an example:
- In the Business Data menu, select Flow.
- In the Flow page, select New on the top ribbon.
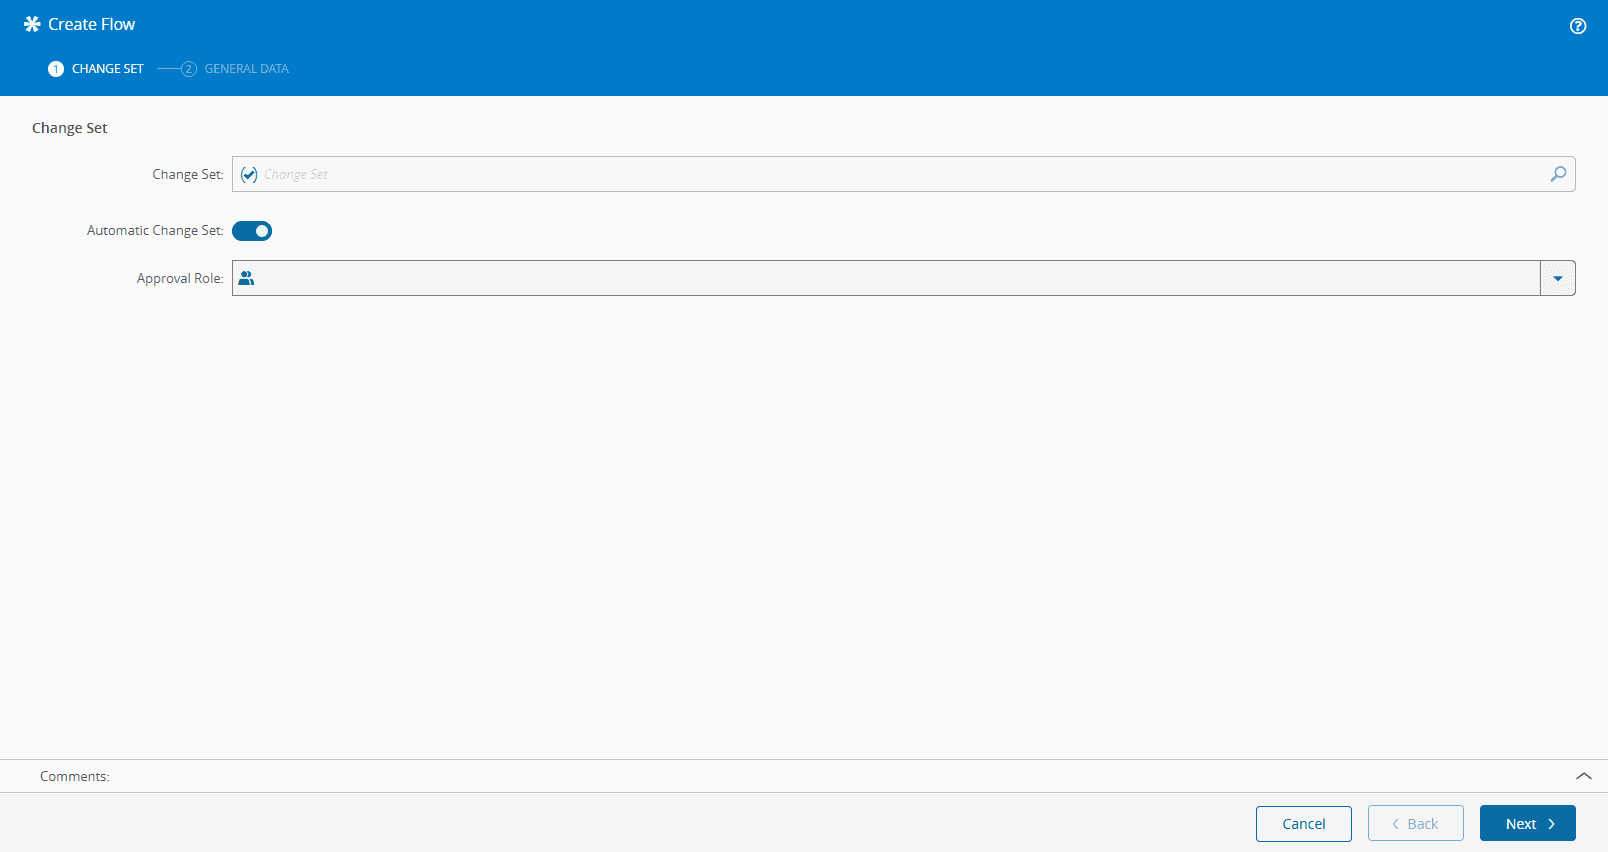
- For the Change Set step, select to Create new rather than use an already existing Change Set.
-
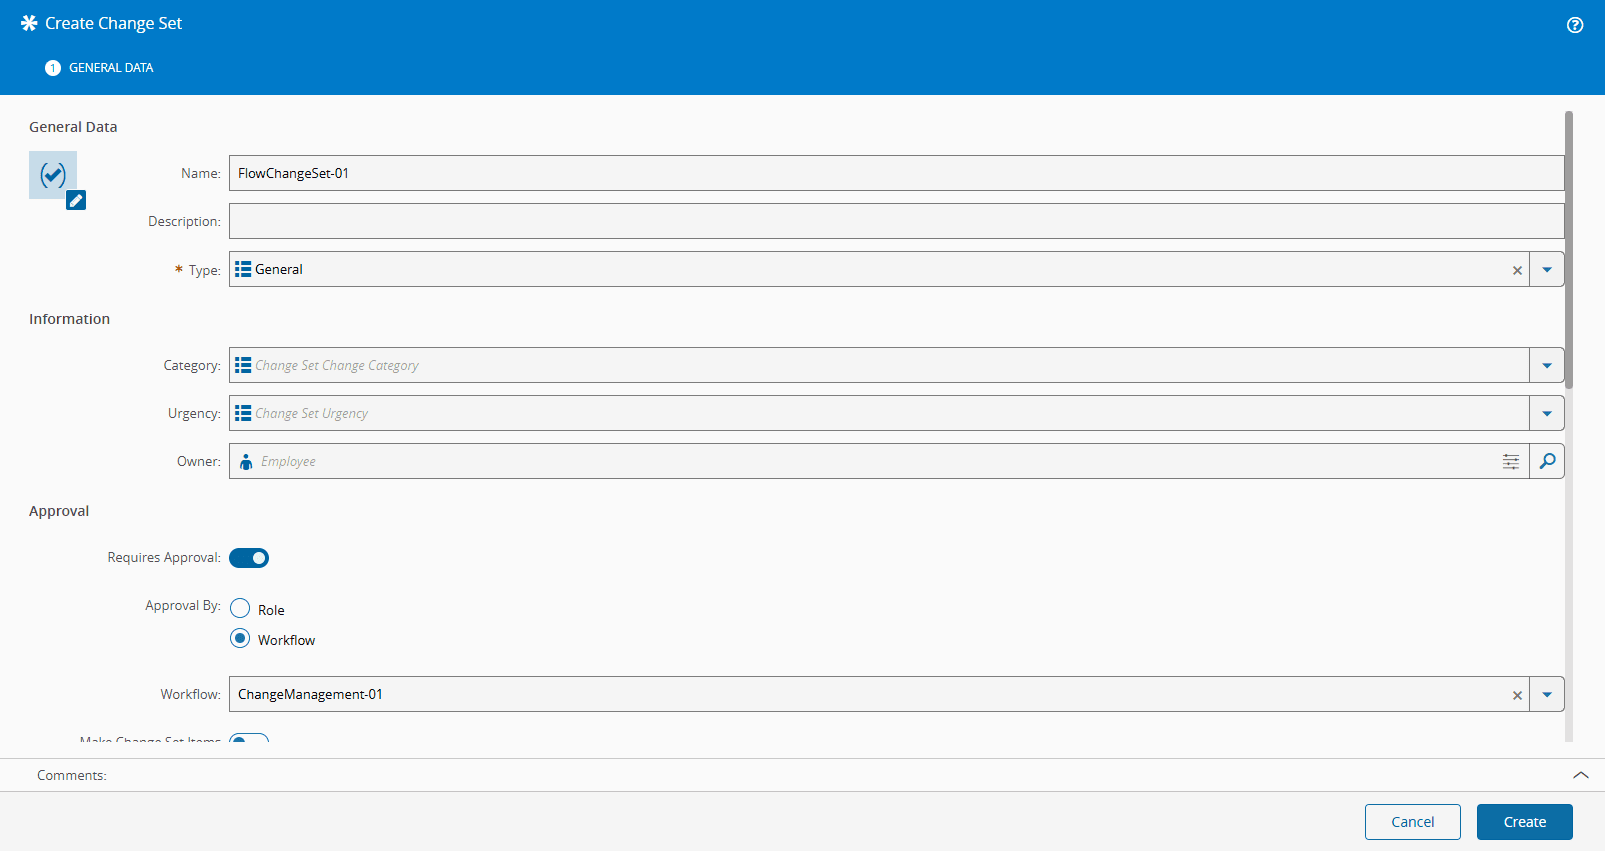
Create the Change Set and in the General Data be sure to enable Requires Approval, select Workflow for the Approval By option, and enter the Workflow State Model that was created previously:
Info
For this example Workflow was used, but the difference between Approval Role and Approval Workflow is as follows:
-
Approval Role - single approver for less complex processes (example: demo flow).
-
Approval Workflow - multi-role approval for more complex processes (example: production flow).
-
-
Select Create to complete the Change Set. For more information, see Create Change Set.
-
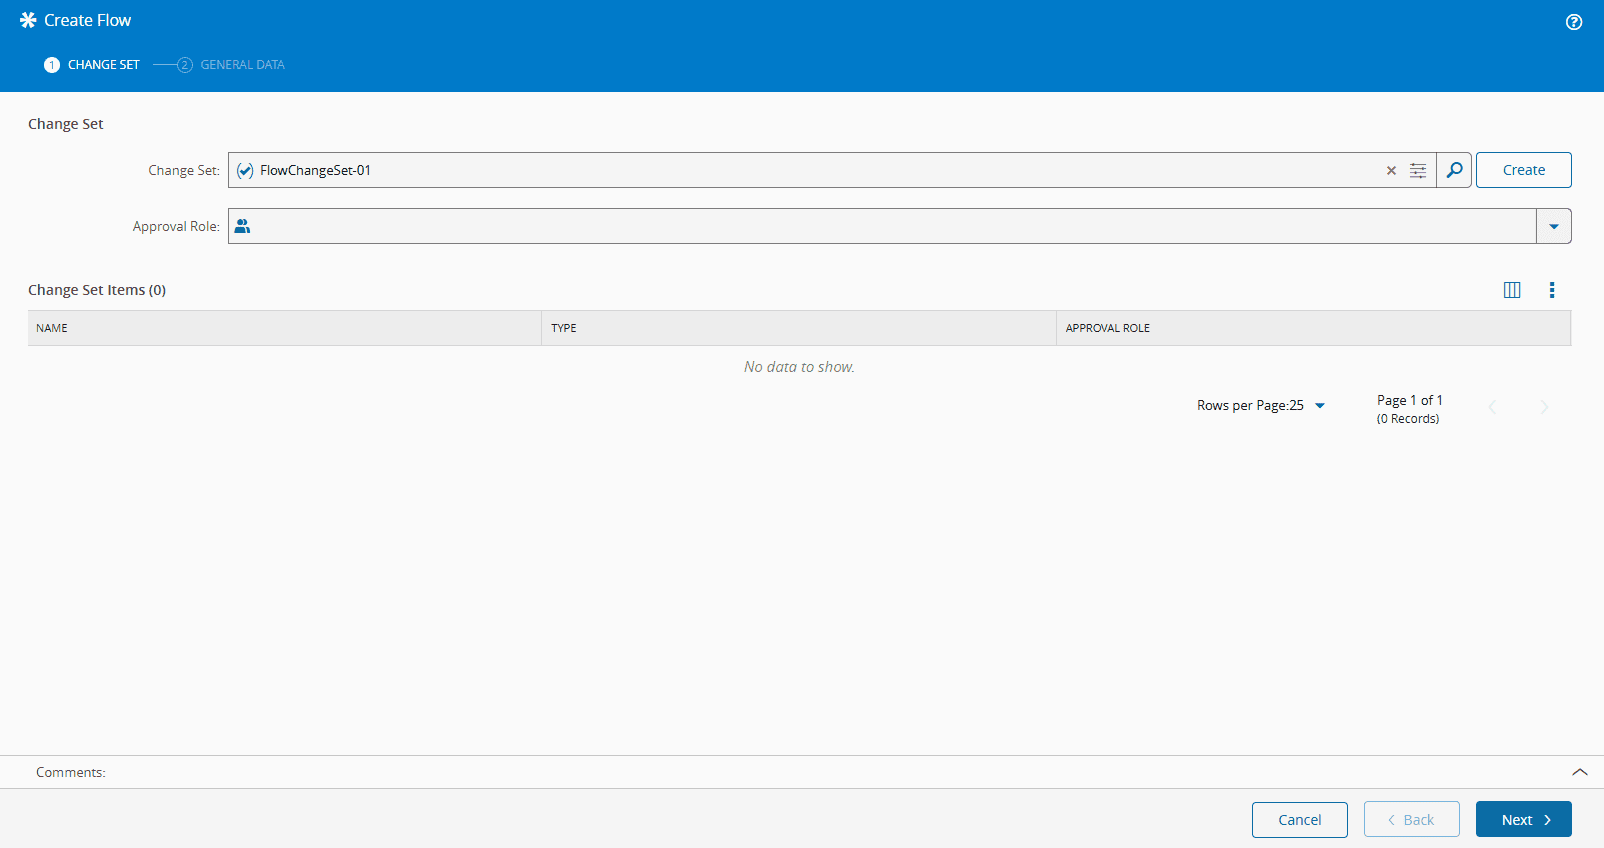
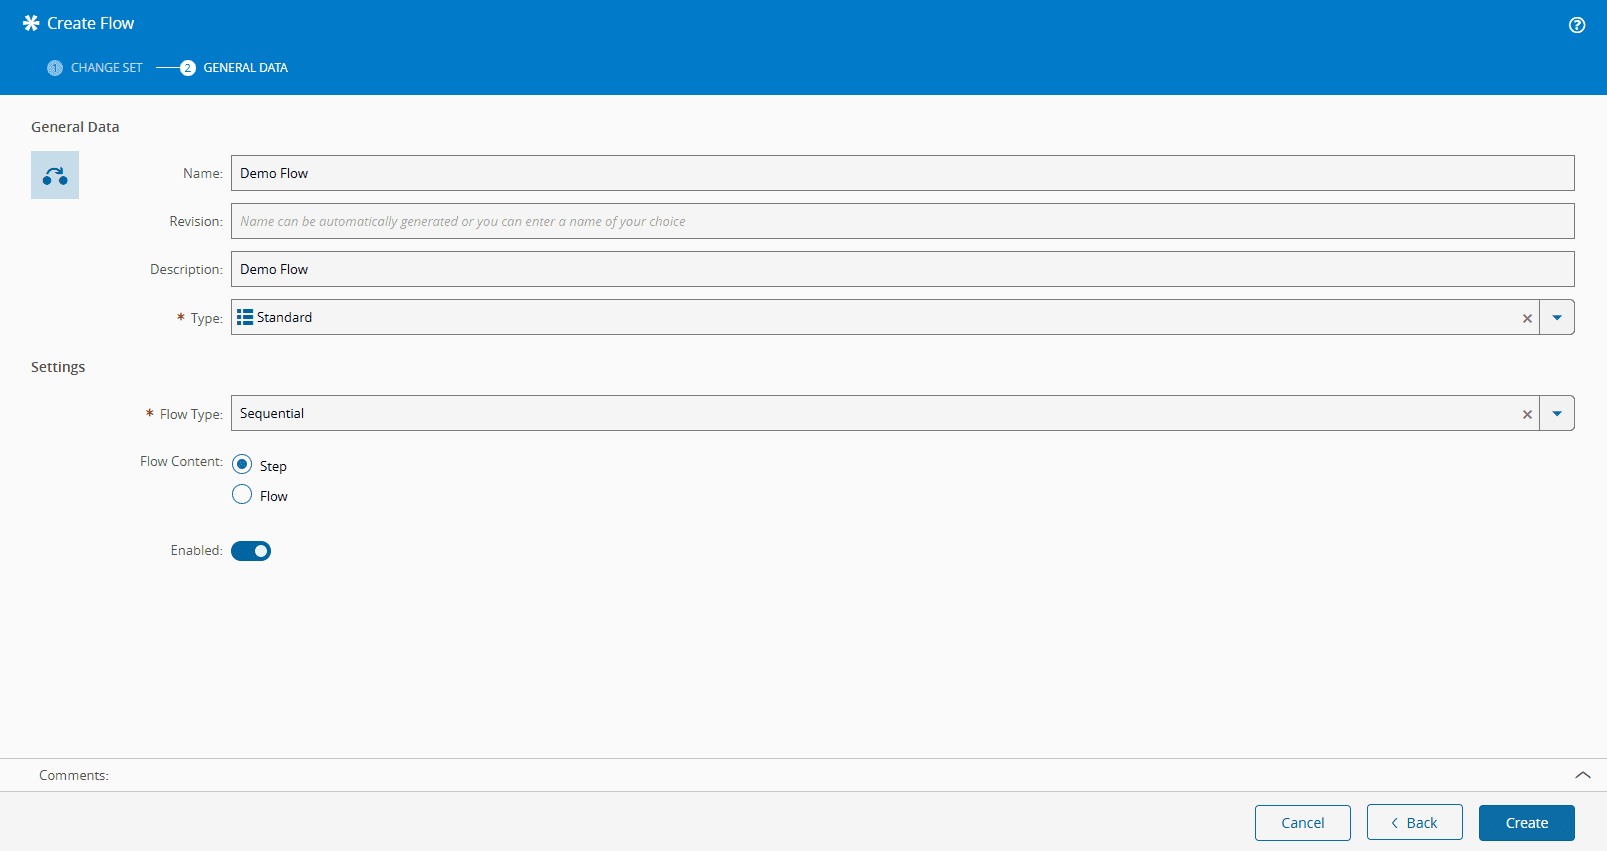
Back in the Create Flow wizard, select Next to continue:
-
Complete the General Data of the Flow and select Create at the end:
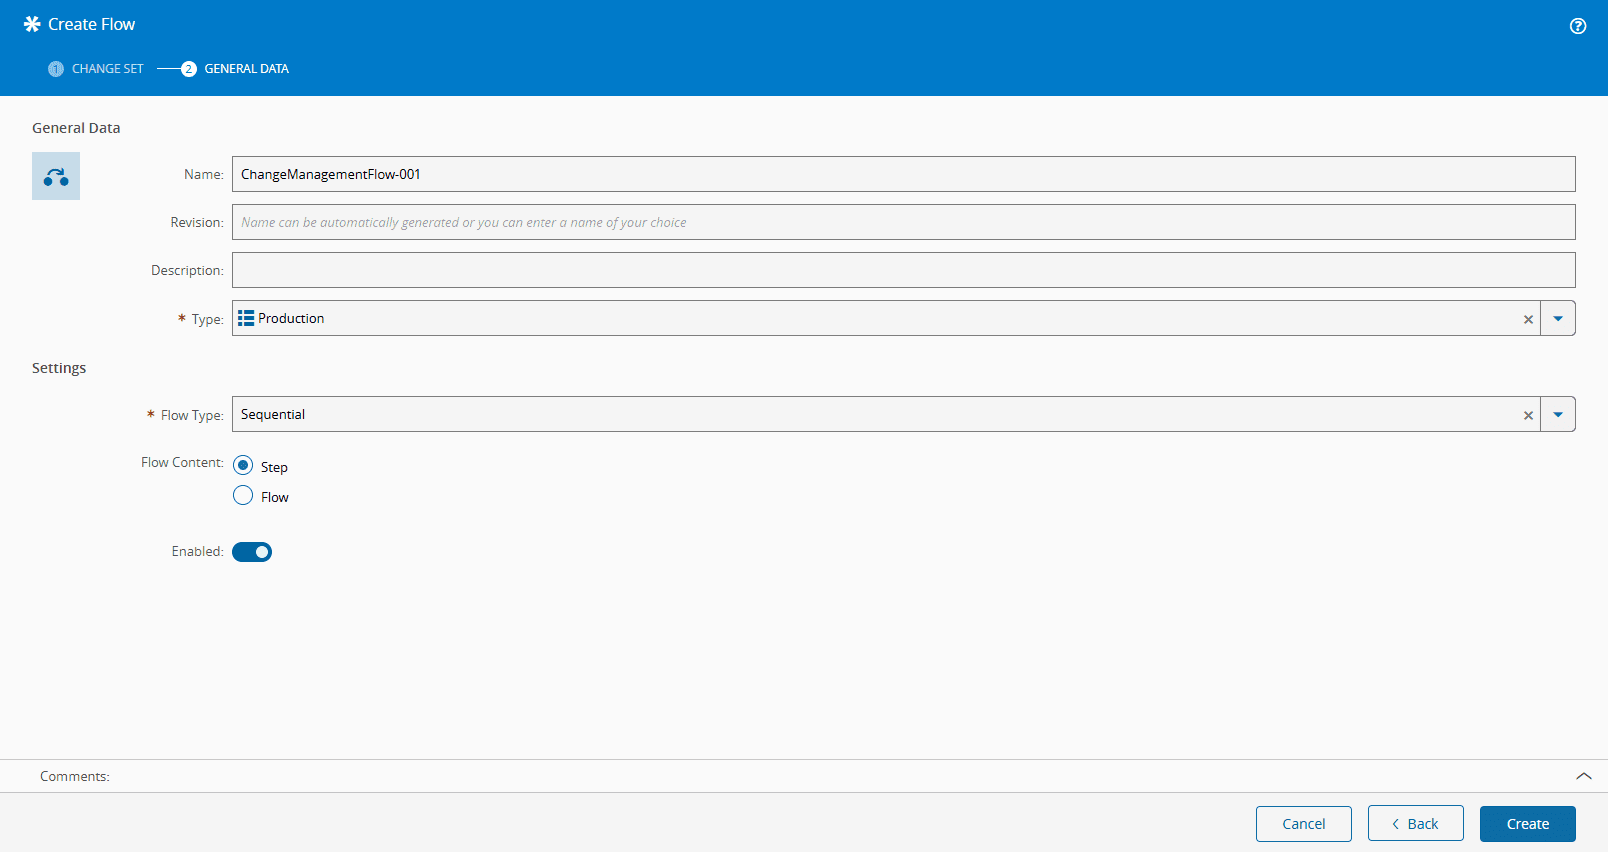
-
You are now going to Edit and Save your Flow:
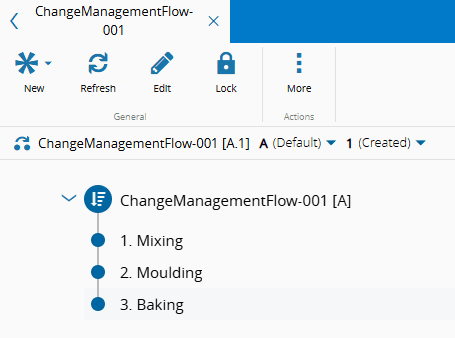
For more information, see Create Flow.
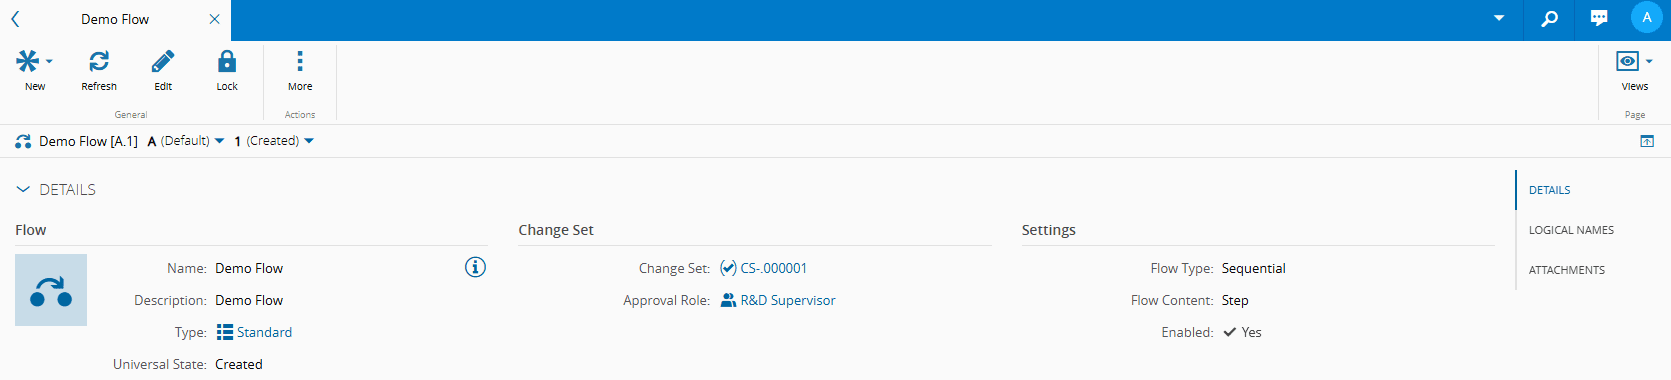
Change and Approval Process#
From the Change Set created for the Flow, which is available in the Details page of the Flow, let's walkthrough the change and approval process.
Here you can see the Change Set in question:
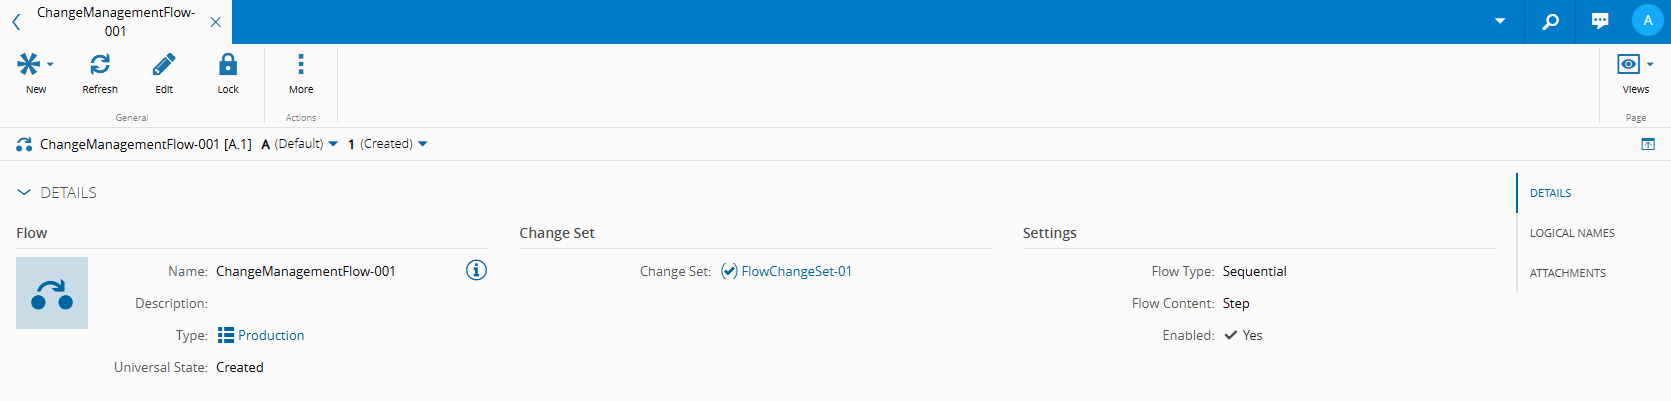
When you open it, this is what you see:
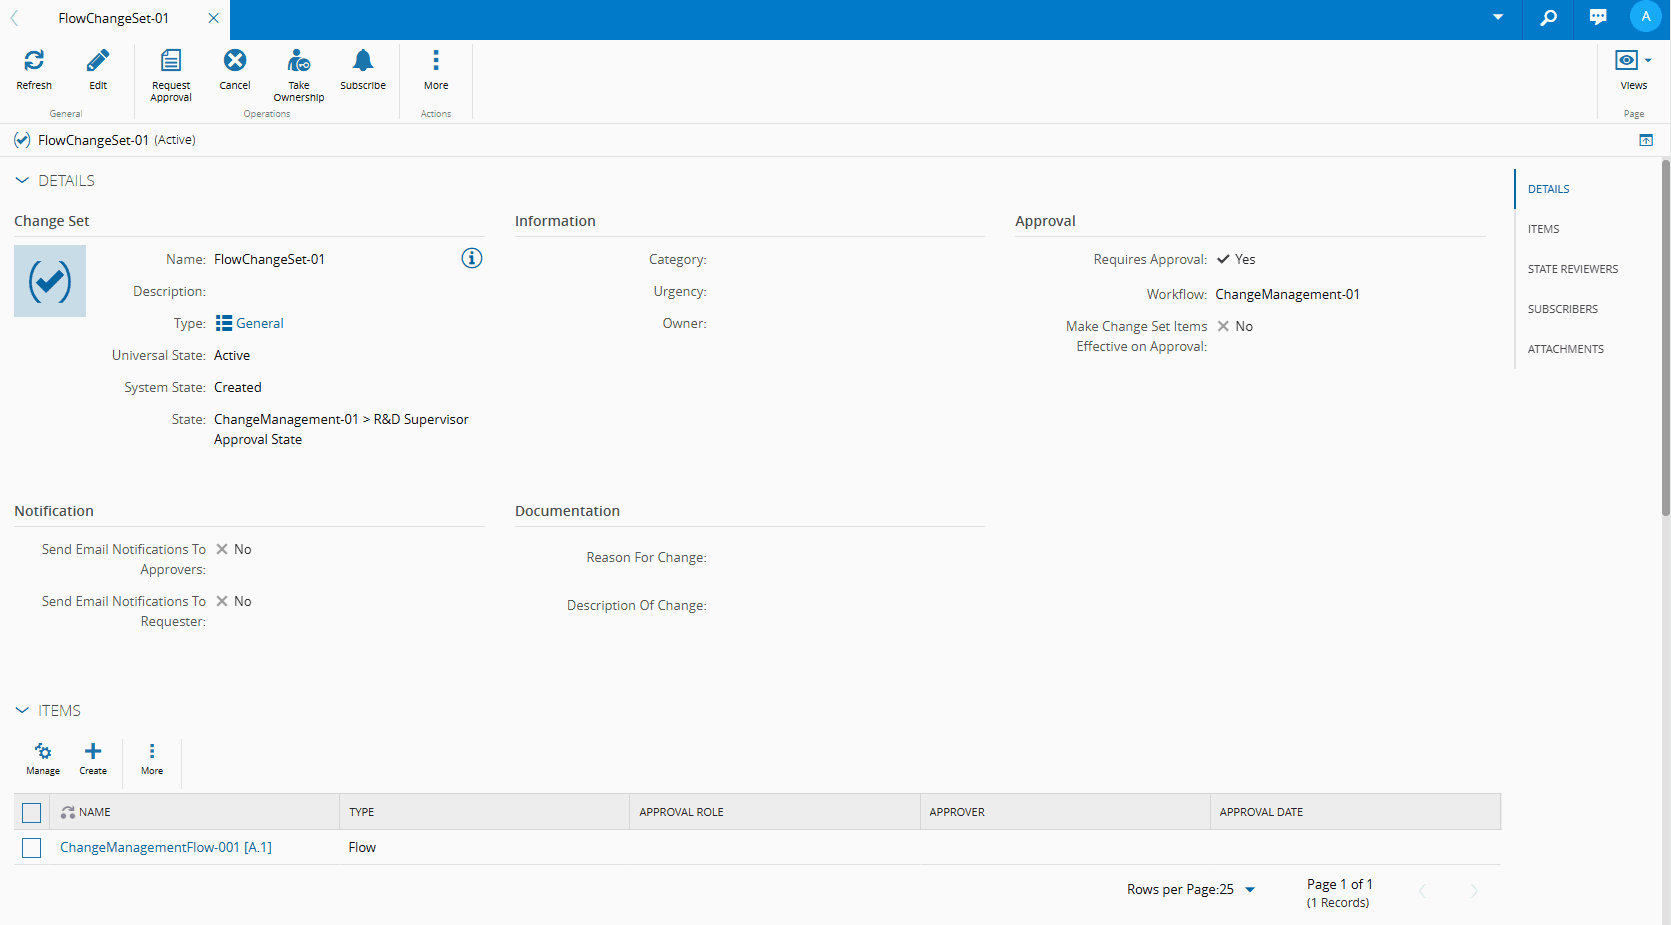
And notice how the name of the created State Model, and the first state of the approval workflow are available in the State field.
Set Observer#
Now, before continuing with the change and approval process, and because in this tutorial the Plant Manager was set as an Observer, you need to manage this Role, and confirm other Roles, in the State Reviewers section, as follows:
- Select the State Reviewers section.
-
Select Manage and add the Plant Manager as an Observer:
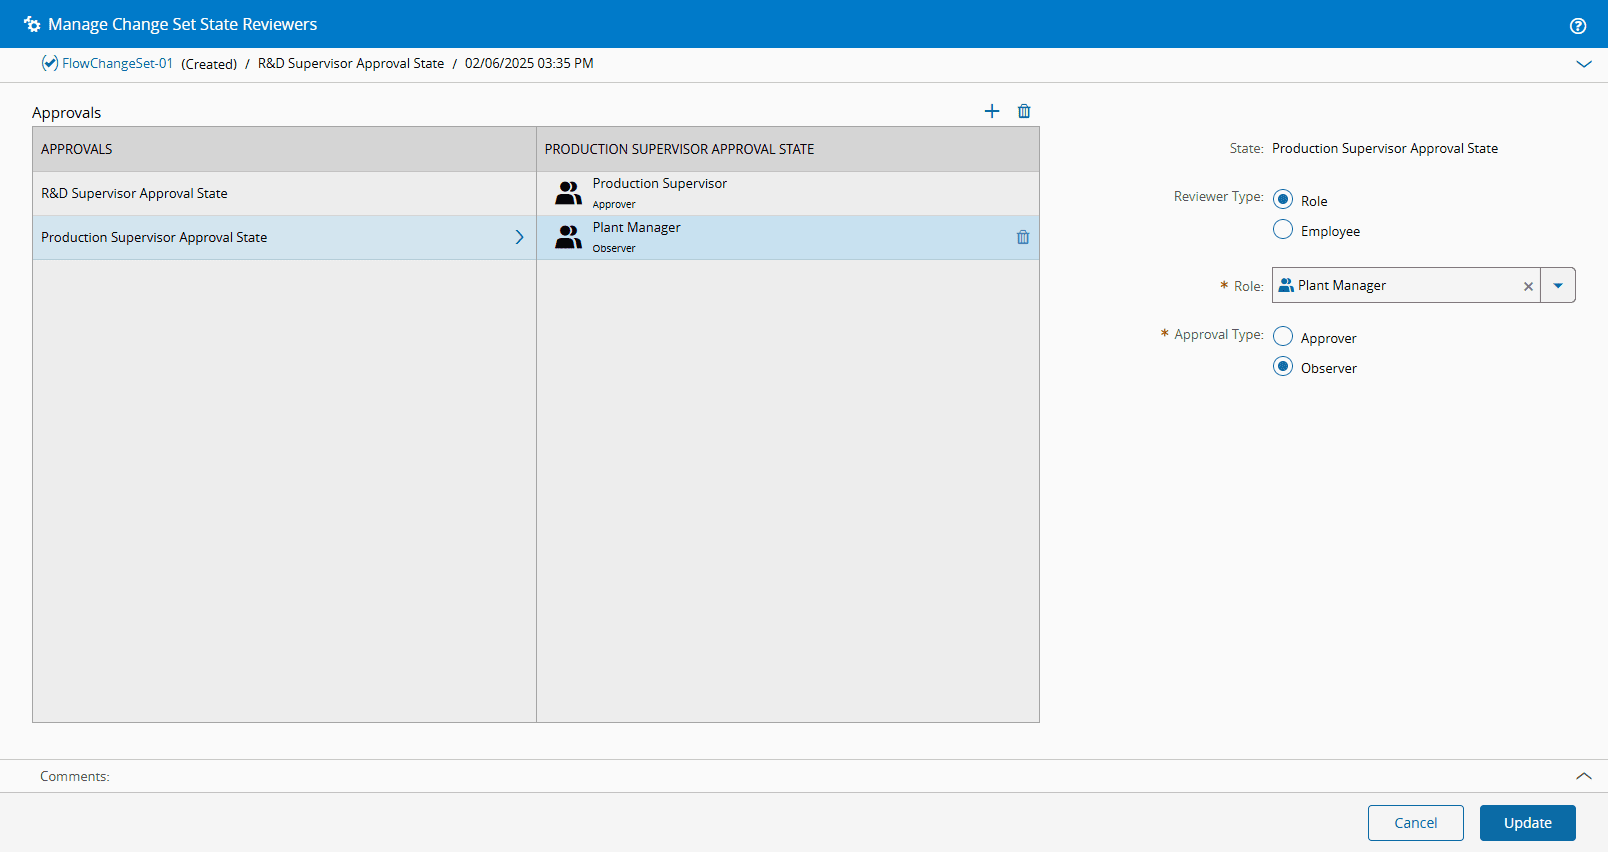
Note
The Observer is aware of what is happening with the Change Set, and can approve or not, but this Role's approval is not mandatory to approve the Change Set - this Role is a passive onlooker.
-
Select Update.
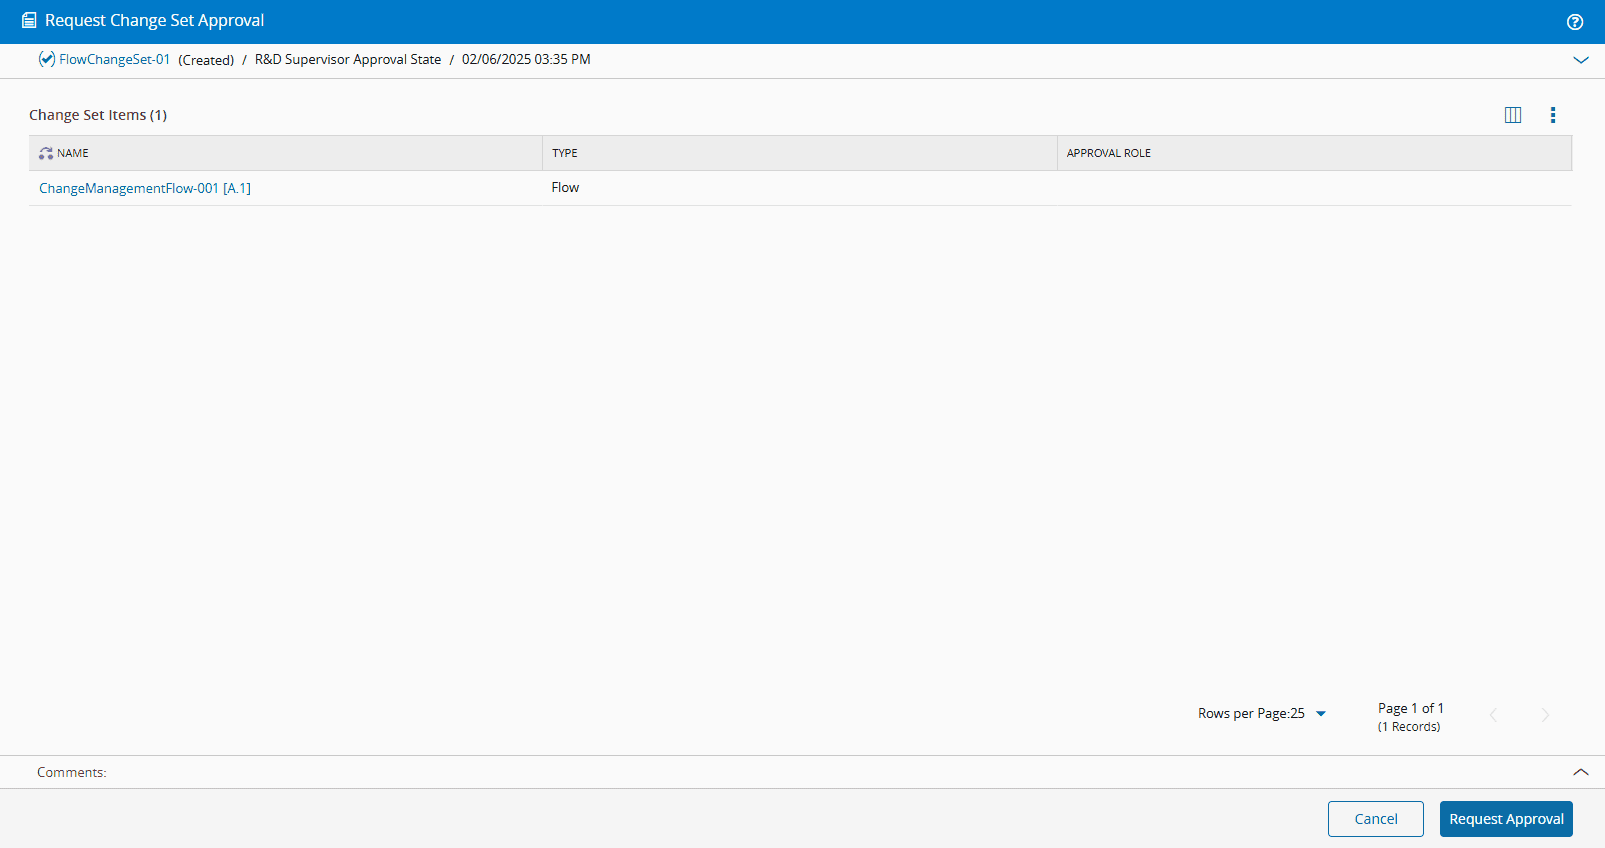
Returning to the change and approval process, and back in the Details page of the Change Set, select the Request Approval button on the top ribbon, and then again in the wizard:
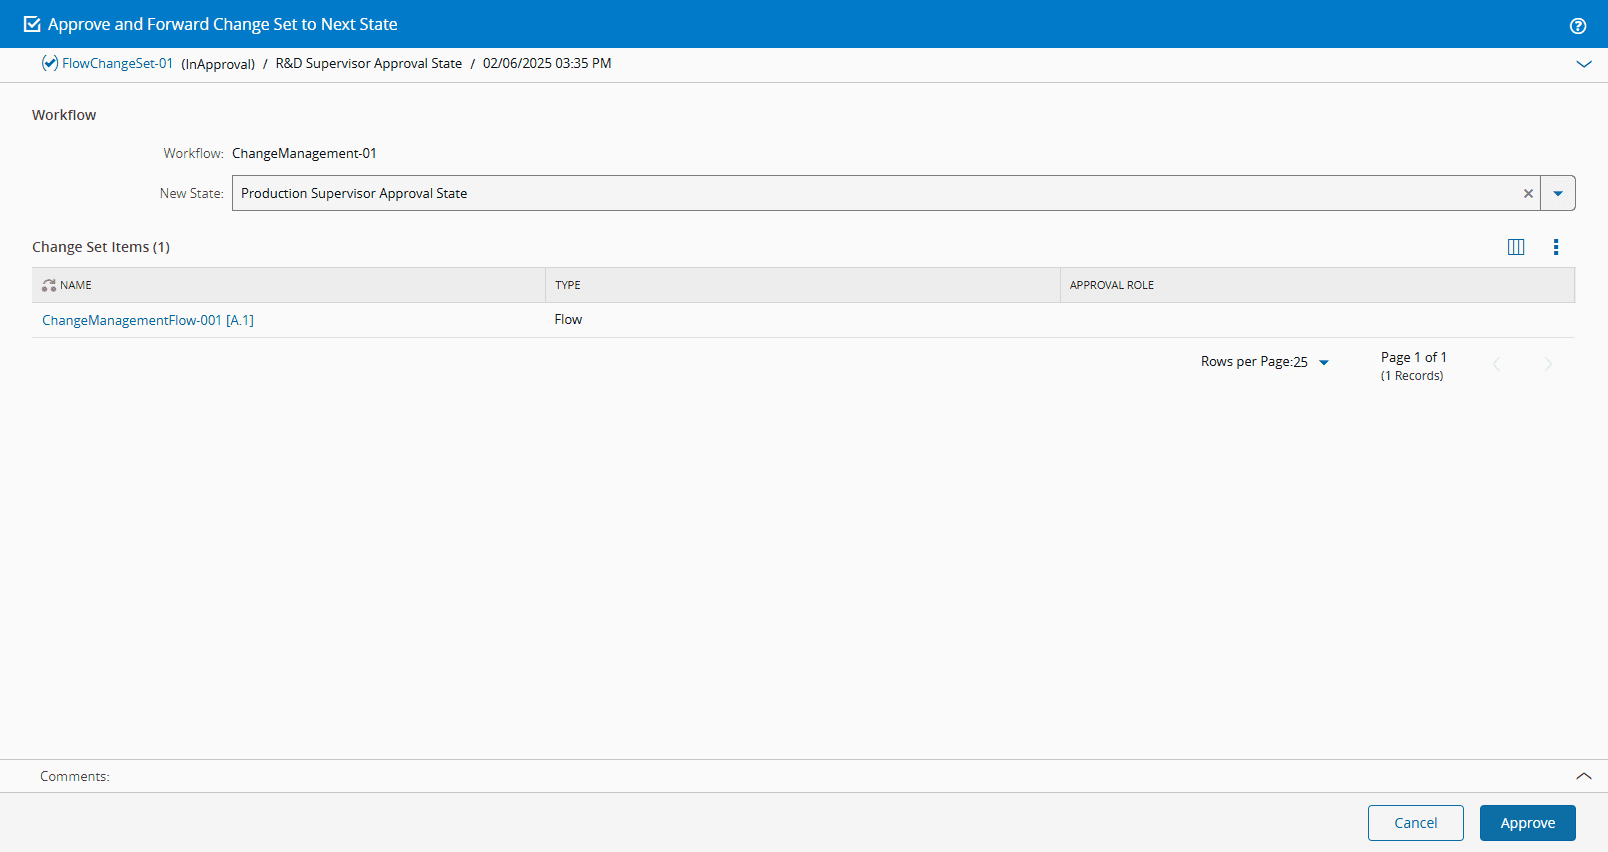
Select the Approve button on the top ribbon, and then again in the wizard to approve the first state of the approval workflow and move on to the next one:
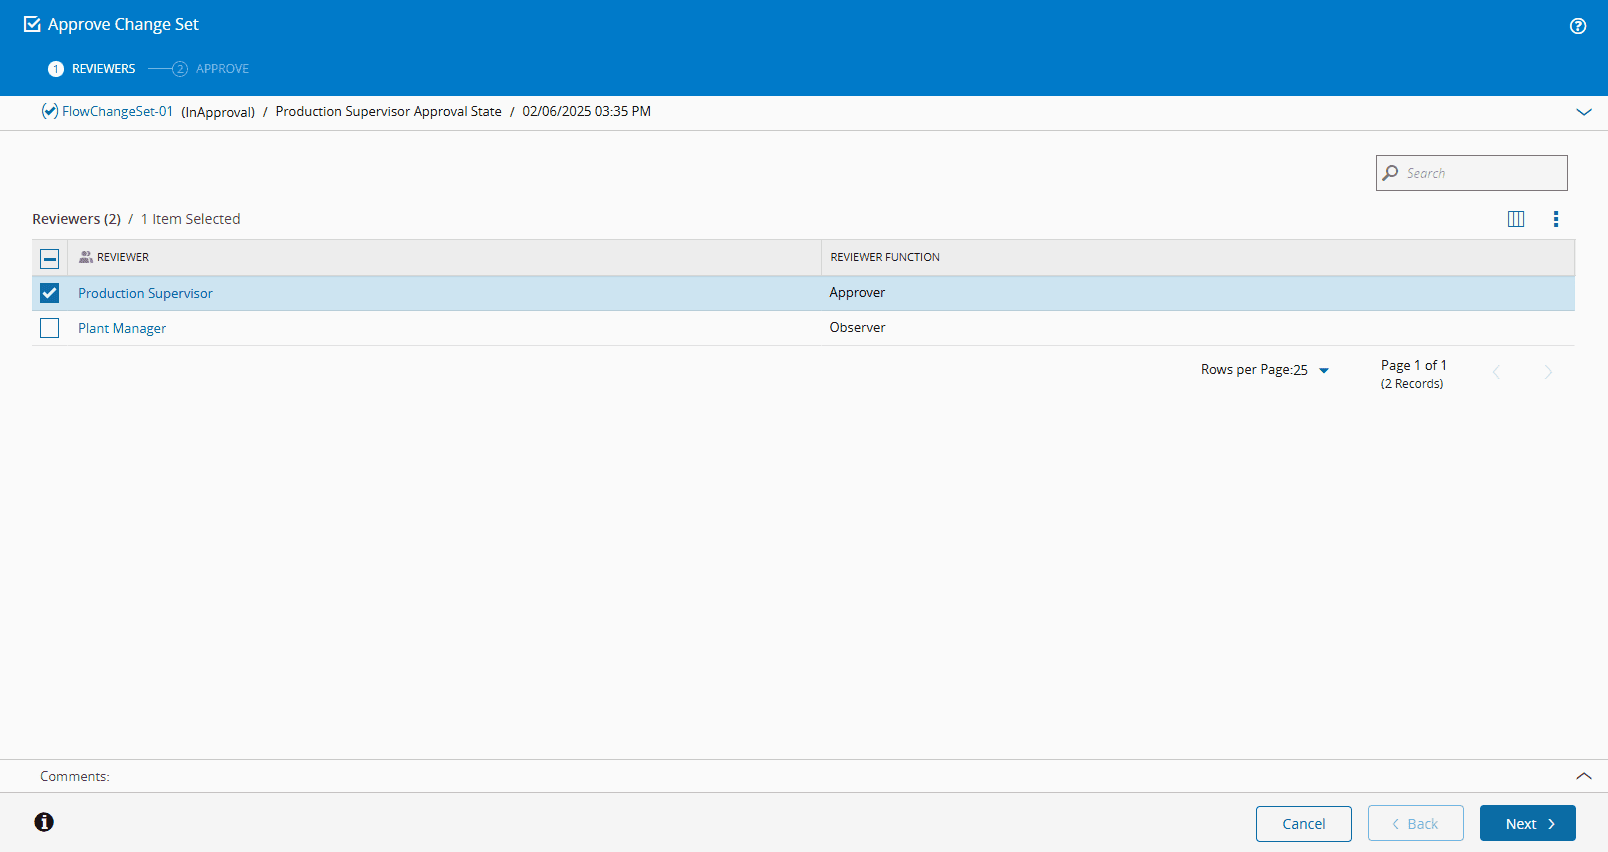
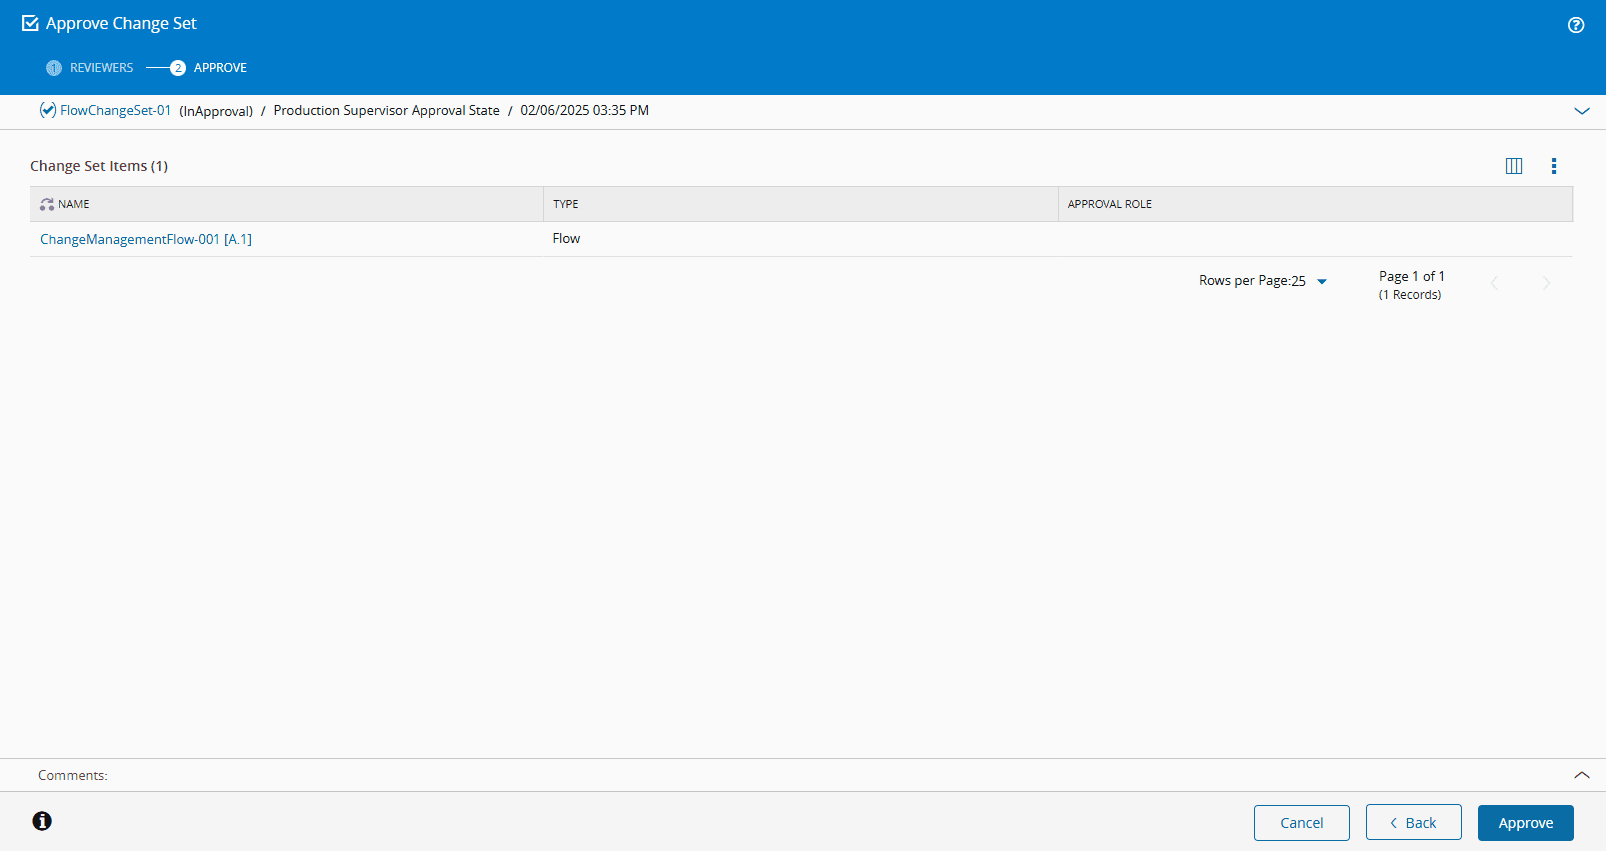
Back in the Details page of the Change Set, select the Request Approval button on the top ribbon. In the Approve Change Set wizard, select the appropriate Reviewer, this is, the Approver, and select Next:
In the Approve step, select Approve to complete the operation:
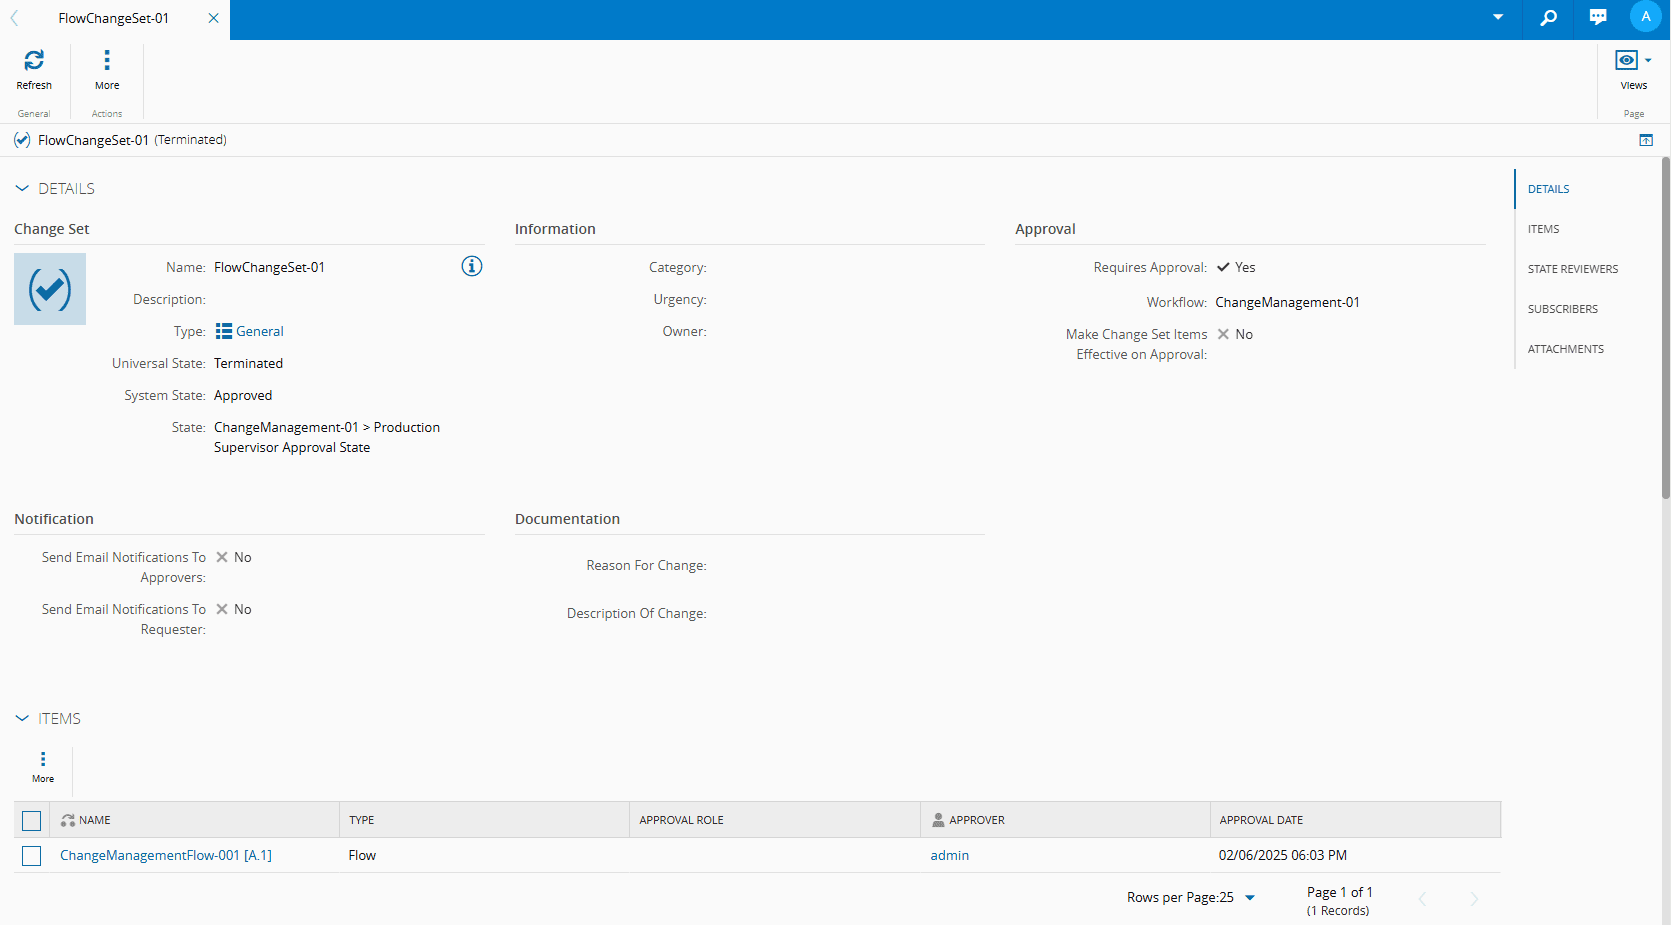
As you can see, the Universal State of the Change Set is now Terminated (was Active) and the System State is Approved (was Created). Additionally, the State information now relates to the last state of the State Model:
Advanced Setup#
The aim of this type of setup is to make the most of Critical Manufacturing MES by removing additional and repetitive configurations when we are using the system.
This means that by using an Advanced Setup you will not have to constantly create a new Change Set when you create a new versioned entity or object.
So let's look at how you can automate this setup and configure the system for your benefit.
Name Generator#
Your starting point will be in the Administration menu, Name Generators page, where you will create a Change Set Name Generator to be used later in this setup:
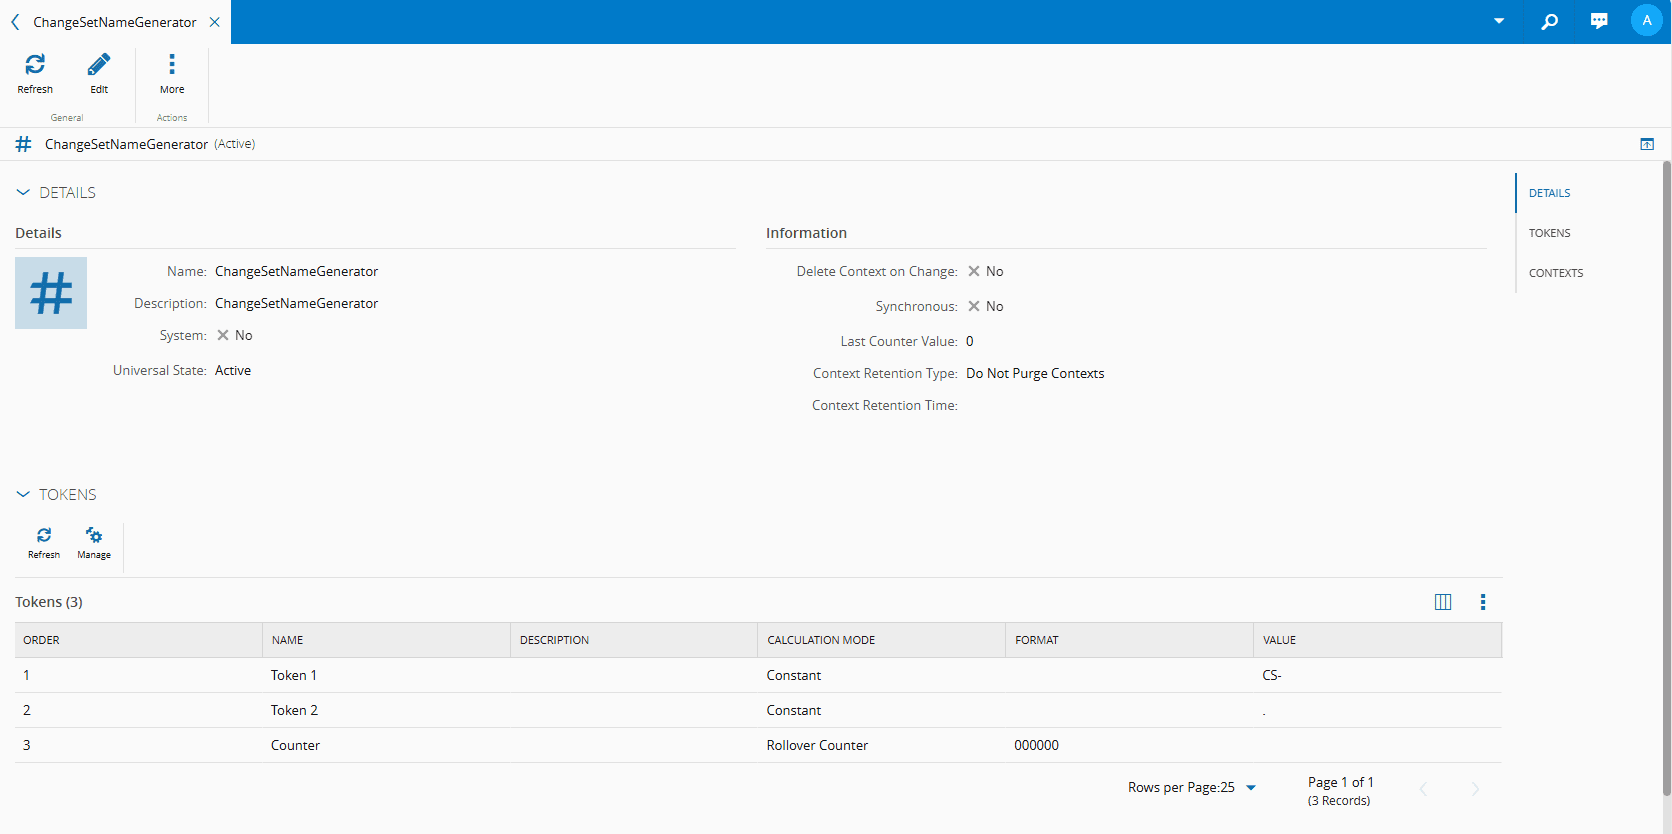
For more information, see Name Generators
Entity Types#
Now, in the Entity Types page of the Administration menu, configure the Flow object for the purpose of this example.
Follow the steps below to configure the necessary fields:
- In Entity Types, create of search for the Flow object. For more information, see Entity Types.
- As you already have the Flow in the system, you can simply select the Edit button on the top ribbon.
-
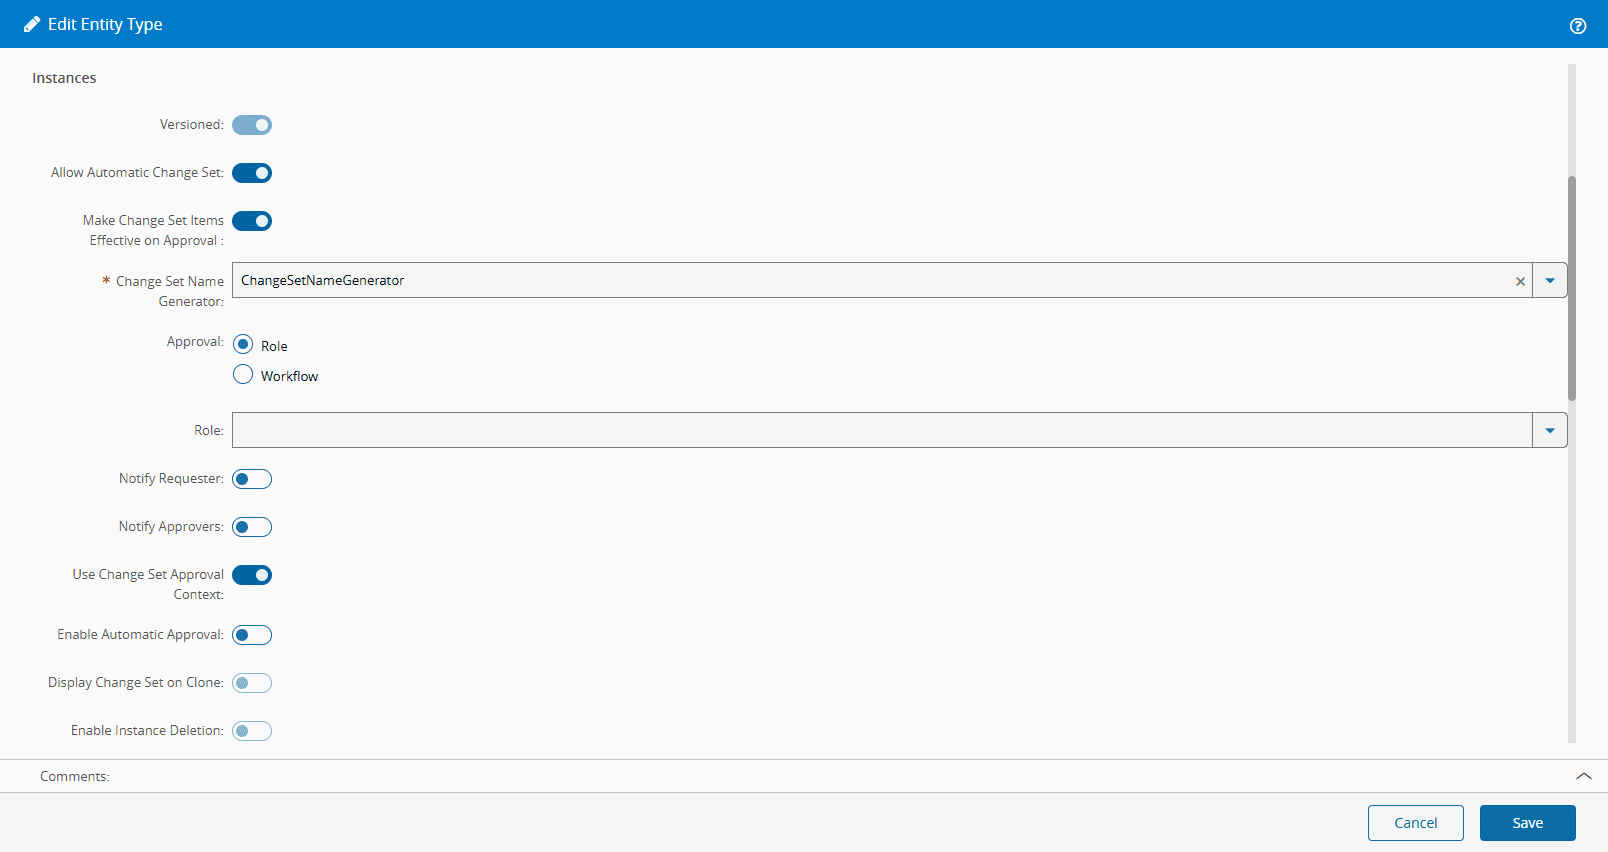
In Edit mode, and in the Instances section, be sure to:
- Allow Automatic Change Set
- Make Change Set Items Effective on Approval
- Enter the created Change Set Name Generator
-
Use Change Set Approval Context - where approvals can be defined depending on the context
Info
If the Use Change Set Approval Context property is enabled, when this entity creates and automatic Change Set, it will have to confirm this in the ChangeSetApprovalContext smart table.
-
Select Save to complete the operation:

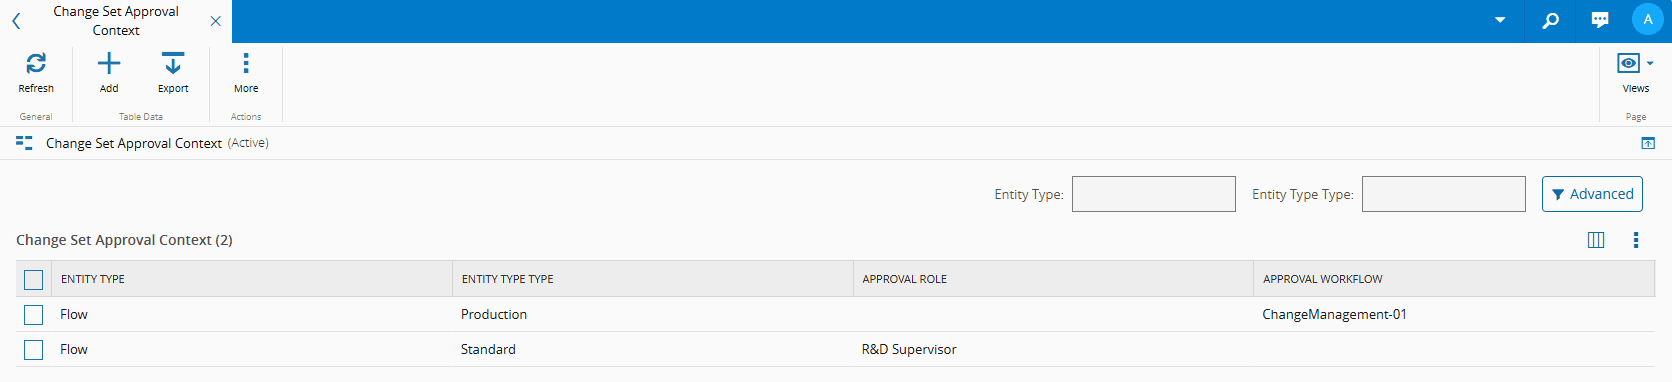
Change Set Approval Context#
Next, in the Administration menu, configure the Change Set Approval Context smart table.
For the purpose of this tutorial, both Approval Role and Approval Workflow were configured, and will then be tested:
For more information, see Smart Tables.
Info
A Change Set can have an Approval Role or an Approval Workflow, but not both.
Approval Role Test#
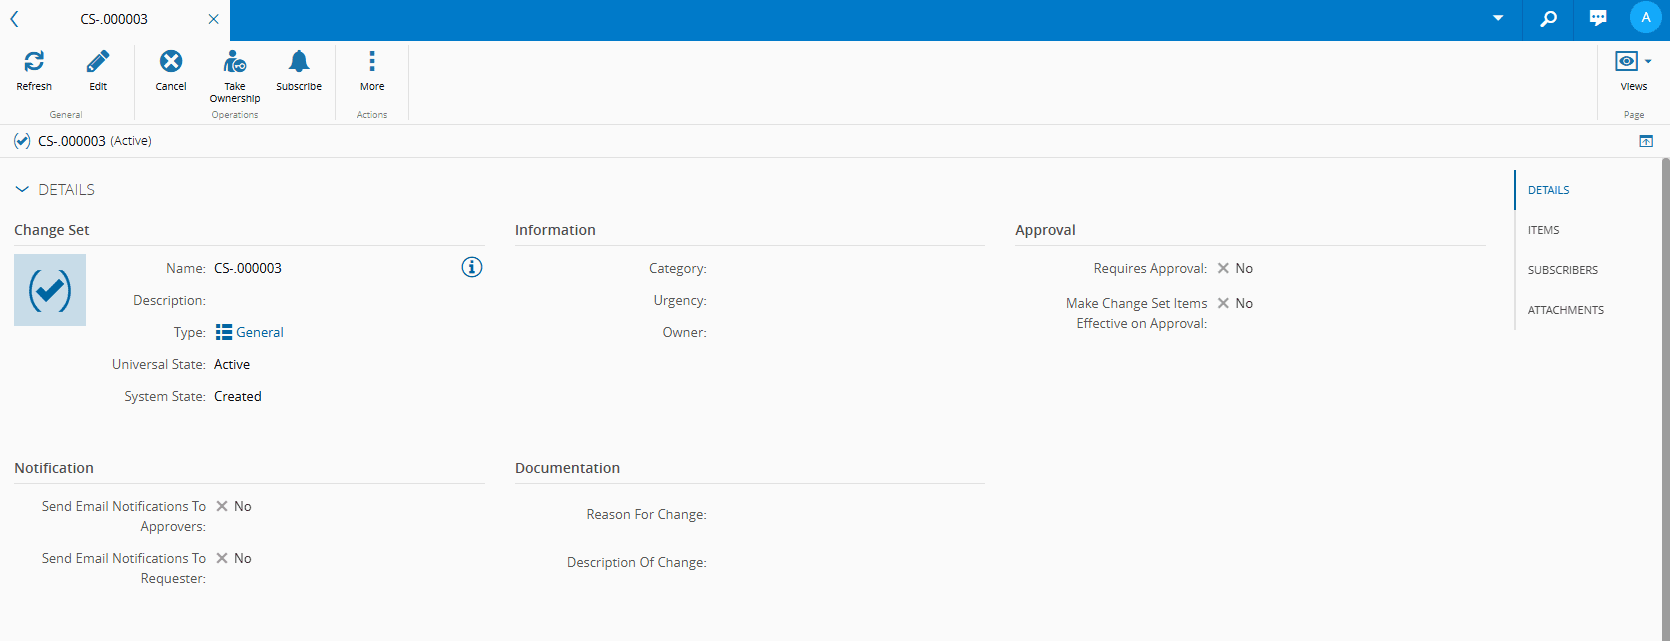
When you now create a Flow (versioned entity), there is no need to create a Change Set because you configured it to be automatic:
Select Next and create a Flow with the Type as Standard (under Entity Type Type in the smart table above):
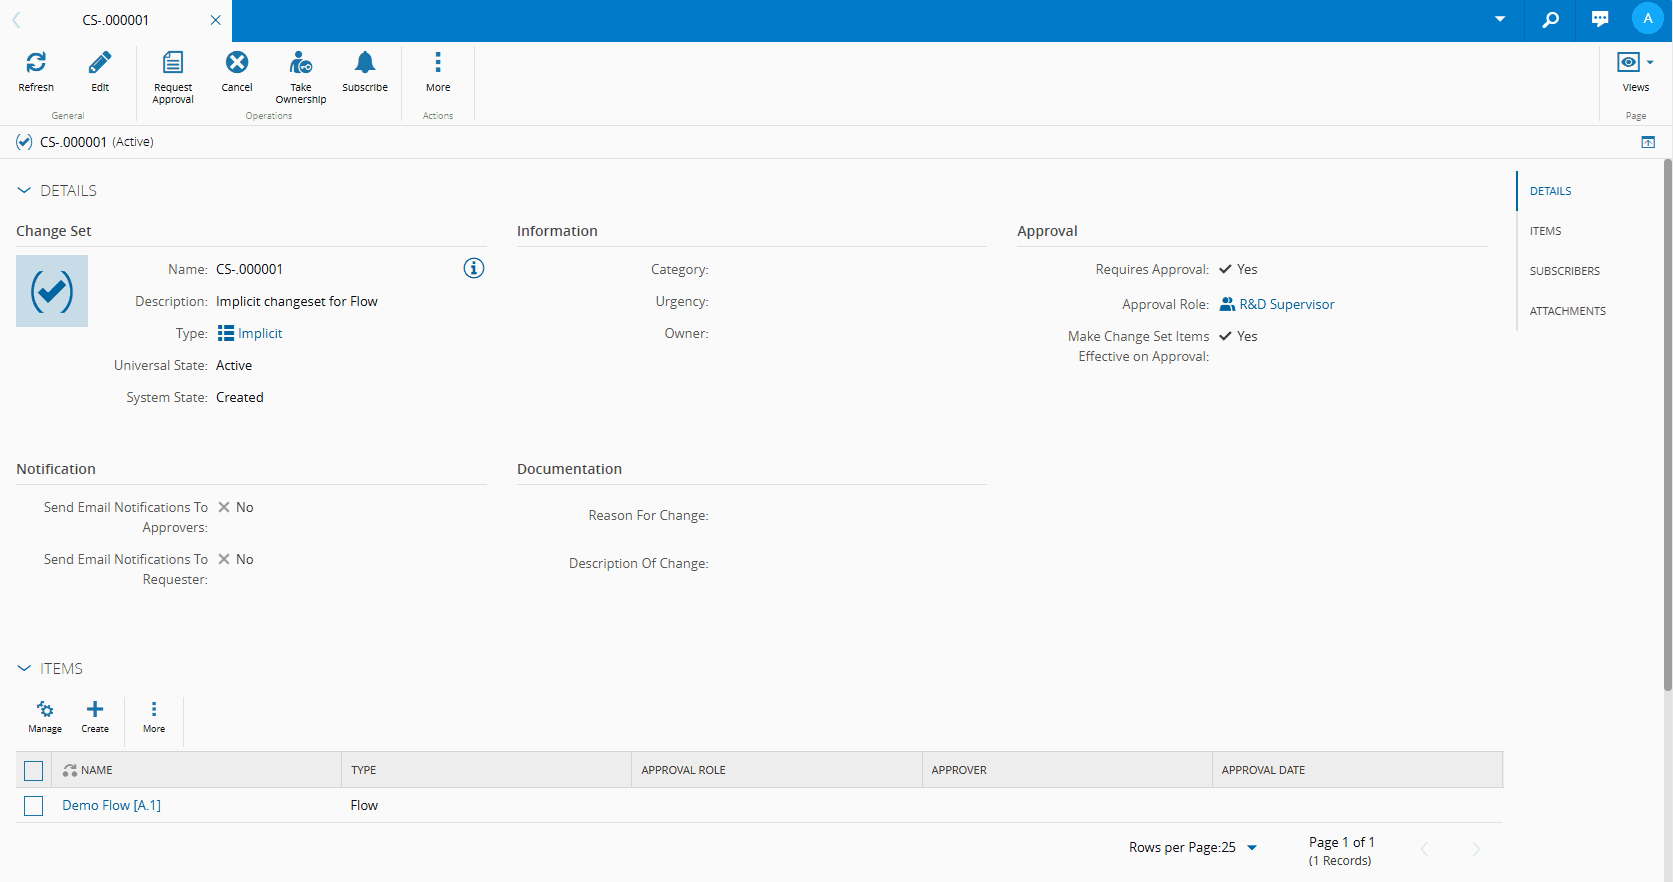
When the Flow is created you can clearly see the Name Generator at work:
Additionally, if you open the Change Set itself, you can further confirm the configurations that were set including the Approval Role details (single approval):
Approval Workflow Test#
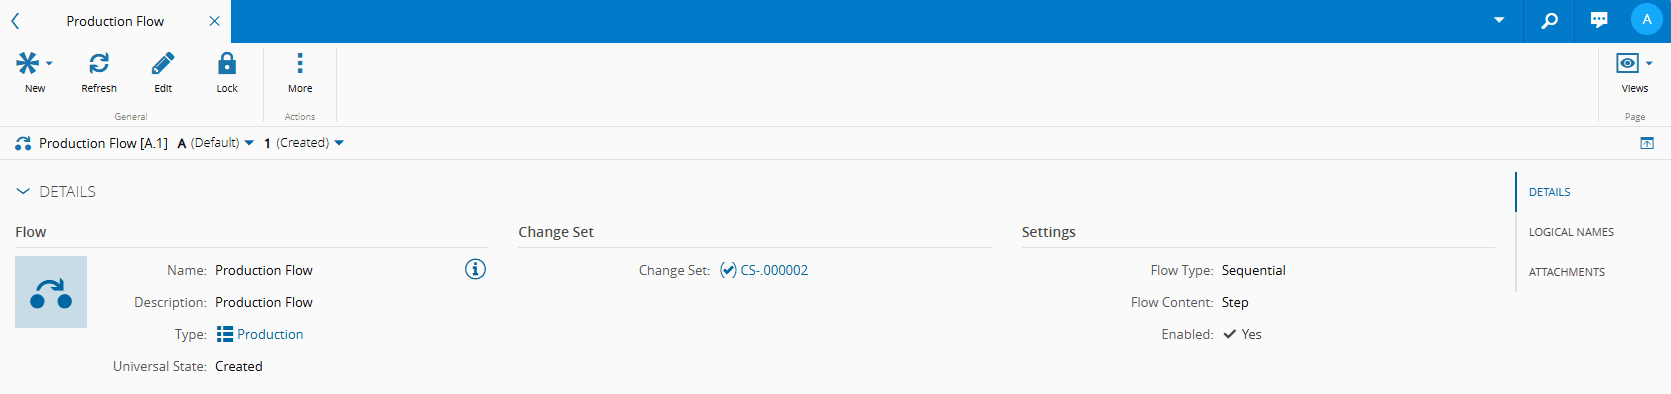
You can now create a Flow (versioned entity), with the Type as Production (under Entity Type Type in the smart table above). The Change Set will again be automatic:
Select Next and create a Flow with the Type mentioned above:

When the Flow is created you can clearly see the Name Generator at work:
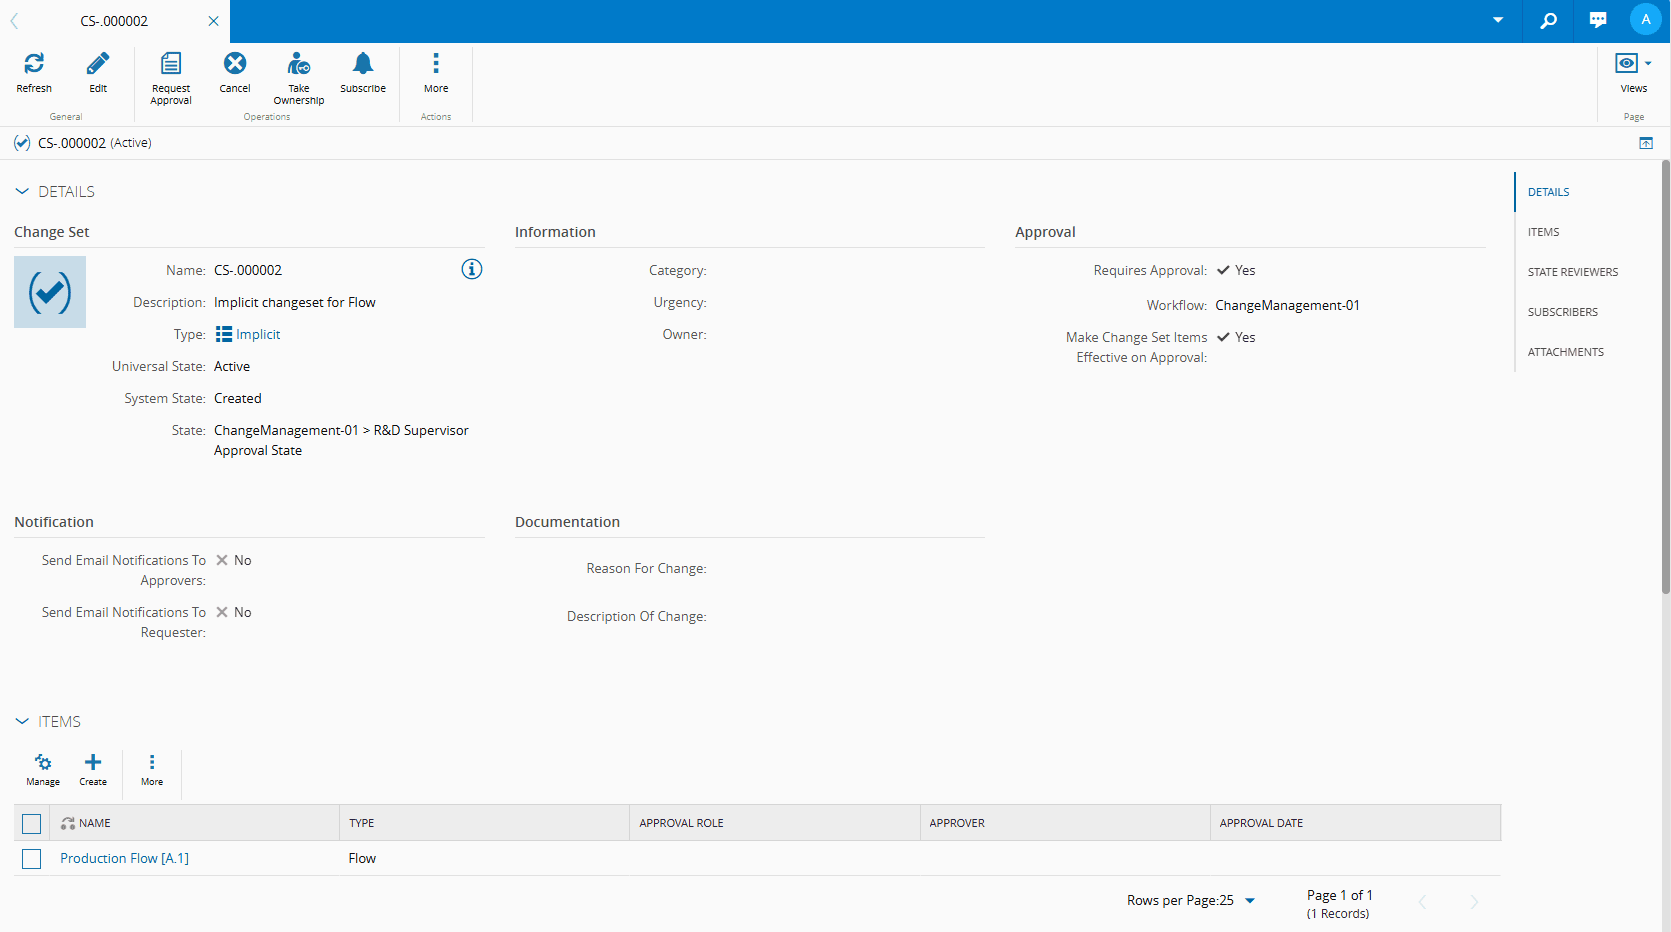
Additionally, if you open the Change Set itself, you can further confirm the configurations that were set including the Approval Workflow details (multi-role approval):
Note
Depending on the scenarios you are using, there may be dependencies between the versions of the versioned entities being used.
Subscribe to Notifications#
You can Subscribe and Unsubscribe to Change Set notifications by selecting the Subscribe button on the top ribbon:
Note
Subscribers receive updates and notifications without interacting directly with approvals.
| Icon | Description |
|---|---|
| Select to subscribe to Change Set notifications (you are not yet part of the Change Set Subscription List). | |
| Select to unsubscribe from Change Set notifications (you are already part of the Change Set Subscription List). |
You can add Subscribers to the Change Set by going to the Subscribers section and managing Subscribers by adding or removing employees:
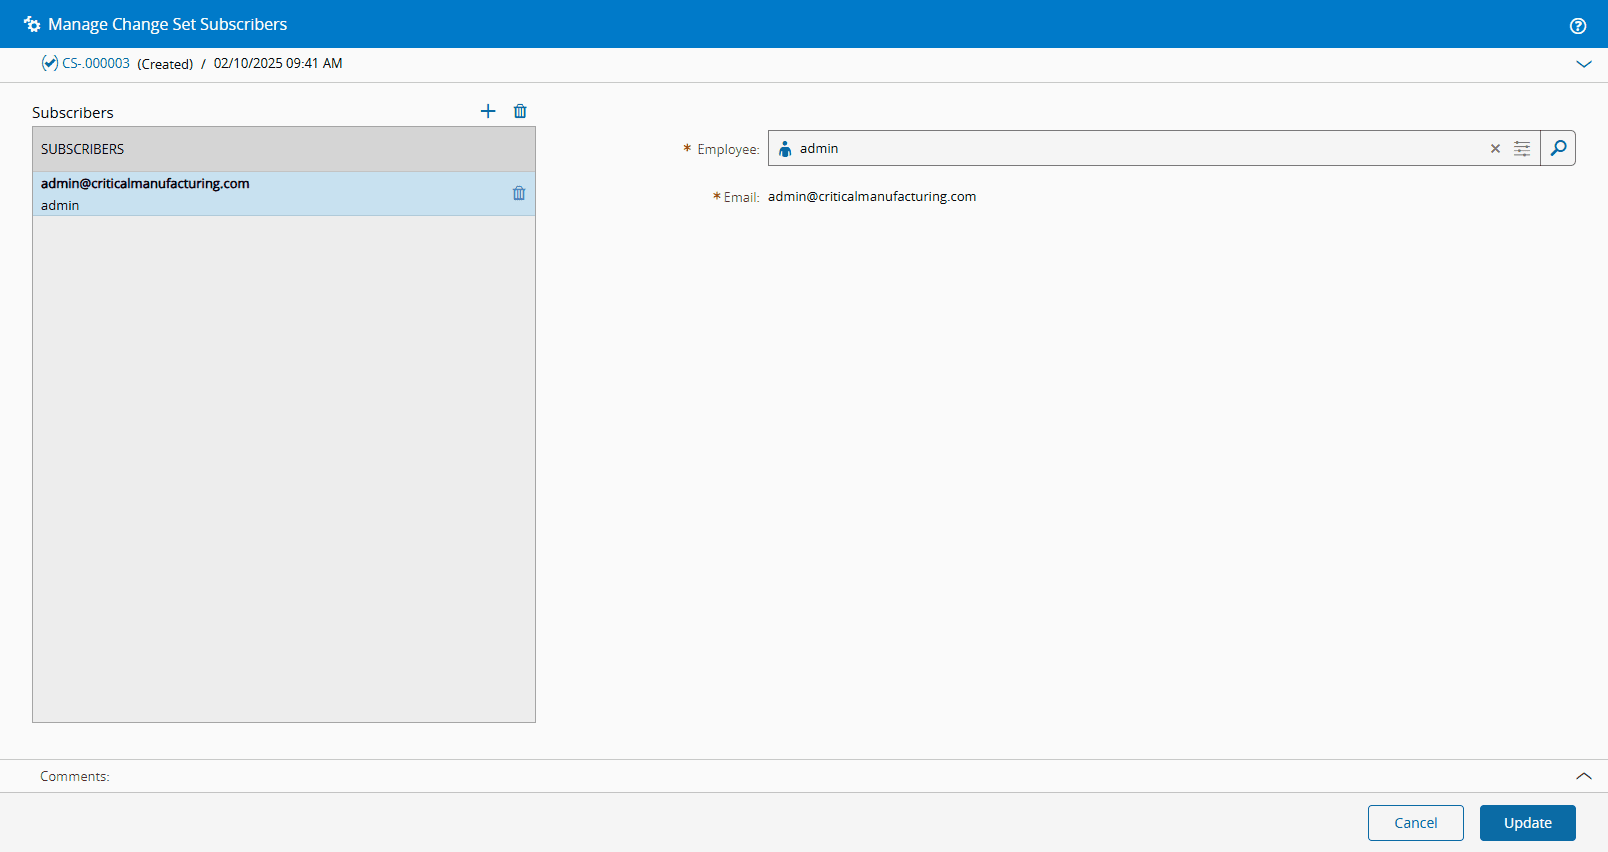
For more information, see Manage Change Set Subscribers.
You are now ready to take full advantage of the Change Set entity, and are better equipped to understand how Change Management works.