Create Event Rule#
 EventRule.Create
Overview#
Event Rules is an Administration entity that allows you to create an Event Rule with actions of type Notification or Rule. The created actions will only be executed when the event is triggered.
Setup#
No specific setup is required other than to meet the preconditions of the transaction.
Preconditions#
- The Alarm Management module is properly licensed in the system.
- The name of the Event Rule must be unique.
Sequence of Steps#
Step 1: Create Event Rule#
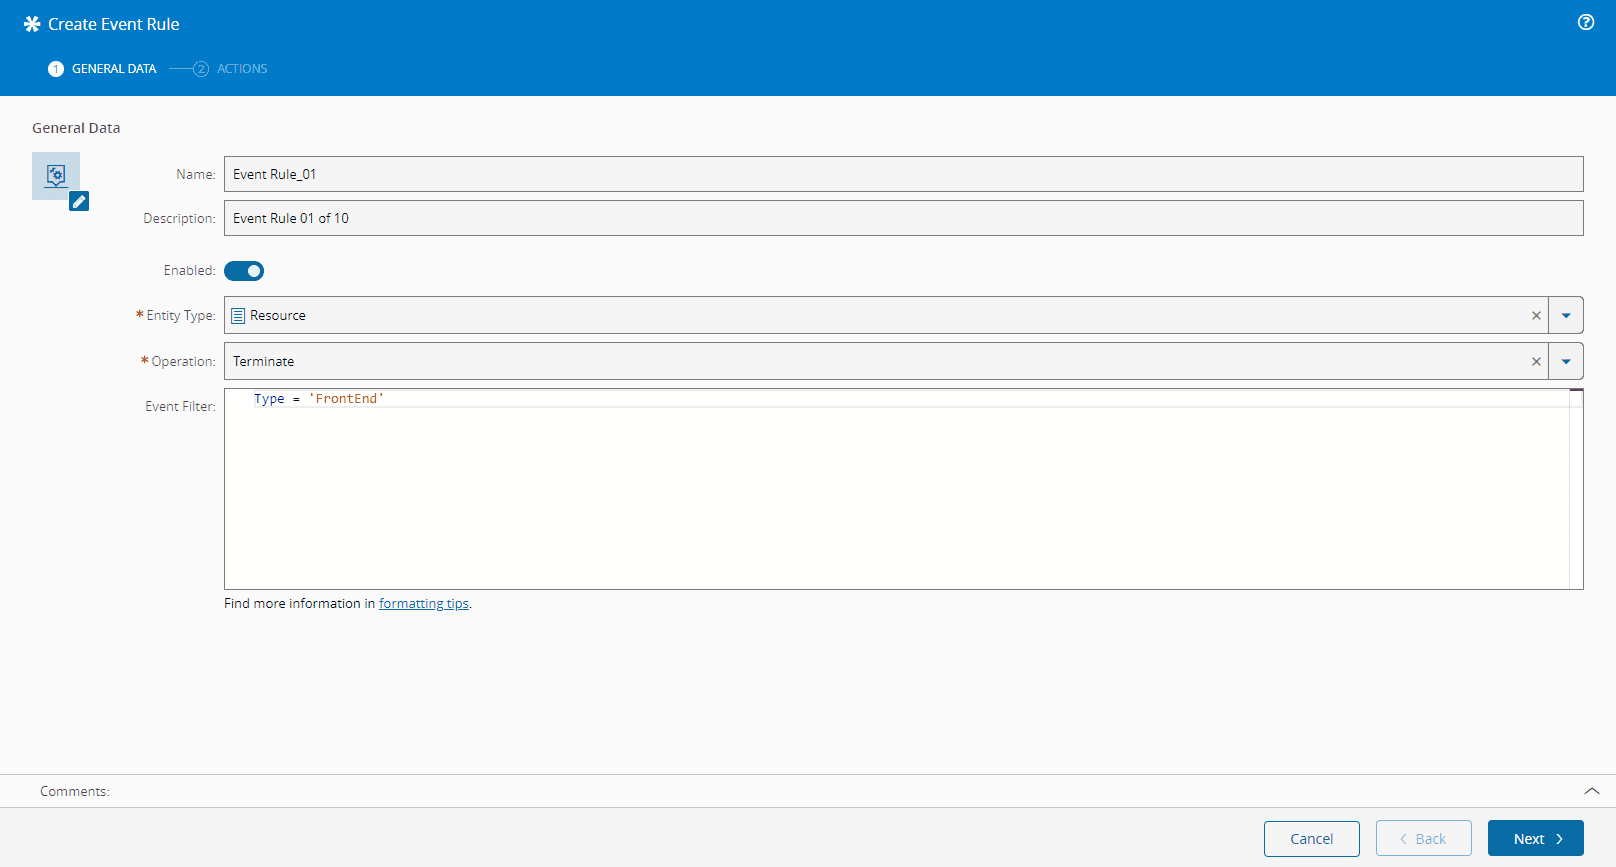
- Enter a unique Name. This field can be left empty if there is a Name Generator configured to provide unique names automatically.
- Provide a Description.
- Specify whether the rule is Enabled (defaults to
Enabled). - Specify a valid Entity Type for which the rule applies. For example, Resource.
-
Specify a valid Operation for the Entity Type. For example, Clone.
Note
The Event Rule will react to the selected Entity Type and Operation.
-
Use the Event Filter to define the conditions of execution of the event rule. In the Event Filter, you must use a subset of JSONata ⧉ expressions, as follows:
- Equal/Not Equal Comparators ('='/'!=').
- And/Or Boolean operators ('and'/'or').
- Boolean values for ensuring a expression are always true or false ('true'/'false').
- Quotation marks to define Entity Type values (e.g. "Dark Blue" or 'Soft Blue').
- Reference to Entity Type properties without whitespaces (e.g. Color = 'Blue').
- Reference to Entity Type with whitespaces or special characters (e.g.
Wheel color= 'Blue') - Parentheses for precedence in compound expressions (e.g. Color = "Blue" and (Size = "Small" or Size = "Medium") ).
Note
When you use the Event Filter editor, the Create Event Rule wizard checks the syntax of the expression in real-time.
Step 2: Actions#
-
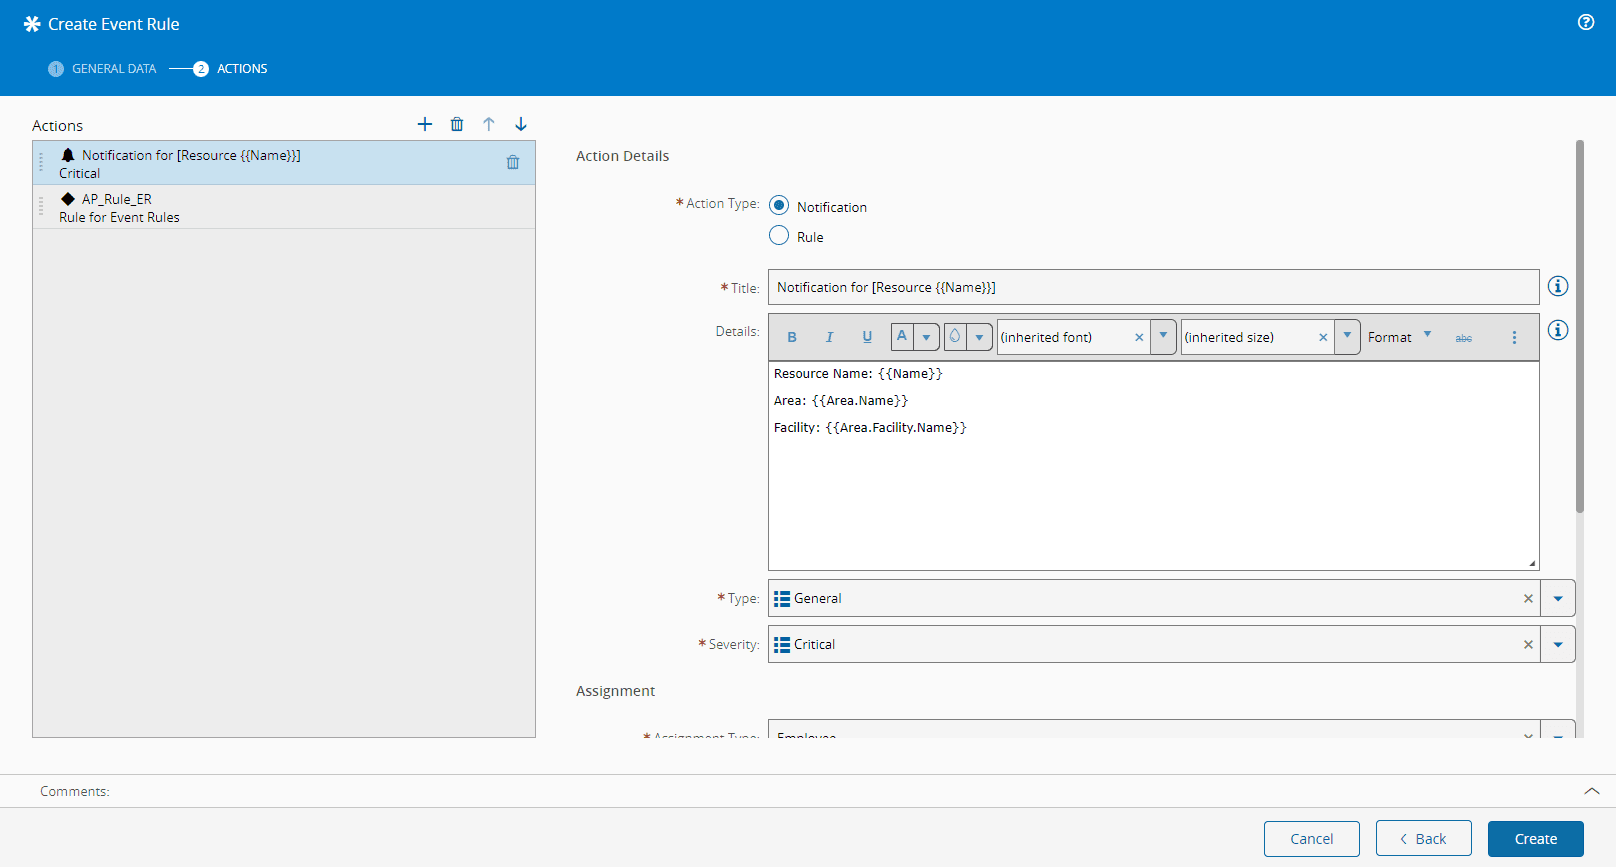
On the left panel as many Event Rule Actions as needed, and for each define the:
- Action Type - Notification (default) or Rule.
- If Rule:
- Define an active Rule that has an Event Rule Scope.
-
If Notification:
- Enter a Title. it is possible to add links to objects using the syntax available in the button. For example, the title: Notification for [Resource {{ Name }}] will create a link to the specific Resource that triggered the event (name placeholder will be replaced by the name of the actual resource).
- Enter the Details using the Rich Text editor.
Note
In the Details field you can also use the same syntax structure as above.
-
Select the Type of the Notification - values are taken from the
NotificationTypeLookup Table. - Select the Severity of the Notification - values are taken from the Lookup Table
NotificationSeverity. - Select the Assignment Type:
- Employee - for a particular Employee (an active Employee must be defined).
- Everyone - for every Employee.
- Role - for a particular Role (an active Role must be defined).
- Select whether Send Email to Assigned Party is enabled (defaults to
False). If enabled, the Send Email to Distribution List field must specify the distribution list that will receive the email notification. - Define the Mode of the clearance:
- Automatic - the notification will be cleared by the system when the Valid To date/time is reached.
- ManualEveryUser - every user must clear the notification.
- ManualSingleUser - the first user will clear the notification for everyone.
-
In Valid To define the date up to which the clearance is valid. This field is mandatory for Manual Every User and Automatic, but optional for Manual Single User.
Note
You can use Shortcuts such as
@Todayor@Nowin the Valid To field, which will be replaced by the date/time of the event when it occurs.
-
Select Create to complete the operation.