Create Inspection Plan#
 InspectionPlan.Create
InspectionPlan.CreateTemplate
InspectionPlan.CreateFromTemplate
Overview#
This operation is used to create an Inspection Plan.
Preconditions#
The Inspection Plan name must be provided and unique.
Sequence of Steps#
There are several ways to create a new versioned object. Depending on the level, follow these steps to get started:
- Entity - In the landing page of this entity type in the Business Data menu or in the details page of an existing entity of the same type, select New on the top ribbon. For more information see Creating Entity Objects.
- Revision - If you want to create a new revision, go to the New dropdown button on the top ribbon and select Revision. For more information, see Revisions.
- Version - If you want to create a version associated to an existing revision, go to the New dropdown button on the top ribbon and select Version. For more information, see Versions.
Step 1: Change Set#
- Select an existing Change Set or select Create to create a new Change Set. If configured to support implicit Change Sets, it is also possible to check the option Use Automatic Change Set.
- Optionally, select an Approval Role.
Step 2: General Data#
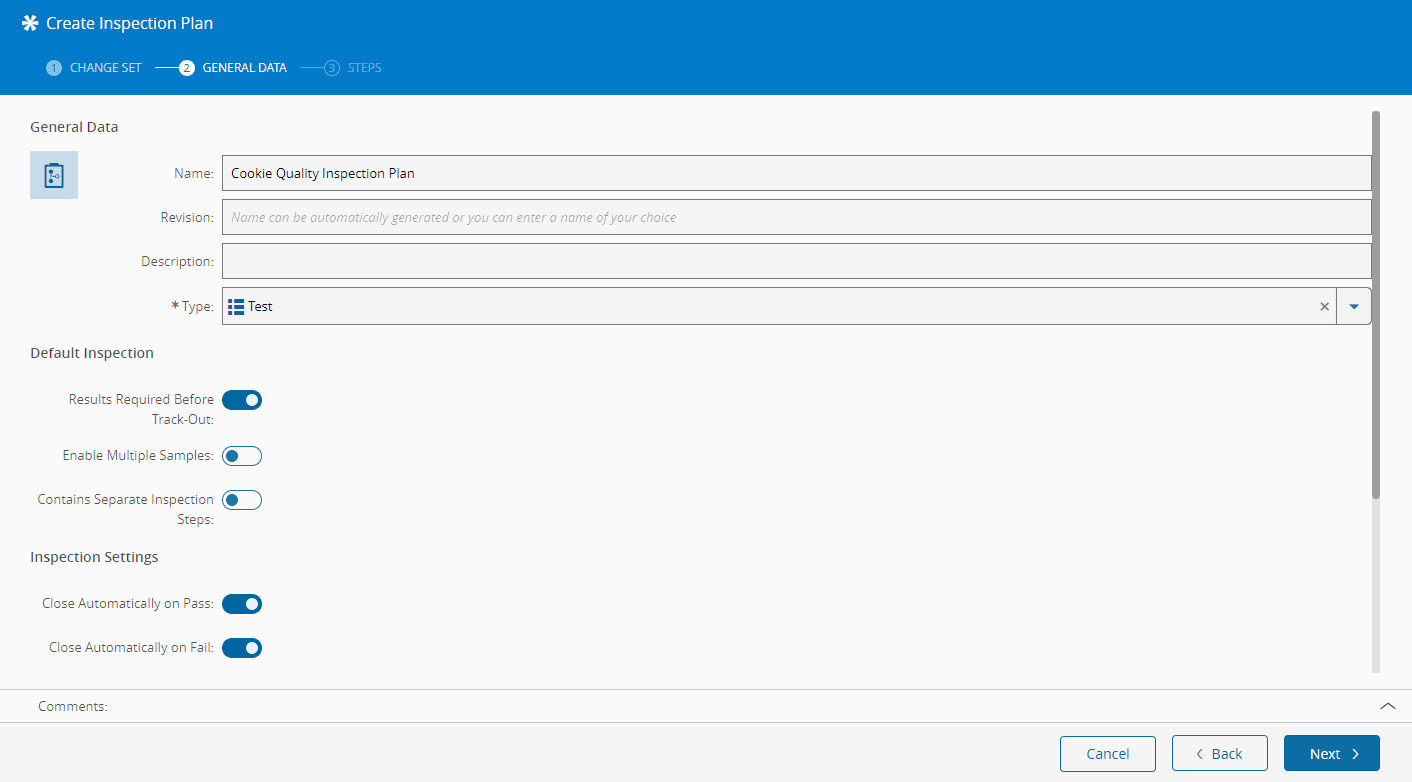
- Provide a unique name for the Inspection Plan.
- If you are creating a new version, the revision that was selected when you started the process will be the revision this version will be associated with. If you are creating a new entity or revision (with a new version associated to it), provide a name for the revision or it will be automatically generated for you. For more information on revision naming, see Revision Naming.
- Optionally, provide a description of the Inspection Plan.
- Select the Inspection Plan type. The list of possible values is taken from the [[inspectionplantype-lt | Inspection Plan Type Lookup Table ]].
-
Select which options you would like to enable in the Default Inspection section:
- Results Required Before Track-Out - controls whether the Inspection Order must be Closed, with all results captured, before you can Track-Out the main Material. This option only controls whether results must be finalized: an incomplete Inspection Order Step Sample blocks a full Track-Out of the main Material even when this flag is not selected.
- Enable Multiple Samples - the Inspection Plan can have multiple samples to inspect.
- Contains Separate Inspection Steps - the Inspection Plan can contain separate Inspection Steps.
Note
The Inspection Plan can only contain more than one Inspection Plan Step if the
Contains Separate Inspection Stepsflag is selected. -
In the Inspection Settings section:
- The Close Automatically on Pass flag closes the Inspection Plan automatically when the inspection result is
Pass. - The Close Automatically on Fail option closes the Inspection Plan automatically when the inspection result is
Fail. - Enable the automatic opening of a Protocol to address a
Failresult. If enabled, select the appropriate Protocol to be opened. - Configure a Future Hold on the Material by selecting its creation mode:
None- no Future Hold will be created.Always- when the Inspection Plan is assigned to a Step.On Fail- when the Inspection Plan fails.
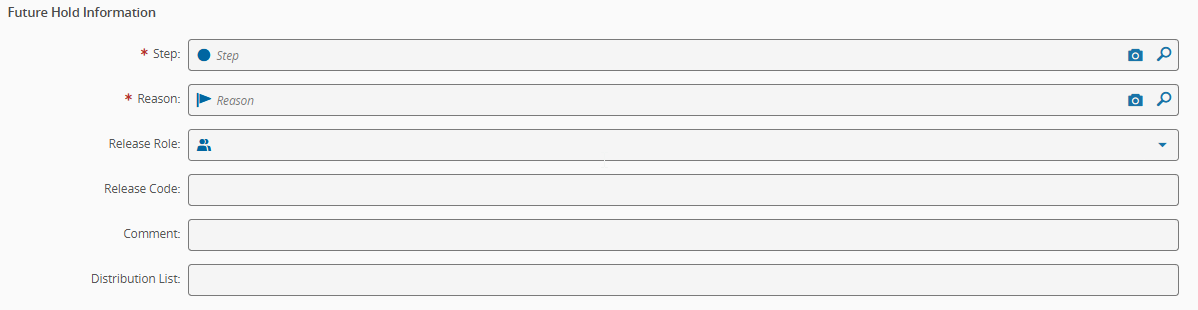
Future Hold Information section (only appears if Future Hold Creation Mode is Always or On Fail)
Select the Future Hold Step and Reason. Optionally, the following properties can also be defined:
- Future Hold Release Role
- Future Hold Release Code
- Future Hold Comment
- Future Hold Distribution List
- Choose whether to immediately put the Material on Hold when the Inspection Plan fails.
Hold Information section (only appears if the Material set on Hold when the Inspection Plan fails)
Select the Hold Reason. Optionally, the following properties can also be defined:
- Hold Release Role
- Hold Release Code
- Hold Comment

- The Close Automatically on Pass flag closes the Inspection Plan automatically when the inspection result is
-
Select Next to define the Inspection Plan Steps.
Step 3: Steps#
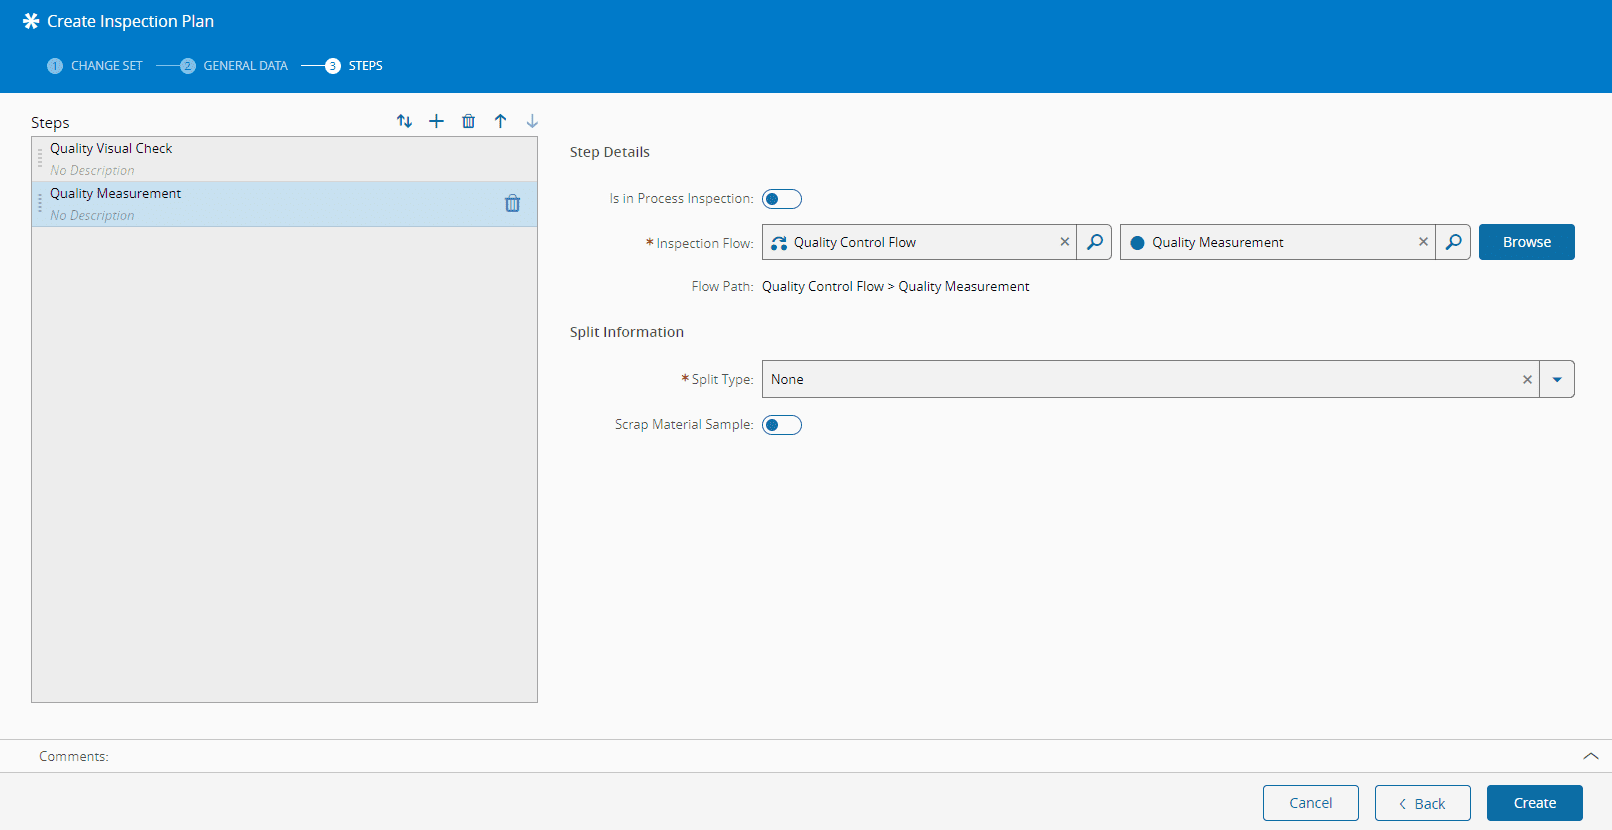
This section is used to define the different steps for the Inspection Plan.
- Add as many Inspection Plan Steps as desired (select in the top right of the grid to add, to remove, and order the Steps with the and buttons, or by dragging them). The steps can also be copied from other steps that belong to an existing version of the same Inspection Plan, by using the Copy Steps option.
-
Specify at least one Step, and provide the following information for each:
- Enable
Is in Process Inspectionif the Inspection takes place at the same Step where the Inspection Plan is triggered. This removes the need for any other Inspection Plan Step configuration. - If the
Is in Process Inspectionis not enabled, specify the following information: - The Inspection Flow and Step where the Inspection Plan will be performed.
-
The Split Type to be performed:
- None - No Split.
- Permanent - The Material will be Split and transformed into several Child Materials.
- Temporary - The Materials created during the Inspection Plan Step shall be merged back with the original Material at the end of the Flow.
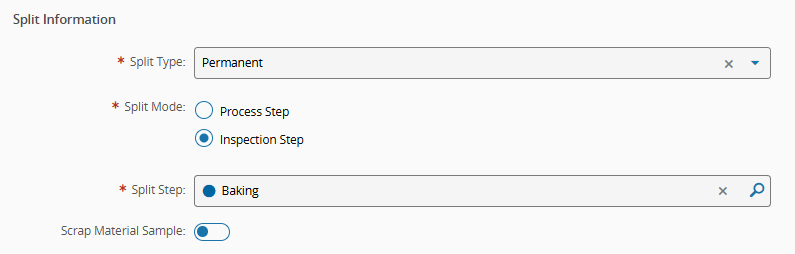
Split Information section (only appears if a Split is to be performed)
Select the Split Mode:
- Inspection Step - select one of the Inspection Plan Steps to be used as a Split Step.
- Process Step - the Split will be performed in the same Step.
Choose the Step in which the Split will be performed.
-
Choose whether to scrap the Material sample used for the inspection. If set as
true, select the appropriate Reason for the scrap.
Warning
If the Inspection Plan contains an In-Process Inspection Step and the Results Required Before Track Out property is set to
true, both the Close Automatically on Pass and Close Automatically on Fail properties must be set totrue. - Enable
-
Select Create to complete the operation and the new Inspection Plan will be created.