---
alias: installation-guide-connectiotinstallation
tags:
- connect iot
description: "This document outlines steps for installing and configuring the Connect IoT system, including package deployment and Automation Manager setup"
---
# Connect IoT Installation
The **Connect IoT Installation** requires post installation steps that are described in this document.
!!! note
While this method provides a direct installation method for Connect Iot, Critical Manufacturing recommends using the automatic deployment method, which you can read about in [[user-guide-automation-manager-configure-deployment]].
## Package Repository
As described in the System Requirements, Connect IoT requires a Package Repository to store all binaries and respective versions.
Currently, two types of repositories are supported (`NPM` and `Directory`), each with their advantages and disadvantages.
| Type | Advantages | Disadvantages |
| --------- | ------------------------------------------------------------ | ------------------------------------------------------------ |
| NPM | Authentication with roles
Web-Server-Based
Well defined Api
Commercial solutions with support | Must install/configure/maintain server
Commercial solutions/support is not free
Internet connection may be required
Updating packages requires unpublish + publish (development + hotfixes) |
| Directory | Free
Easy to prepare
Easy to retrieve/change packages
No internet/ports required | Must be available in all IoT computers (mount)
Authentication based on ACL
Anyone with permissions can simply delete everything |
Table: Package Repository types
## Deploy Connect IoT Packages
### Package Selection
Run the setup wizard and select the package `Cmf.ConnectIoT.Packages` from the dropdown and select **Next**.
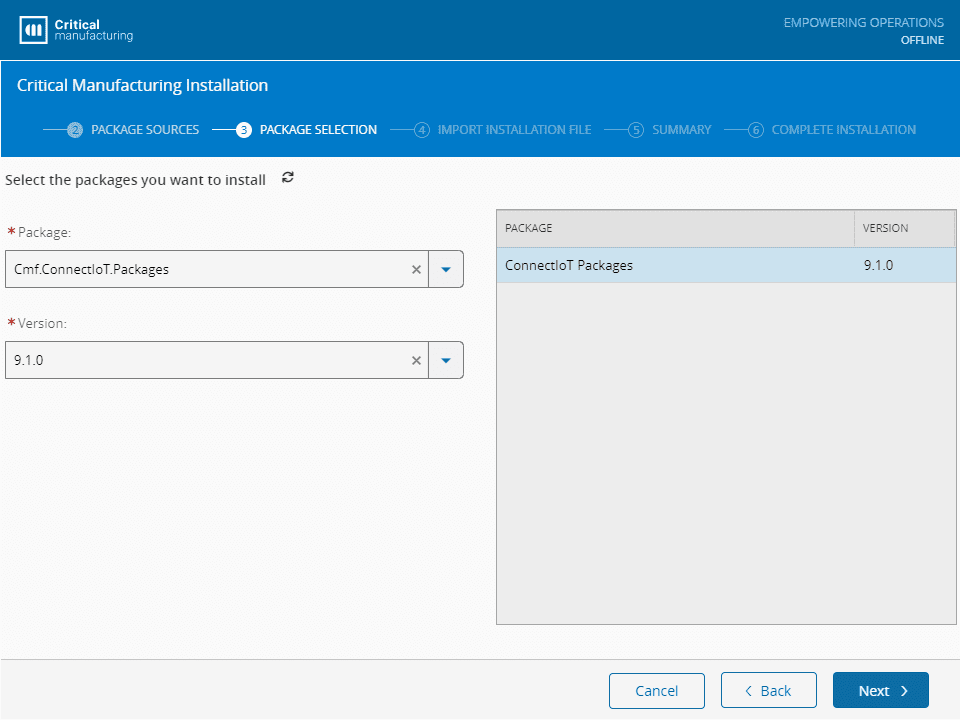
If you have any previously exported configuration file, you can import it. Nevertheless, continue to the **Next** step.
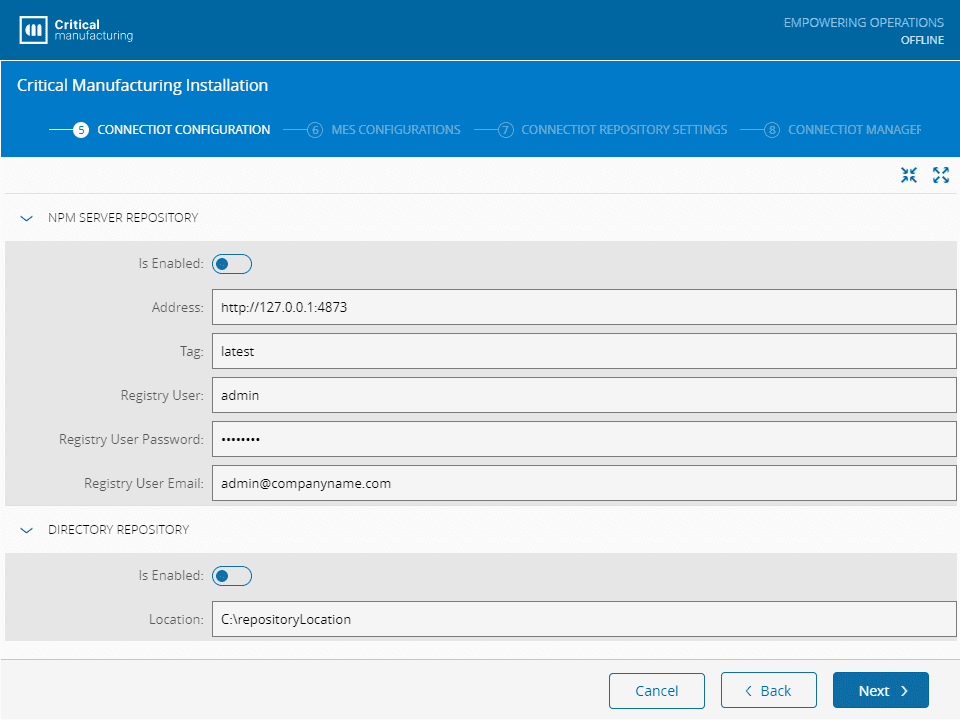
### Connect IoT Configuration
In the **NPM Server Repository** group, fill out the fields as described below:
* **Is Enabled** - specify if the packages should be published to an NPM Repository.
* **Address** - full address (including port) of the server (must support NPM api).
* **Tag** - tag to mark the packages.
* **Registry User** - username with publish permissions.
* **Registry User Password** - password of the user indicated in the previous field.
* **Registry User Email** - email to associate to the user that will publish the packages.
In the **Directory Repository** group, define the following options:
* **Is Enabled** - specify if the packages should be published to a Directory Repository.
* **Location** - directory full path (if the directory does not exist, it will be created).
### MES Configurations
Define the configurations for the MES system:
* **Tenant Name** - tenant name used to connect to the MES system.
* **HostName or IP Address** - address where the MES system is installed.
* **Port** - port address for the MES system.
* **Use SSL** - whether SSL will be used.
In the **User Account** group, fill out the details for the user that will access the system:
* **User Account** - user account to access the MES system.
* **User Password** - user password to access the MES system.
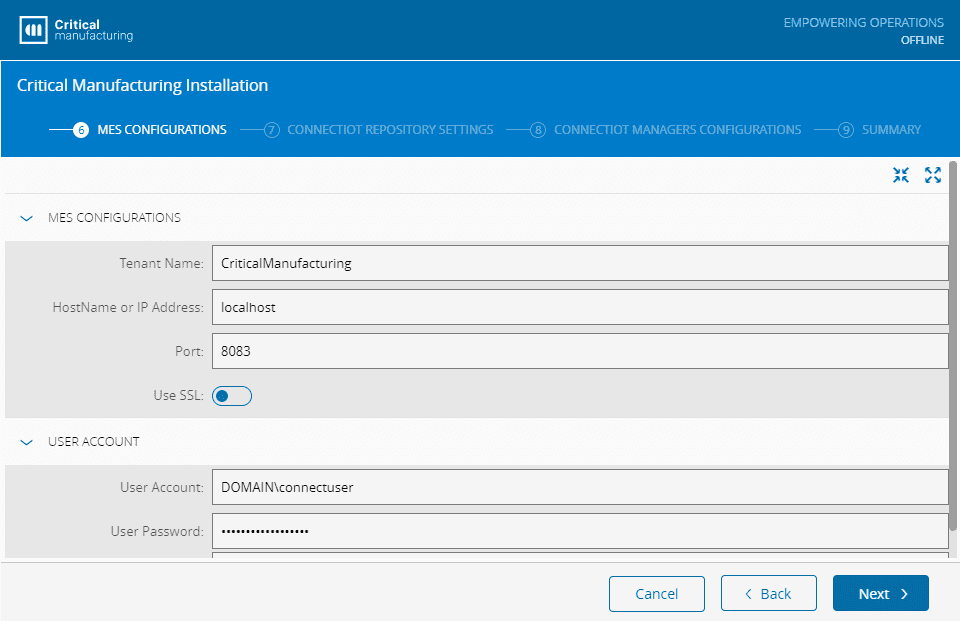
Select **Next** to continue.
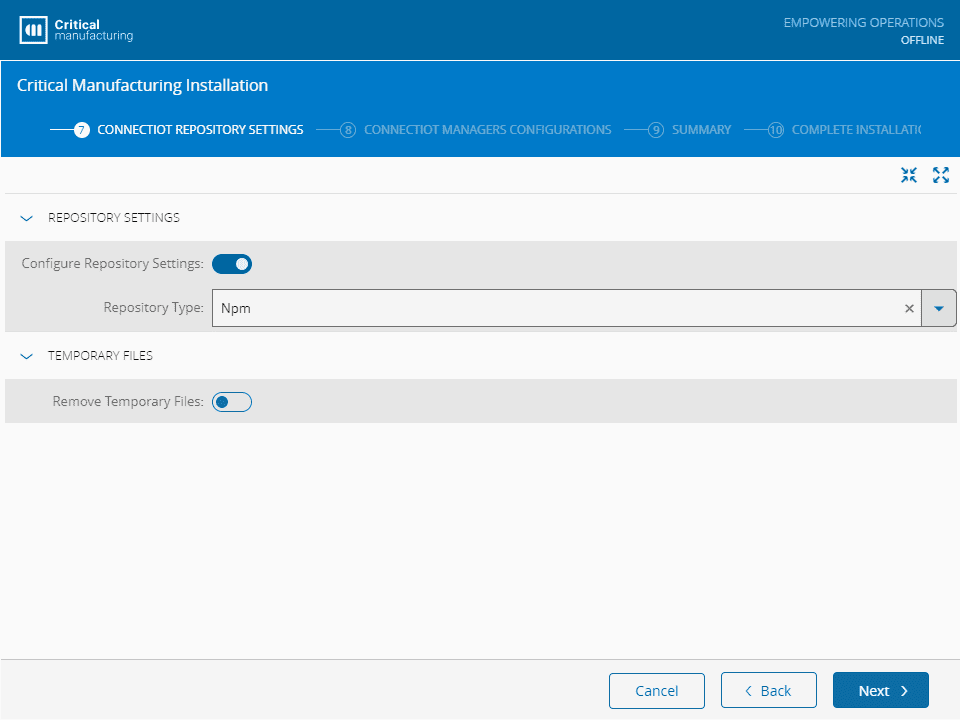
### Connect IoT Repository Settings
In the **Repository Settings** group, define whether to use Configure Repository Settings, as well as the type of Repository to use:
* **Npm**
* **Directory**
In the **Temporary Files** group, select whether the temporary files should be removed.
Select **Next** to continue.
### Connect IoT Managers Configurations
In the **Manager Selection** group, insert the Automation Manager IDs (one entry per line), and define the base directory where the Managers will be running.
Finally, define whether the Manager should be installed as a service.
Below, in the **Automation Manager User Settings** group, define the user credentials (username and password) to be used to run the Automation Manager.
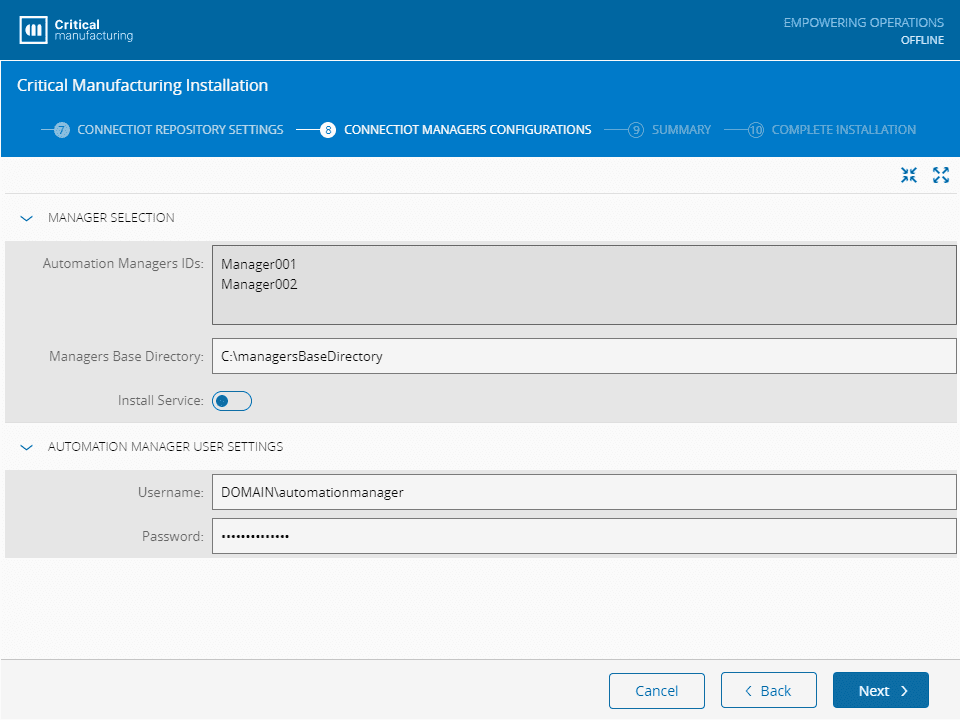
Select **Next** to review the installation summary, and then continue with the installation process until the end.
## Manually Deploy Packages
Sometimes, there is the need to manually deploy packages - example: Customization packages, so it is important to understand how to accomplish this task.
### Directory Repository
It is fairly simple to deploy a package or even a set of packages:
1. Copy the file(s) into the directory you are using as the Directory Repository (the one used in the installation of the previous section).
2. Execute the `.rebuildDatabase.ps1` PowerShell script that was created during the installation:
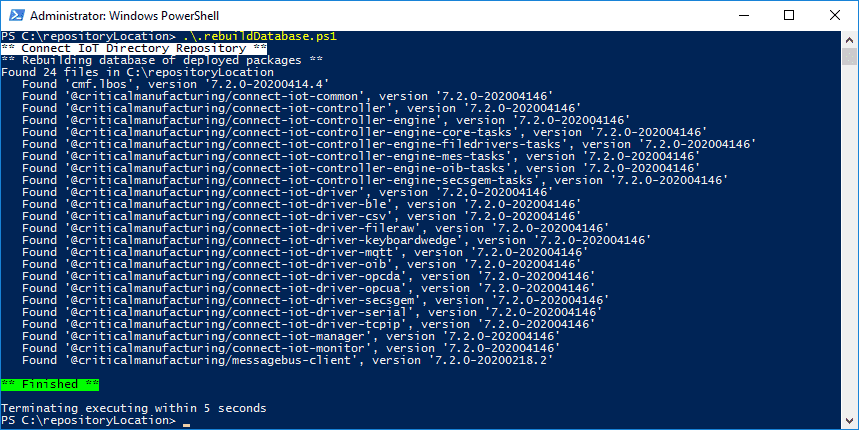
3. The database is now updated will all the available packages.
!!! note
The script fully updates the content of the directory, so you can delete/add/update the packages and run the script.
### NPM Repository
If the NPM server is configured with authentication roles for publishing, make sure you log in first:
```bash
npm login --registry=
```
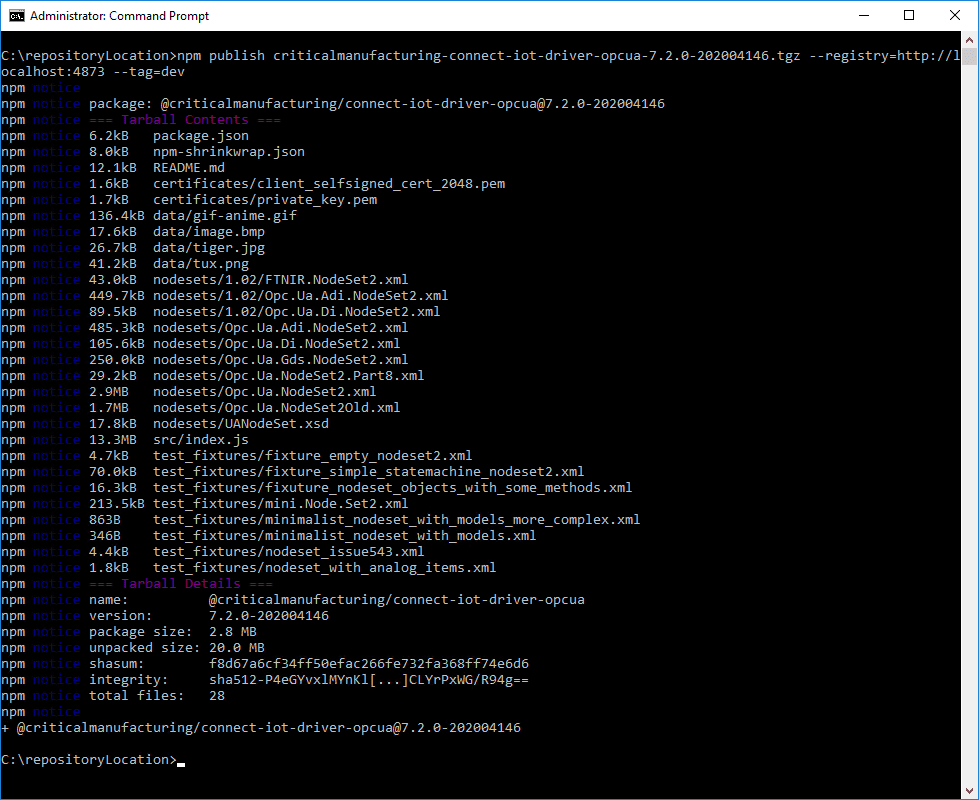
Then, and for each of the packages you intend to publish, run the command:
```bash
npm publish --registry= --tag=
```
## Install Automation Manager
As of version 7.2, it is possible to download, from the `Automation Manager` entity page, a zip compressed file fully prepared to be used, so, installing the Automation Manager has never been easier.
After downloading the file using the respective wizard, simply extract all the contents into the destination directory.
The final step is to install the automation as a Windows Service. For this feature, execute the PowerShell script that is located in `scripts\InstallService.ps1` as an administrator (requirement to create Windows Services), and answer the questions.

!!! info
.Net Framework 3.5 or higher is required for a correct installation of the Automation Manager.
## Troubleshooting
### Untrusted Certification Authority
When you get one of the following errors:
* "Unable to verify the first certificate"
* "Unable to get local issuer certificate"
it means you are connecting to an SSL enabled host and most likely, the server certificate was issued by a Untrusted Certificate Authority.
To fix this issue, you need to create a text file, named `extra_ca_vertificate.txt`, with the entire chain of certificates (in `.pem` format), which is needed to allow the server certificate to be validated.
This file must contain the full certificate chain, including, in order:
1. The Root Certificate
2. The Intermediate Certificate
3. The Server Certificate
If you only have certificates in `.pfx` format, you can use OpenSSL to convert them:
```bash
openssl pkcs12 -in file.pfx -out file.pem -nodes
```
The structure of the final file should look like this, in the order listed above:
```text
# Root Certificate
-----BEGIN CERTIFICATE-----
bGUgQ28xEDAOBgNVBAsMB3RlY2hvcHMxCzAJBgNVBAMMAmNhMSAwHgYJKoZIhvcN
AQkBFhFjZXJ0c0BleGFtcGxlLmNvbTAeFw0xOTA1MTcxMDQ5NTRaFw00NjEwMDEx
...
oEGp4U7q1UGmGfmXKiT/gsxJB6bbD6kO1SVdE+706WLg1vN4cLj1jvIr00jhWt41
sJtjAyB64zRVeS5Ic7Vidv6UDMM=
-----END CERTIFICATE-----
# Intermediate Certificate
-----BEGIN CERTIFICATE-----
MDQ5NTRaMIGBMQswCQYDVQQGEwJVUzELMAkGA1UECAwCTUExDzANBgNVBAcMBkJv
c3RvbjETMBEGA1UECgwKRXhhbXBsZSBDbzEQMA4GA1UECwwHdGVjaG9wczELMAkG
...
knyZpJnYVisd5NUVmjWNSlK/S6eA/Ka9LxFUhjRt0MMcXP91YHp6+rgsigZt5c3V
aBM3yGsn3YQnttUNp2dQwBgNpH9=
-----END CERTIFICATE-----
# Server Certificate
-----BEGIN CERTIFICATE-----
BwmQEGpD6ECCjPXZLH38KLCpSLzzQEqz0tulvDtRIGlEPLsdlWMLnwbQPG/TJ2M5
Gpezb90Lqfi6POObEIO3/3dAewgn4xhW6aZHf6yWgtM7gdQIJpRXK2T8ZGWv1LMz
...
KAjgC4ttj4DlJfljq61DlegE/0BbAtqNiQ3er9NB/wor3ET5eOO/12Ly1eotiHd5
/rkm+ENnvbNWk4w+LzHXfejtSAh=
-----END CERTIFICATE-----
```
Once the file is ready, set the location into the `NODE_EXTRA_CA_CERTS` environment variable:
```bash
set NODE_EXTRA_CA_CERTS=c:\certificates\extra_ca_certificates.txt
```
As an alternative, you can disable the certificate integrity check. This will not disable security, but will use the certificate exactly as received. However, this option should **only** be used in a development environment.
```bash
set NODE_TLS_REJECT_UNAUTHORIZED=0
```
!!! note
The environment variables should be defined as a persistent wide definition. The commands explained in this section are temporary and will only be valid during the session of the command window.