Connect IoT Administration#
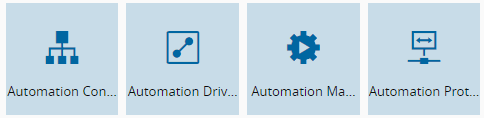
To use the Connect IoT module in the MES system, you must have an approved license. If all entities shown in the image below are available, your Connect IoT license is active and fully functional.
Activate Entities to be used by IoT#
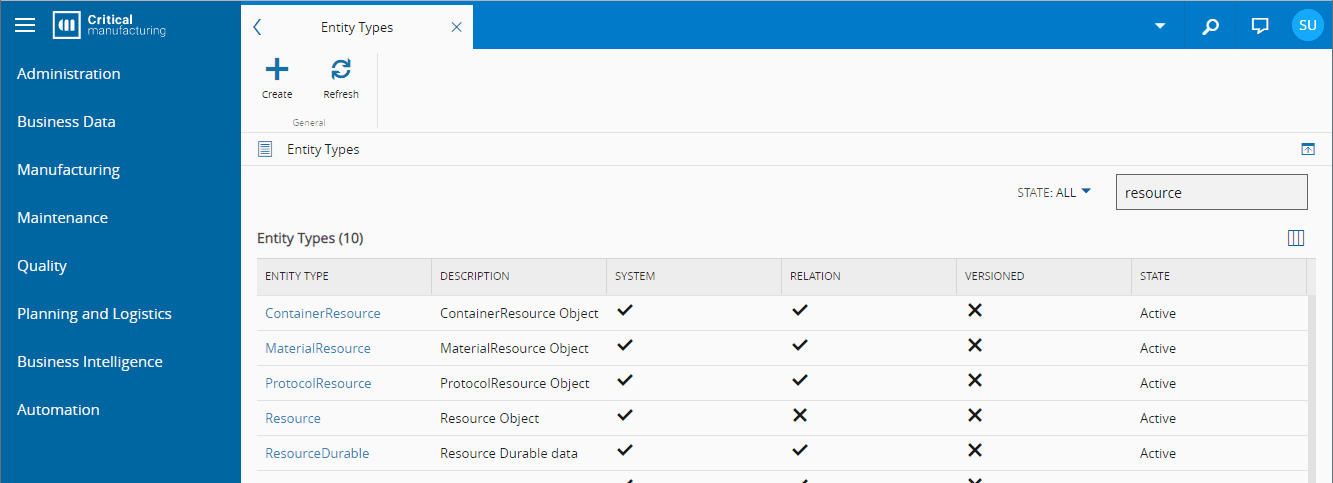
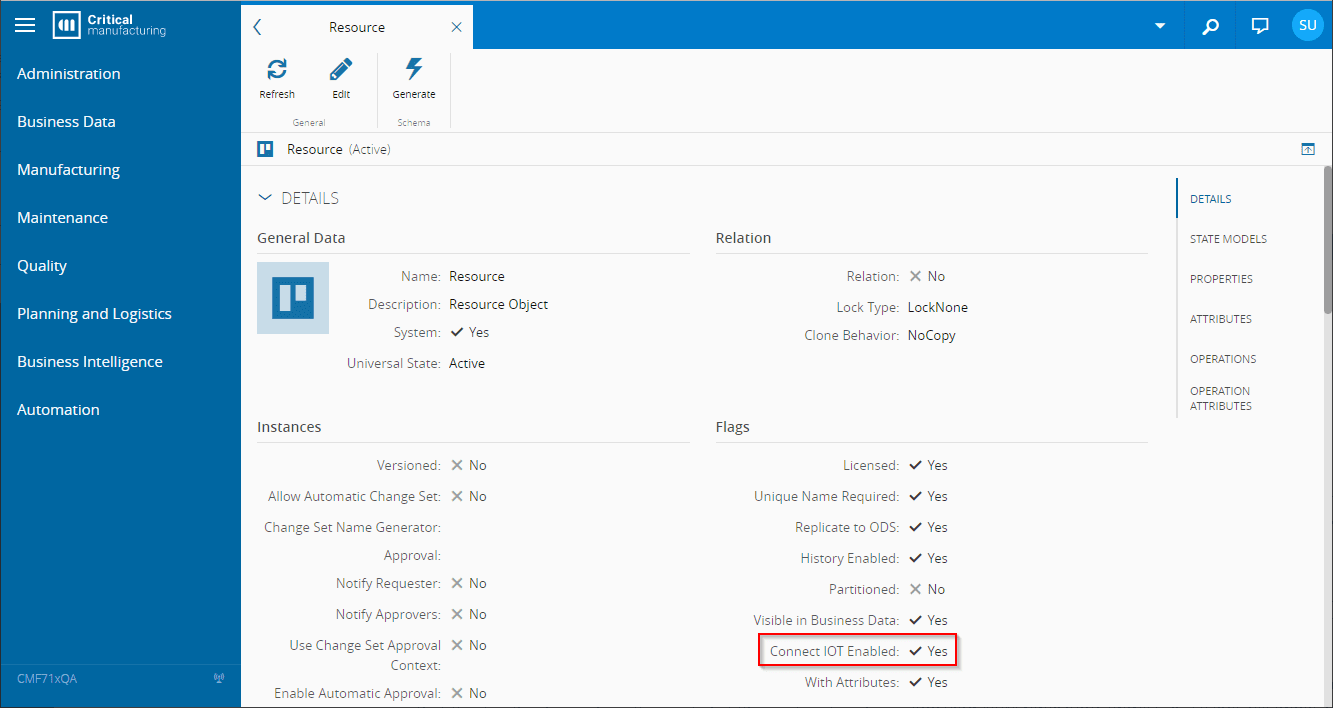
At least one entity type must be enabled to be used by Connect IoT workflows. To enable them, in the Administration/Entity Types/<EntityName> page, you will need to activate the Connect IoT Enabled checkbox.
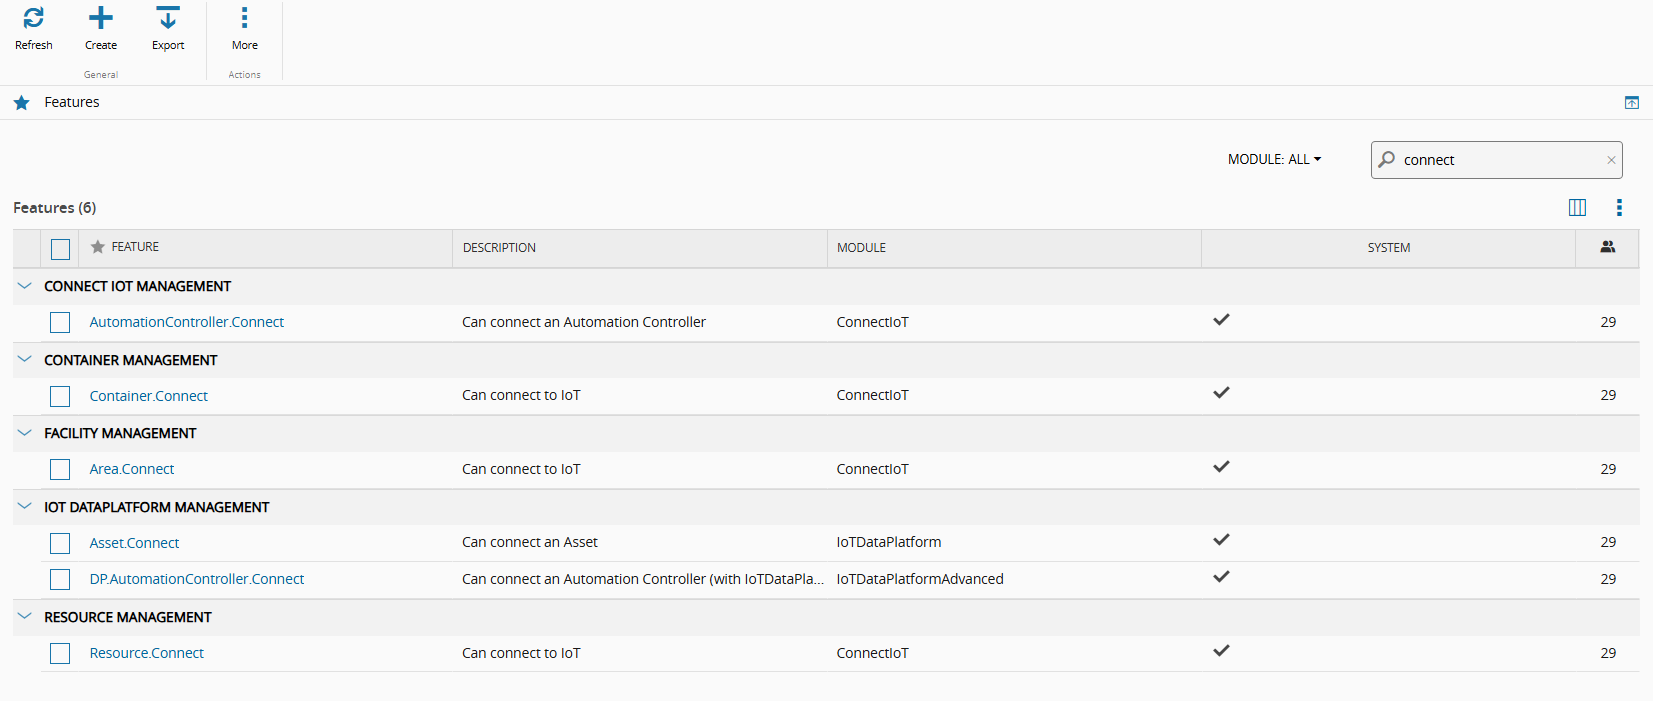
Enable the <entity>.Connect feature on the Security page to display the Connect button for the selected entity, as shown in the image below.
Package Repository#
The Package Repository contains the runtime components used by Connect IoT.
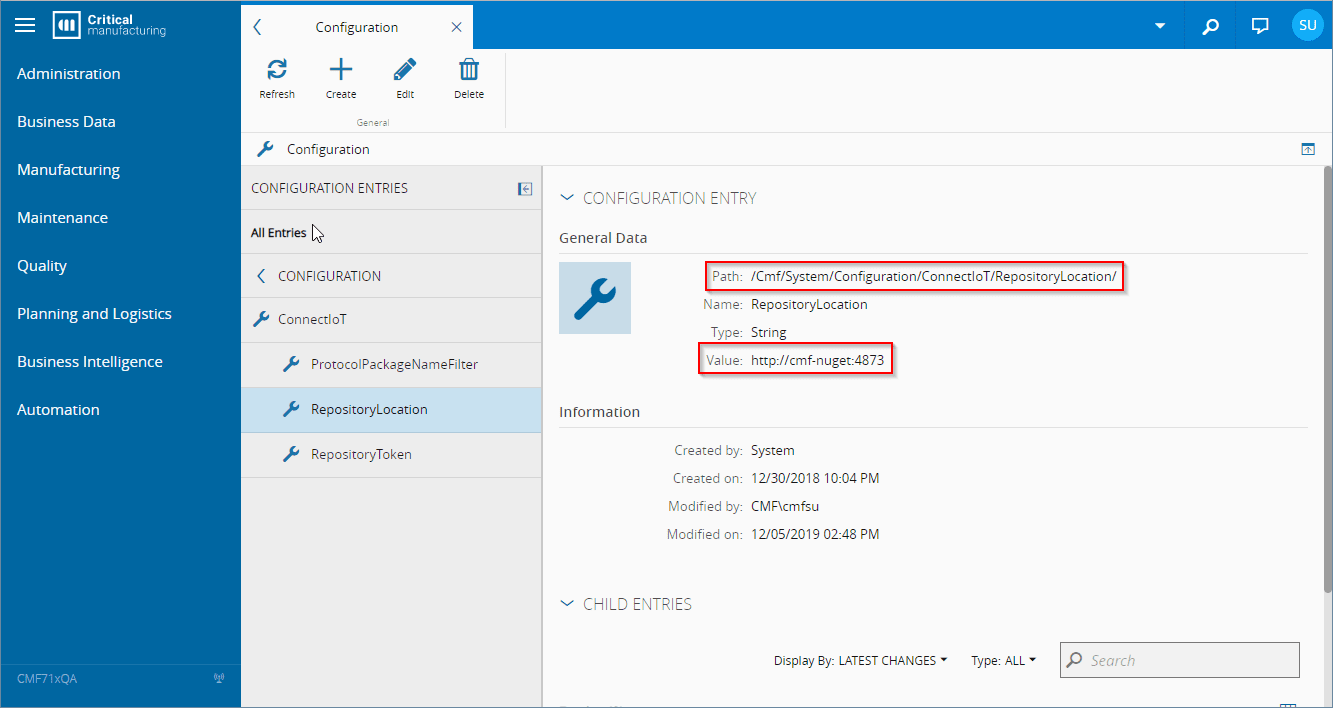
To configure the type and location, use the Configuration page located in Administration > Configuration, search for "IoT" and fill out the values for path /Cmf/System/Configuration/ConnectIoT according to the following table:
| Name | Type | Possible Values | Default Value | Description |
|---|---|---|---|---|
| RepositoryType | String | NPMDirectory | NPM | Type of Package Repository to use: - NPM: NPM server based repository- Directory: Directory-based repository. Must use .rebuildDatabase.ps1 script supplied in the ISO to generate the database. |
| RepositoryLocation | String | Depending on the RepositoryType, fill with: - NPM: Url of the NPM server. Example: http://server.company.com:4873- Directory: Path where the packages were deployed. Must be accessible by MES host and IoT runtime components. Example: E:\Repository | ||
| RepositoryToken | String | If RepositoryType is set to NPM, enter the Bearer token for authentication, if needed. Example: VGhpcyBpcyBhIHRlc3Q= |
Table: Connect IoT System Configurations
Managing Packages in the Repository#
The Automation Repository page supports listing and uploading packages natively only when the Repository Type is set to Directory.
When the Repository Type is set to NPM, you cannot manage packages directly through the MES UI. Instead, you must manage packages externally using a standard NPM client CLI (for example, npm publish) or an NPM server native user interface (such as Nexus, Verdaccio, or Artifactory) to list, upload, and maintain them.
NPM Registry Compatibility Requirements#
To ensure full compatibility with MES, the underlying NPM registry or repository manager must support specific standard NPM API behaviors. The host automatically handles discovery and version retrieval by interacting with the registry through the following mechanisms:
| Functionality | API Endpoint(s) | Requirement & Behavior |
|---|---|---|
| Package Discovery & Search | GET /v1/search | When the registry search API returns unscoped names for packages that are actually scoped, the host automatically reconciles them. This ensures scoped packages are discovered and mapped correctly within MES without requiring manual naming overrides. |
| Version Retrieval & Fallback Resolution | GET /{package}/{version} GET /{package} | If a direct fetch via GET /{package}/{version} returns an HTTP 404 Not Found, the host executes a fallback strategy. It queries the full package metadata via GET /{package} and programmatically resolves the required version from the returned versions map. |
| Tarball Download Redirects | Follows redirect targets | The host supports registries that offload storage by redirecting package requests to external storage endpoints via HTTP 301, 302, 307, or 308. The host follows the Location header to the final endpoint, supporting up to five sequential redirects. |
Table: NPM Registry Compatibility Requirements
Enable Customizations#
Custom Automation Business Scenarios#
By default, only the automation business scenarios supplied by Critical Manufacturing are visible when using the AutomationBusinessScenario entity. To allow custom/additional business scenarios packages to be used, use the Configuration page located in Administration > Configuration, search for "IoT" and fill out the values for path /Cmf/System/Configuration/ConnectIoT according to the following table:
| Name | Type | Possible Values | Default Value | Description |
|---|---|---|---|---|
| BusinessScenarioPackageNameFilter | String | @criticalmanufacturing/connect-iot-business-scenarios-* | Filter to use to identify packages that can be used for AutomationBusinessScenario entities. Update the value if custom automation business scenarios packages are intended to be used. Use ; as separator and * as wildcard. Example: @criticalmanufacturing/connect-iot-business-scenarios-*;@customer/connect-iot-business-scenarios-* |
Table: Automation Business Scenarios Packages filter configuration
Custom Automation Task Library#
By default, only the task library packages supplied by Critical Manufacturing are visible when using the Automation Task Library (ATL) entity. To allow custom/additional ATL packages to be used, use the Configuration page located in Administration > Configuration, search for "IoT" and fill out the values for path /Cmf/System/Configuration/ConnectIoT according to the following table:
| Name | Type | Possible Values | Default Value | Description |
|---|---|---|---|---|
| TasksLibraryPackageNameFilter | String | @criticalmanufacturing/connect-iot-controller-engine-* | Filter to use to identify packages that can be used for Automation Task Libraries entities. Update the value if custom ATL pacakages are intended to be used. Use ; as separator and * as wildcard. Example: @criticalmanufacturing/connect-iot-controller-engine-*;@customer/connect-iot-controller-engine-* |
Table: ATL Packages filter configuration
Custom Protocol Drivers#
By default, only the protocol drivers supplied by Critical Manufacturing are visible when using the Automation Protocol entity. To allow custom/additional drivers to be used, use the Configuration page located in Administration/Configuration, search for "IoT" and fill out the values for path /Cmf/System/Configuration/ConnectIoT according to the following table:
| Name | Type | Possible Values | Default Value | Description |
|---|---|---|---|---|
| ProtocolPackageNameFilter | String | @criticalmanufacturing/connect-iot-driver-* | Filter to use to identify packages that can be used for Automation Protocol entities. Update the value if custom drivers are intended to be used. Use ; as separator and * as wildcard. Example: @criticalmanufacturing/connect-iot-driver-*;@customer/connect-iot-driver-* |
Table: Protocol Drivers filter configuration
Additional Configurations#
In the section /Cmf/System/Configuration/ConnectIoT of the Configuration, the additional values can be defined:
| Name | Type | Possible Values | Default Value | Description |
|---|---|---|---|---|
| ConfigurationTemplate | Json in string format | <default configuration> | The configuration template to use within the Automation Manager entity. Can be changed in the Configuration Wizard. There is only one possible template and will be stored in this configuration entry.Note: Just change the value here if there is a problem with the json. Otherwise, always use the wizard in Automation Managerentity. |
Table: Connect IoT additional configurations
IoT Port#
For successful connections to an IoT automation manager, the designated port must be available and open within all firewall and network security systems. This port should be the same as the one used in the host section of the config.json file, located in the Connect IoT Manater installation directory.
Sample from http://[servername]:[serverport]/config.json: