Replace and Disassemble#
In manufacturing, replacing defective parts in assembled materials is a critical process. Once a faulty component is identified, the objective is to replace it quickly and efficiently, minimizing any disruption to production.
Critical Manufacturing supports this process in two main scenarios, depending on when the replacement or disassembly takes place:
- When there is a specific Step in the process dedicated to assembly, allowing the system to handle disassembly or replacement operations at that point.
- When disassembly or replacement needs to occur at any time, independent of a specific production Step.
This tutorial will explore both scenarios.
Overview#
In this tutorial, the following themes will be covered:
- Explanation of the Replace and Disassemble operation logic and details
- Explanation of offline replacements, namely how to add, remove or replace components outside the standard production flow, along with relevant configuration notes
- A practical use case with configuration and execution steps
Logic and Details#
These operations are used to manage corrections in previously assembled materials.
The Disassemble operation allows a component to be removed from an assembled material. It returns the consumed quantity back to its source material, as long as the material remains available - the original, or other - based on the defined Bill of Materials (BOM).
Useful Documentation
The Replace operation removes a previously assembled component and adds a new one in its place. The disassembled quantity is discarded.
Useful Documentation
These operations are supported in the following contexts:
-
During a step where a BOM is triggered:
- If the step allows assembly, the Replace and Disassemble options will also be available - assuming more than one unit was assembled. In this case, the quantity of the main Material remains unchanged, while the quantity of the source Material is re-established and therefore increases.
- If the BOMContext is configured to trigger a BOM with the Assembly Type set to Replace and Disassemble, then only those two operations will be available at that Step (assembly will not be possible). In this scenario, when the Disassemble operation is performed, the quantity of the main Material decreases in proportion to the defined relationship between the main Material and the BOM Item. The quantity of the source Material is re-established and increases accordingly.
-
For Explicit Long Running BOMs:
- Additional flexibility is provided to Update Assembly History, through the View Assembly History section, in the Material details. Here, you can manage assembled BOM Items regardless of the Material current Step.
-
From this view, these actions are possible once the BOM instance is closed:
- Add - Increase the quantity of a BOM Item by adding assembled Materials. Only possible if the
Actual Quantityis less than theRequired Quantity. - Remove - Decrease the quantity of an assembled component.
- Replace - Substitute a faulty or incorrect component with a new one.
- Add - Increase the quantity of a BOM Item by adding assembled Materials. Only possible if the
Use Case Example#
Let’s consider a simple production scenario involving three Flows: a Production Flow, a Rework Flow, and a Storage Flow.
-
Production Flow: Step 1, Step 2
-
Step 1:
- Assembles 1 unit of Component A per unit of Main Product
- Assembly Type - Explicit
-
Step 2:
- Assembles 2 units of Component B per unit of Main Product
- Assembly Type - Explicit Long Running
-
-
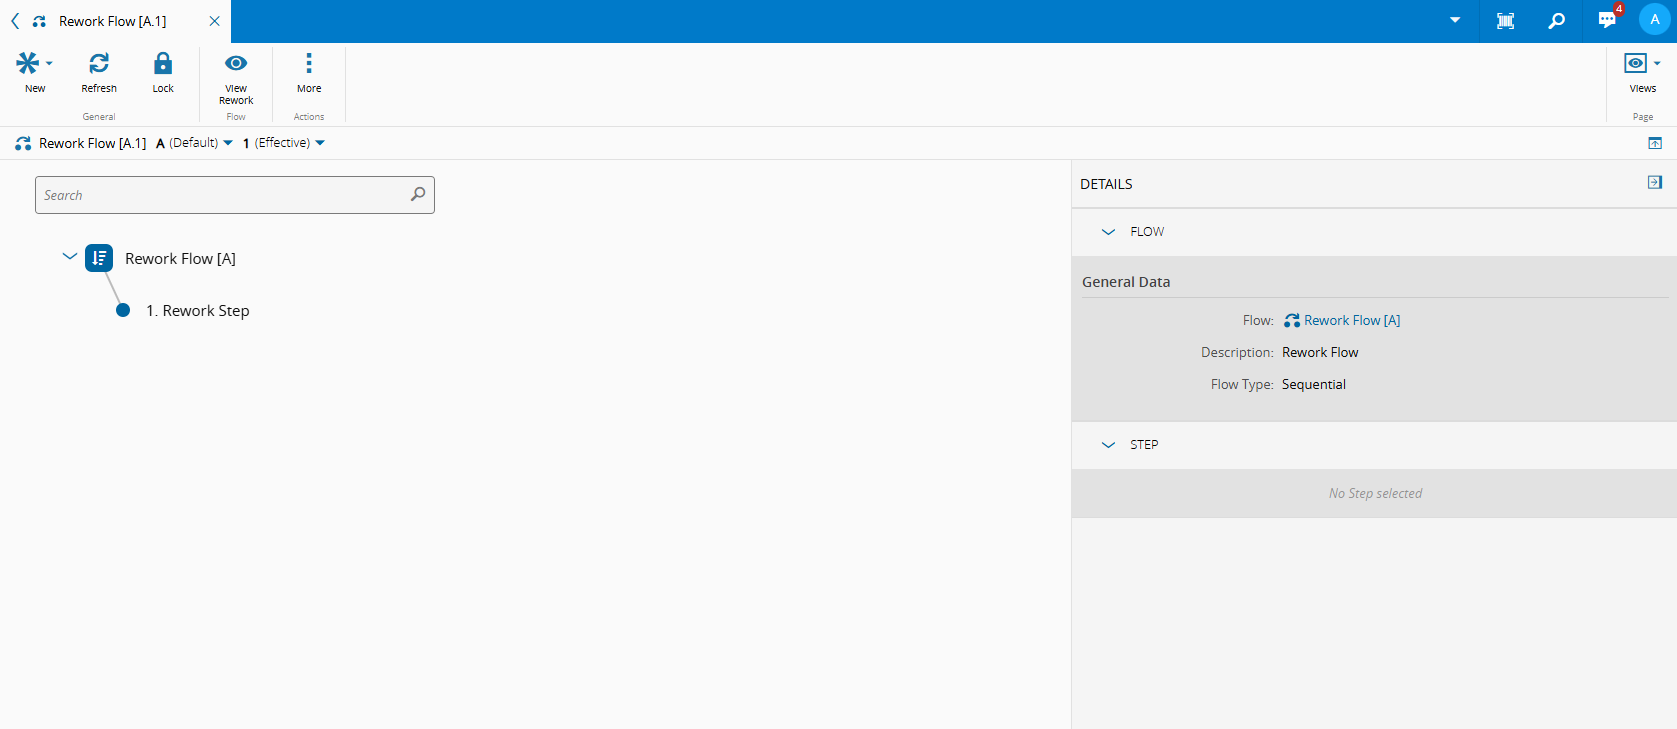
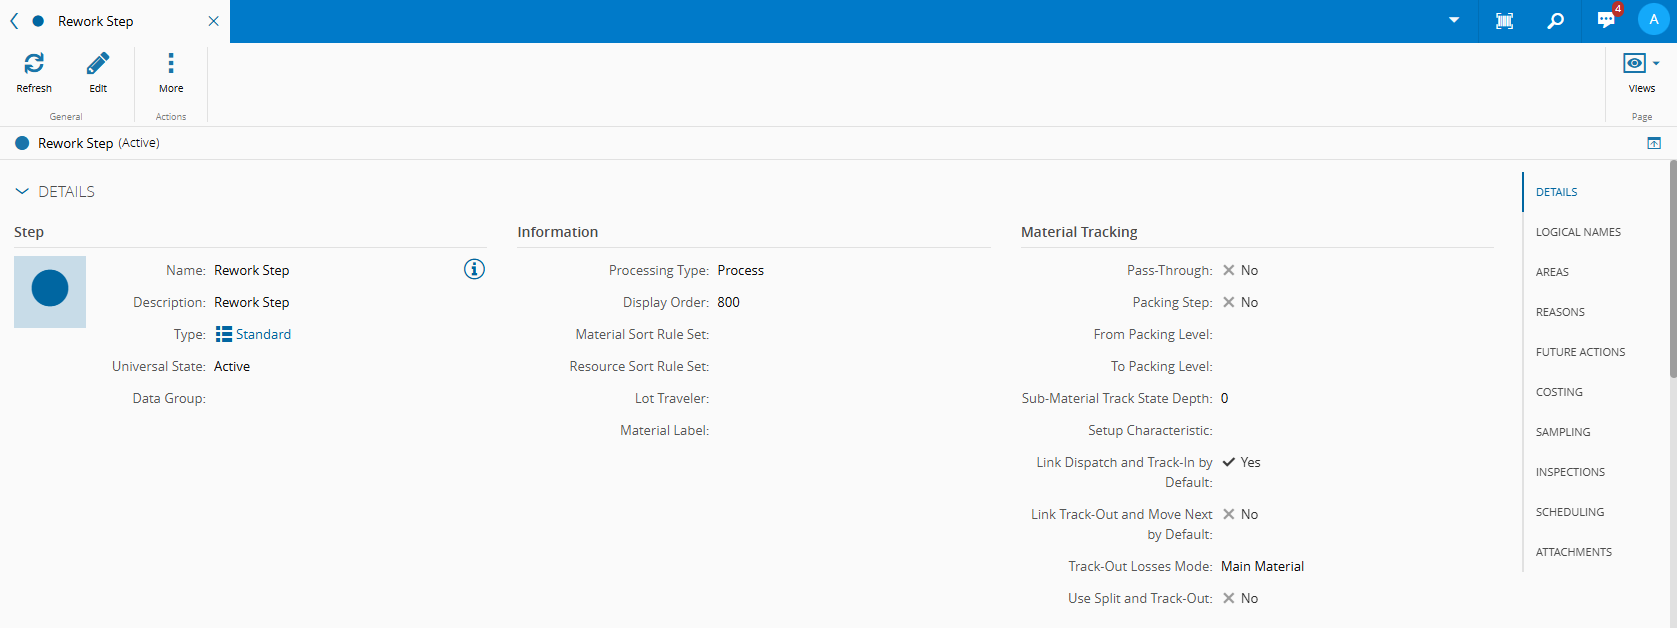
Rework Flow, with Rework Step:
- Used specifically to replace or disassemble Component B Materials.
- Assembly Type - Replace and Assemble
- When a Material is on Step 2, after being processed, can be sent to the Rework Flow, with the Reason "Rework"
-
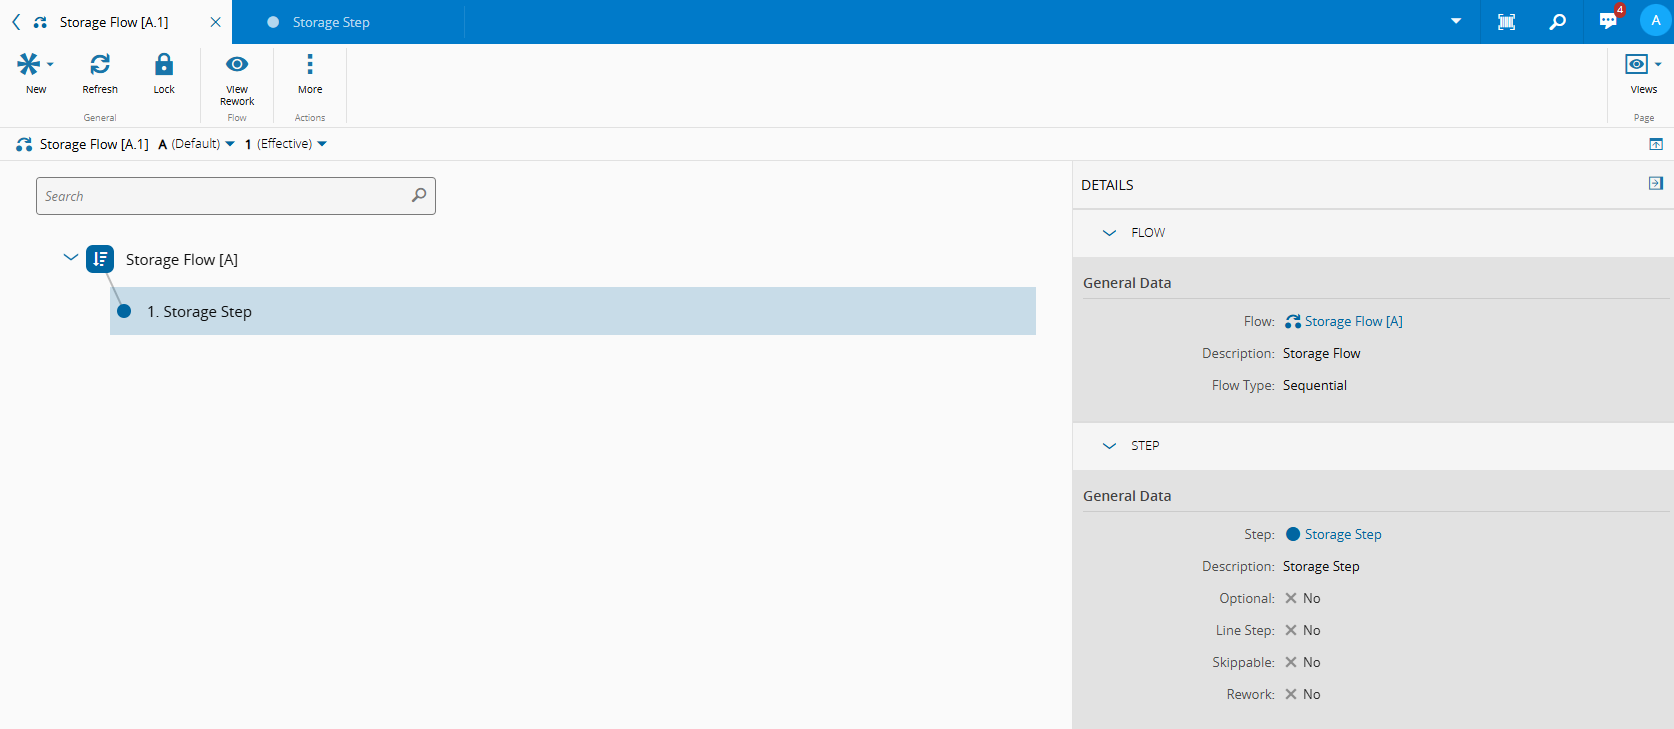
Storage Flow, with Storage Step:
- Where Materials of Component A and Component B are stored
All Steps (Production and Rework) are supported by a General Resource, which provides a General Service.
For the purpose of this tutorial, all Materials will use Units.
Configuration#
Calendar, Facility and Area will not be covered in this step-by-step configuration.
Useful Documentation
Steps and Flow#
The general configuration of the sequential Flow and Steps of the Storage Flow.

The general configuration of the sequential Flow and Steps of the Rework Flow.
The general configuration of the sequential Flow and Steps of the Production Flow.
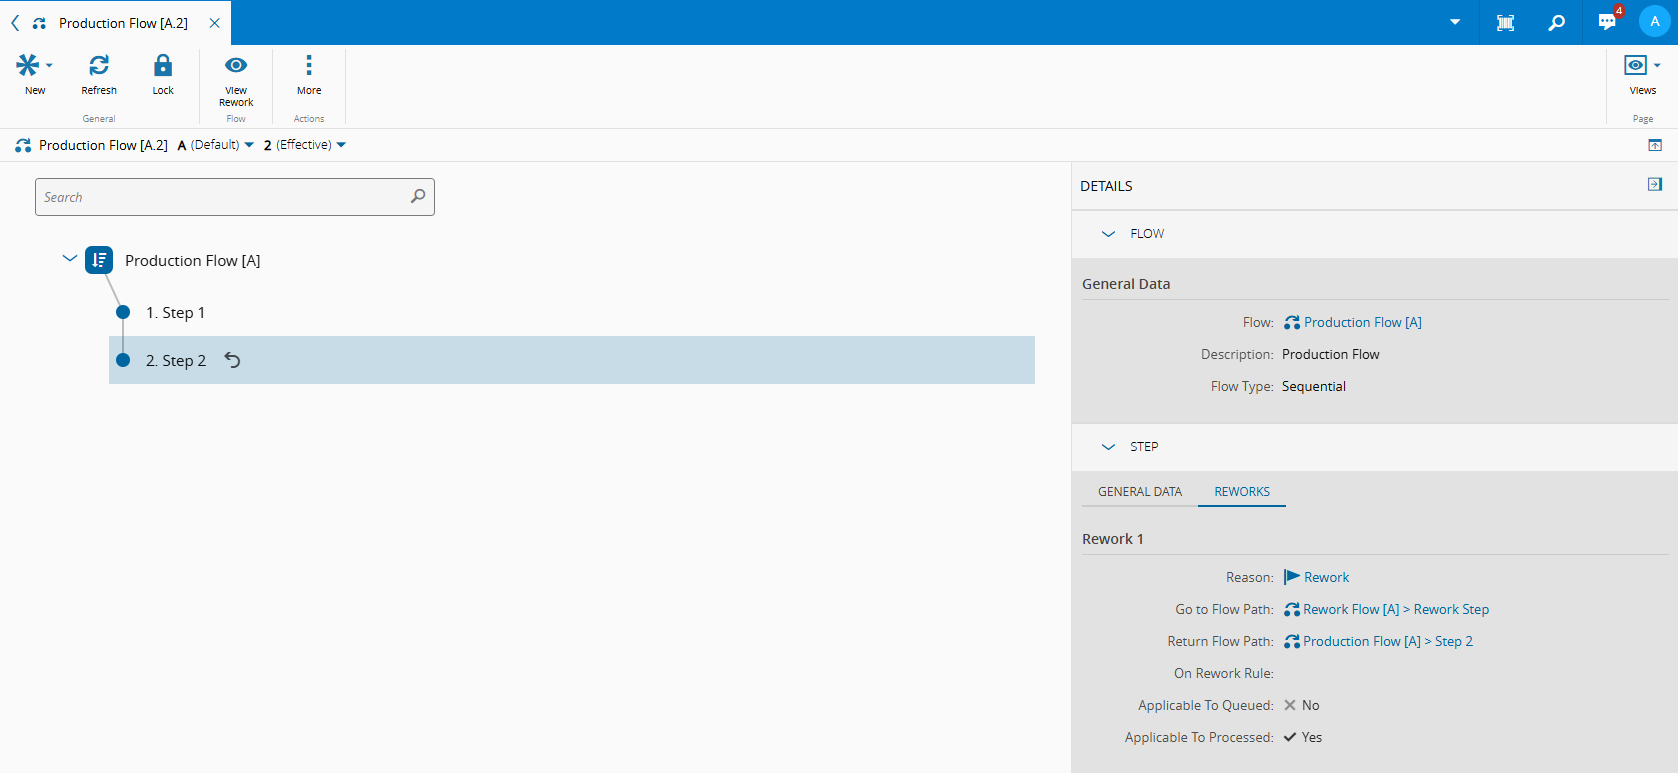

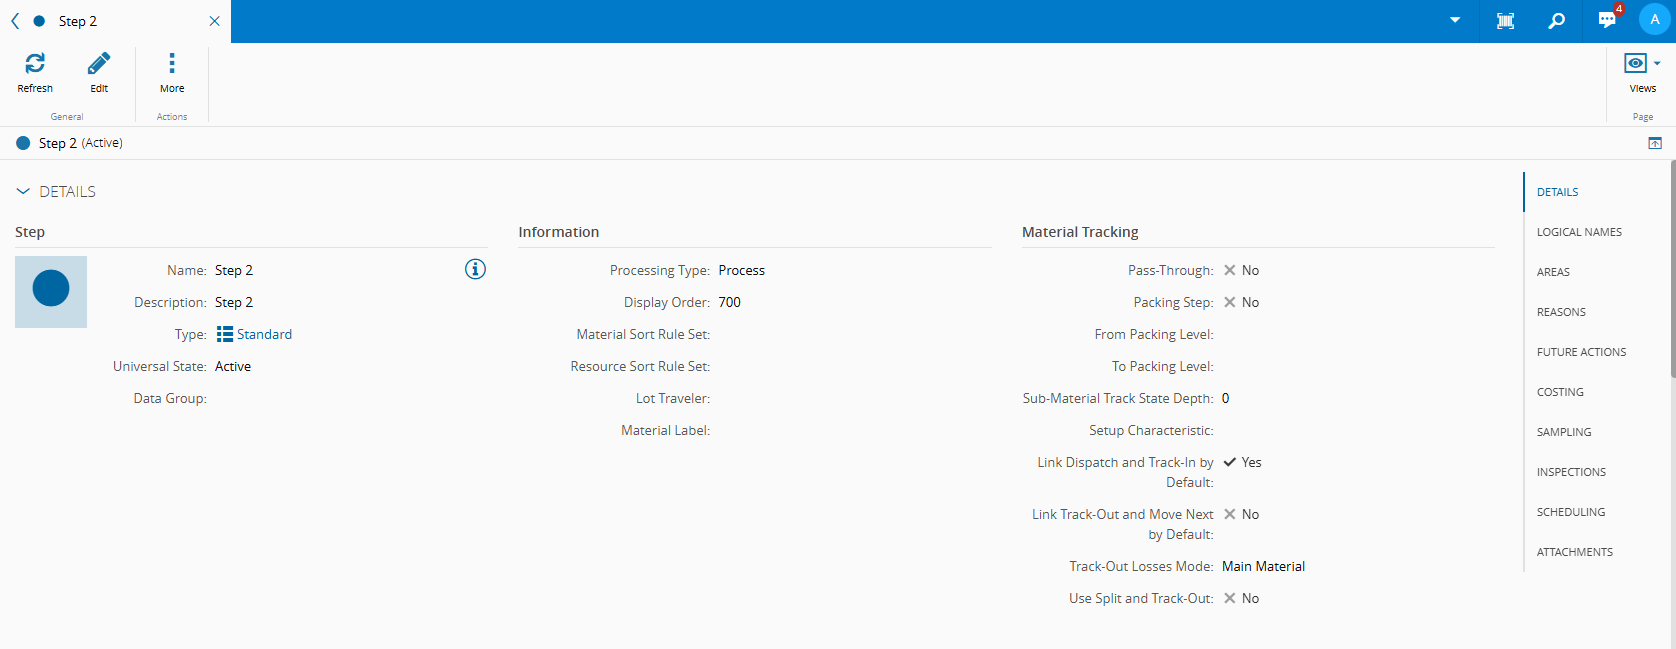
Notice that Step 2 has a rework path configured, with Reason Rework.
Useful Documentation
Products#
The general configuration of the Products is detailed in the images below.


Notice that all Products have the property Discrete set to True. This indicates that their quantities can only assume integer values. Conversely, if the Discrete property is set to False, the Product quantities are considered decimal.
Useful Documentation
Service Context#
The ServiceContext Smart Table configuration can be found in the table below.
| Step | Product | Service |
|---|---|---|
| Step 1 | Main Product | General Service |
| Step 2 | Main Product | General Service |
| Rework Step | Main Product | General Service |
Useful Documentation
BOM#
The configuration of the BOM and BOM Items can be found in the images below.
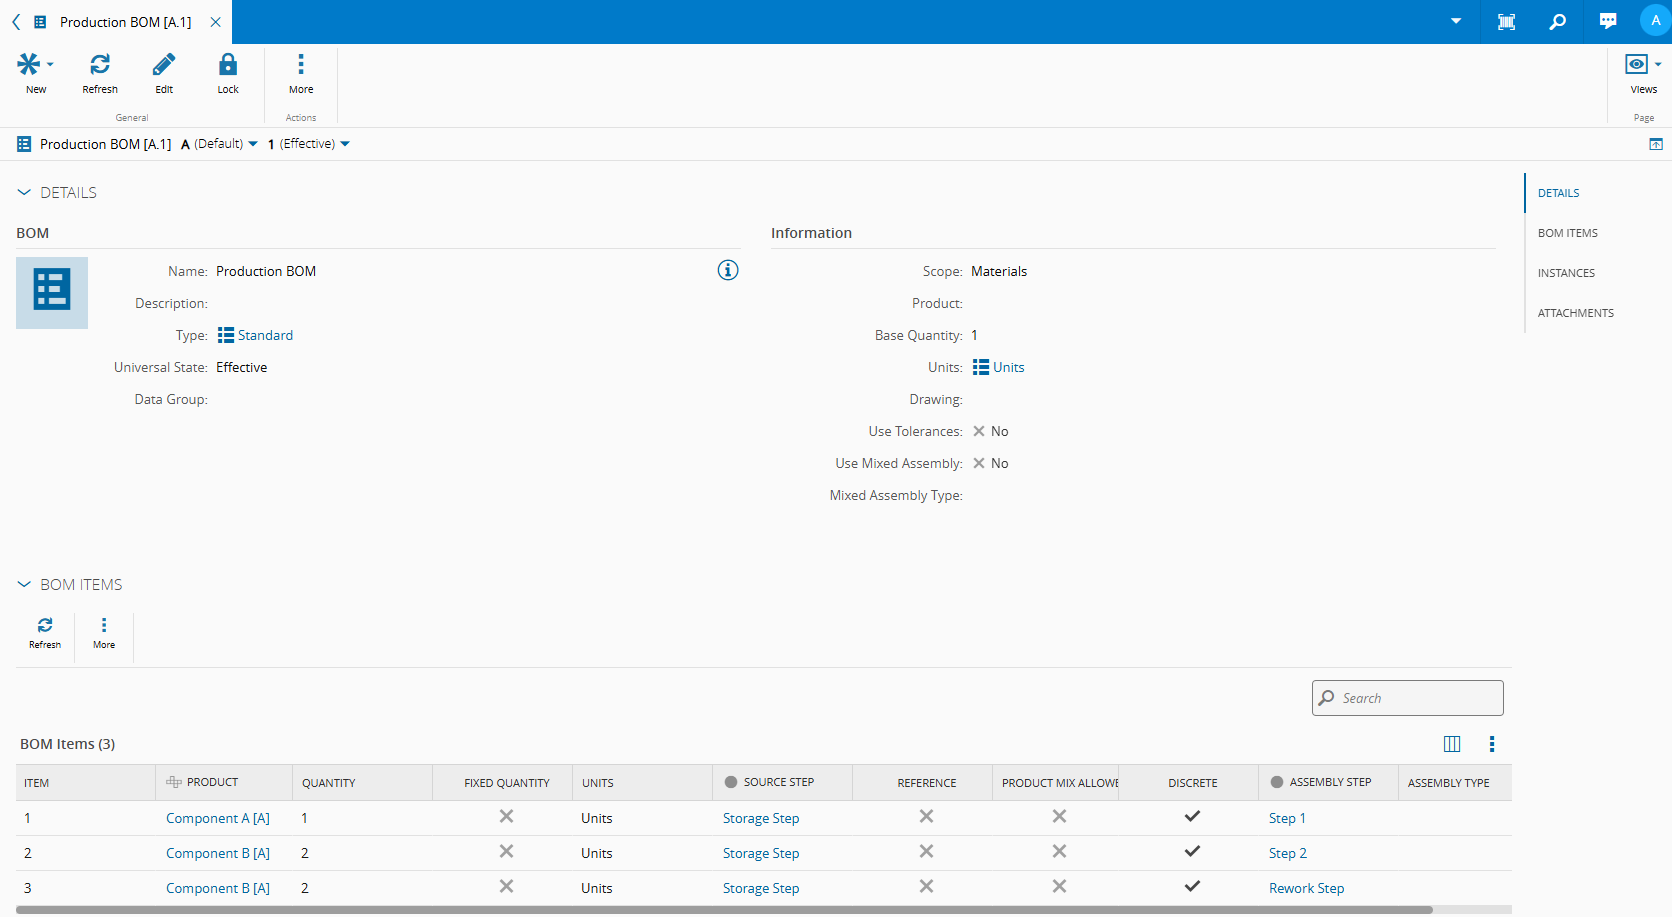
Some important details to keep in mind:
- The
Use Mixed Assemblyproperty is set to false. - The BOM is configured with the Materials scope.
- The
Base Quantityproperty is set to 1.
Useful Documentation
BOM Context#
For each Step, when a Material of Main Product is tracked in, the Production BOM will be triggered, and each Step has its own assembly type.
The configuration of the BOMContext Smart table is presented in the table below.
| Step | Product | BOM | Assembly Type |
|---|---|---|---|
| Step 1 | Main Product | Production BOM | Explicit |
| Step 2 | Main Product | Production BOM | Explicit Long Running |
| Rework Step | Main Product | Production BOM | Replace and Disassemble |
Useful Documentation
The master data file supporting this use case is available here: XML File.
Execution#
In this section, we’ll walk through the different scenarios presented in the tutorial, using the defined use case. You’ll find a step-by-step guide for execution, along with a supporting video.
Before starting, make sure you have available Materials for the Main Product, Component A, and Component B.
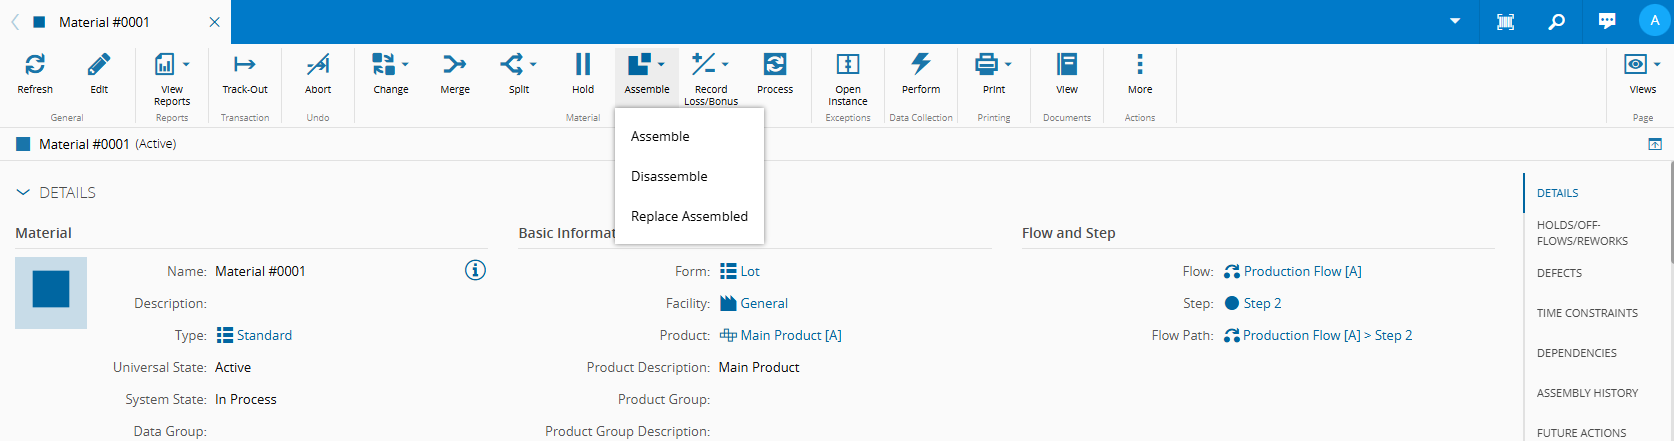
Assemble, Replace and Disassemble Operations#
- When tracking a Main Product Material at Step 1, with a quantity greater than 0, the Production BOM is triggered with the Assembly Type set to Explicit.
- Select the Material and perform Assemble:
- The
Assemble Quantityproperty of the Material increases. - Once the
Assembled Quantityis greater than 0, the Replace and Disassemble options become available.
- The
- Select the Material and perform Replace Assembled:
- Enter the number of units to be replaced.
- Select the source Material that will fulfill the demand.
- The replaced unit is discarded.
- Select the Material and perform Disassemble:
- Enter the number of units to disassemble.
- Select the source Material to which the disassembled units should be returned.
- The
Assembled Quantitydecreases, while thePrimary Quantityof the Material remains unchanged.
- Perform Assemble for any remaining quantity in order to be able to Track-Out.
Note that no BOM Instance are created or listed in the Update Assembly History section.
By performing the same actions at Step 2, you will find a BOM Instance listed. Next, we will explore how to update this history.
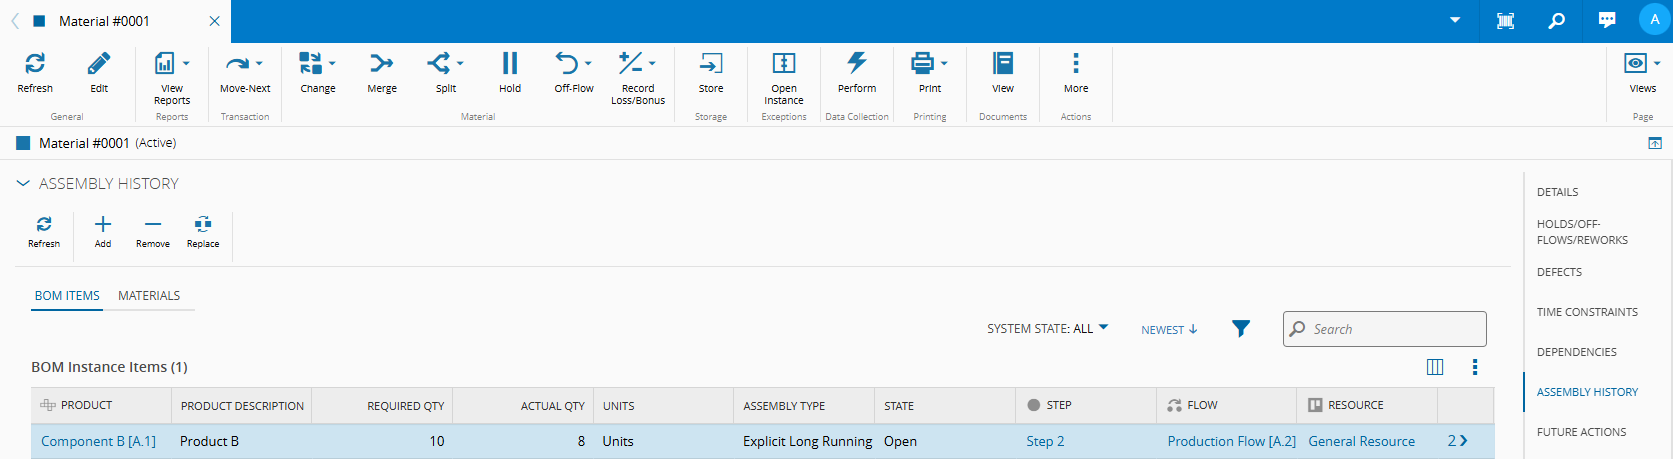
Material Assembly History#
The BOM Instance in the Assembly History section supports three operations when the BOM Instance is closed. To use them, you need to select the BOM Instance, and then perform one of the following:
-
Replace
- Enter the number of units to replace.
- Select the source Material to fulfill the demand.
- The replaced unit is discarded.
-
Remove
- Enter the number of units to remove.
- Select the source Material to which the removed units will be returned.
- The
Actual Quantitydecreases.
-
Add
- Enter the number of units to add (similar to an assembly operation).
- Select the source Material to fulfill the demand.
- The
Actual Quantityincreases. - This option is only available if the
Required Quantityis not yet met by theActual Quantity.
Replace and Disassemble Assembly Type#
- Process the Main Product Material at Step 2. Send it to the Rework Flow, to the Rework Step.
- Perform Dispatch and Track-In.
- Select the Material and perform Replace Assembled:
- Enter the number of units to replace.
- Select the source Material to fulfill the demand.
- The replaced unit is discarded.
- Select the Material and perform Disassemble:
- Enter the number of units to disassemble.
- Select the source Material to which the disassembled units should be returned.
- Both the
Assembled Quantityand thePrimary Quantityof the Material decrease. This is the expected behavior when the Assembly Type is Replace and Disassemble in the BOMContext Smart Table, and differs from the behavior in all other assembly types.
Final Considerations#
There are some behavior worth noting regarding the Replace and Disassemble operations:
-
If a source Material with a primary quantity of 1 was consumed (and thus terminated) during an assembly process, it can still be sent back to its original Material if later removed, but only if the BOM Instance Item is Discrete.
-
How the system handles replacing assembled Materials when the Assembly Type is Explicit Long Running, allowing replacements to be performed as soon as any portion of the BOM has been assembled.