Configuration#
This section covers only the configuration that is specific to Carriers. Assume the base model, such as Calendars, Facilities, and Areas, already exists.
Useful Documentation
Use the Master Data file to load the model this tutorial uses.
Configure the Model#
To build a scenario for Carriers, you need the following configurations:
-
Create Products of Product Type
Carrierfor SemiFG Carriers and Frames. In this example, the products are namedSemiFGCarriersandFrames.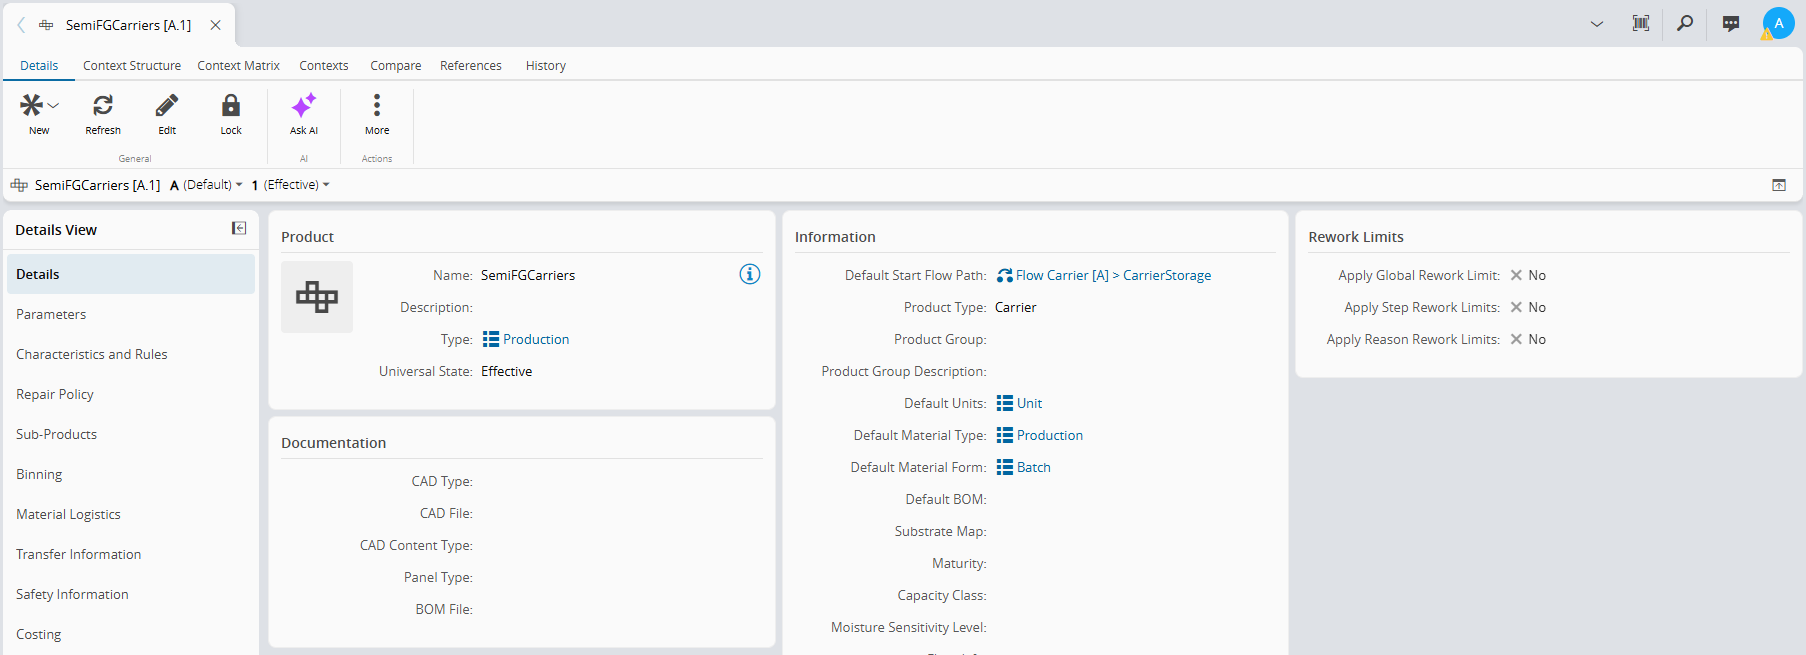
-
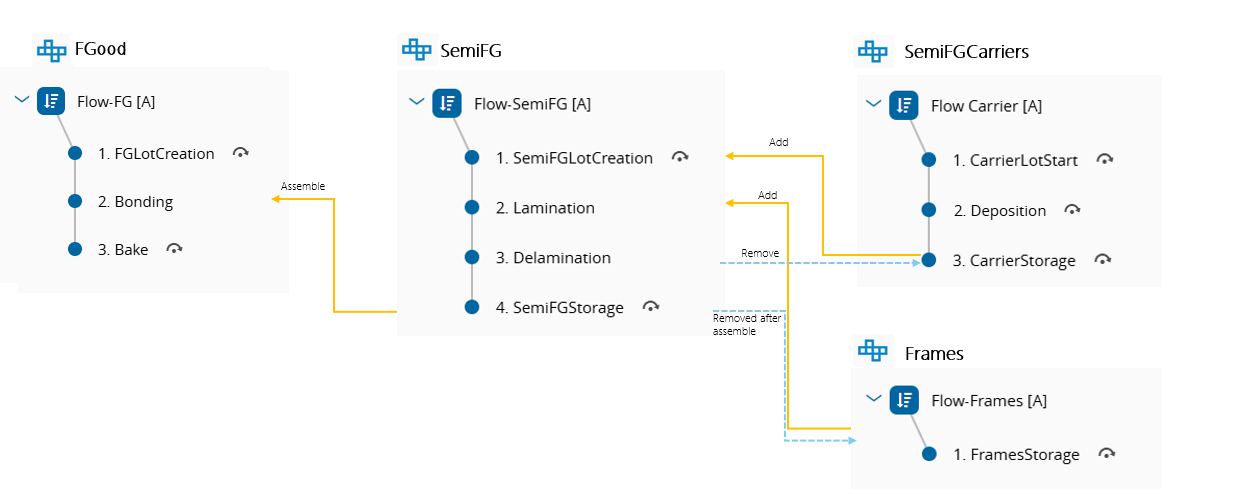
Define the Flows and Steps that create and store each Carrier Product, ready for an operator to pick up and attach to a Material. In this example:
- The
Flow Carriercreates and stores SemiFG Carriers. - The
Flow-Framesflow creates and stores Frames.
- The
-
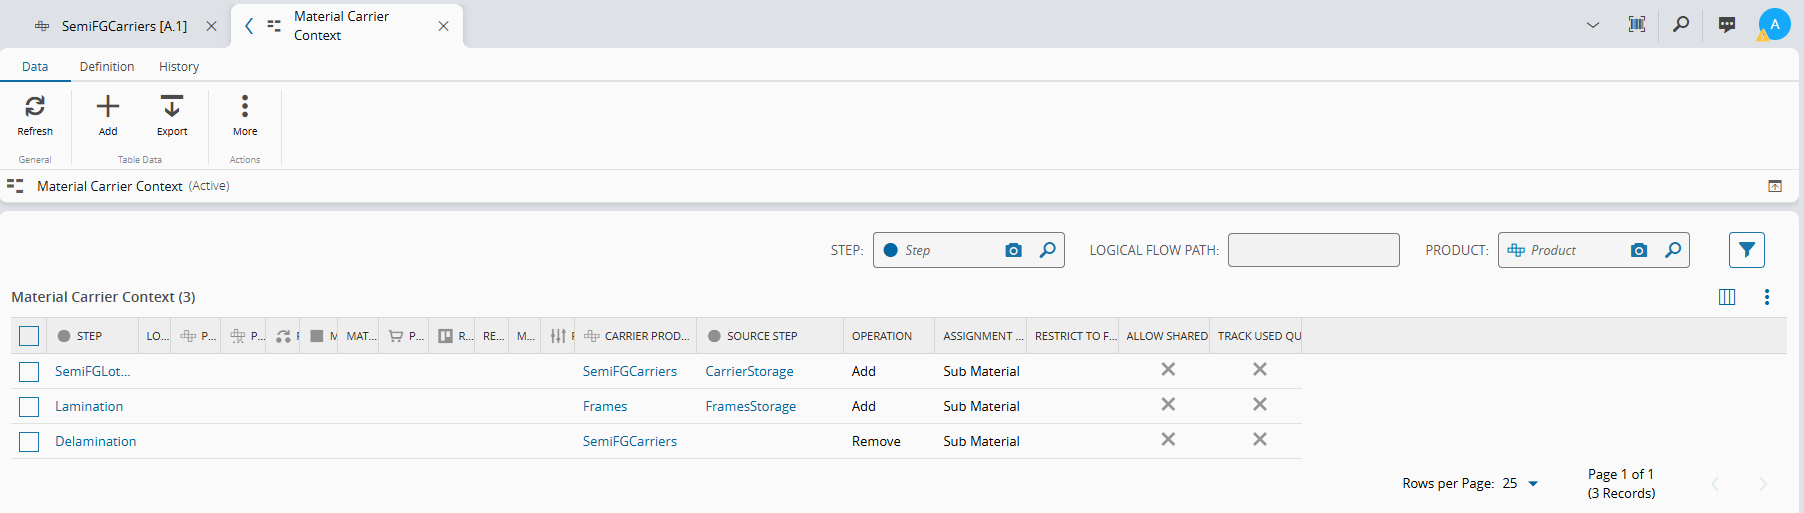
Fill in the MaterialCarrierContext table, where you define the context rules that allow you to associate Carriers with Materials. For each Step specify:
- The Carrier Product to attach or remove
- The Source Step to pick it up from.
- The Operation. One of the following:
AddRemove
- The Assignment Mode. One of the following:
Main Material.Sub Material.
- Optionally set Allow Shared Carriers
- Optionally set Track Used Quantity.
Info
If the MaterialCarrierContext table does not contain any context rules, you cannot associate carriers with materials.
Info
To track how much of a Material each Carrier holds, as in Using Carriers With Capacity, set Track Used Quantity and fill in the capacity configuration described in the next item.
-
For scenarios with capacity tracking, define how much each Carrier can hold:
- Fill in the MaterialCarrierCapacity table with the Product of the Carrier, a Capacity Class, and the Capacity Quantity and Capacity Unit that a Carrier of that class can hold. For example,
SRM-Trayholds300units in class0-50,100units in class50-100, and40units in class100-200. - Set the Capacity Class on the Product or on the Material that the Carrier holds. The list of values comes from the CapacityClass lookup table.
Author check
The master data file does not cover this configuration. Confirm whether to add the capacity data to it. Confirm also that the Capacity Class defined on the Product is used for carrier capacity, since the Product user guide describes it as used for scheduling only.
- Fill in the MaterialCarrierCapacity table with the Product of the Carrier, a Capacity Class, and the Capacity Quantity and Capacity Unit that a Carrier of that class can hold. For example,
-
Optionally, define a Material BOM with Scope set to
Materialsto formalize the physical assembly step. For example, associating the semi-finished material with its carrier at aBondingStep.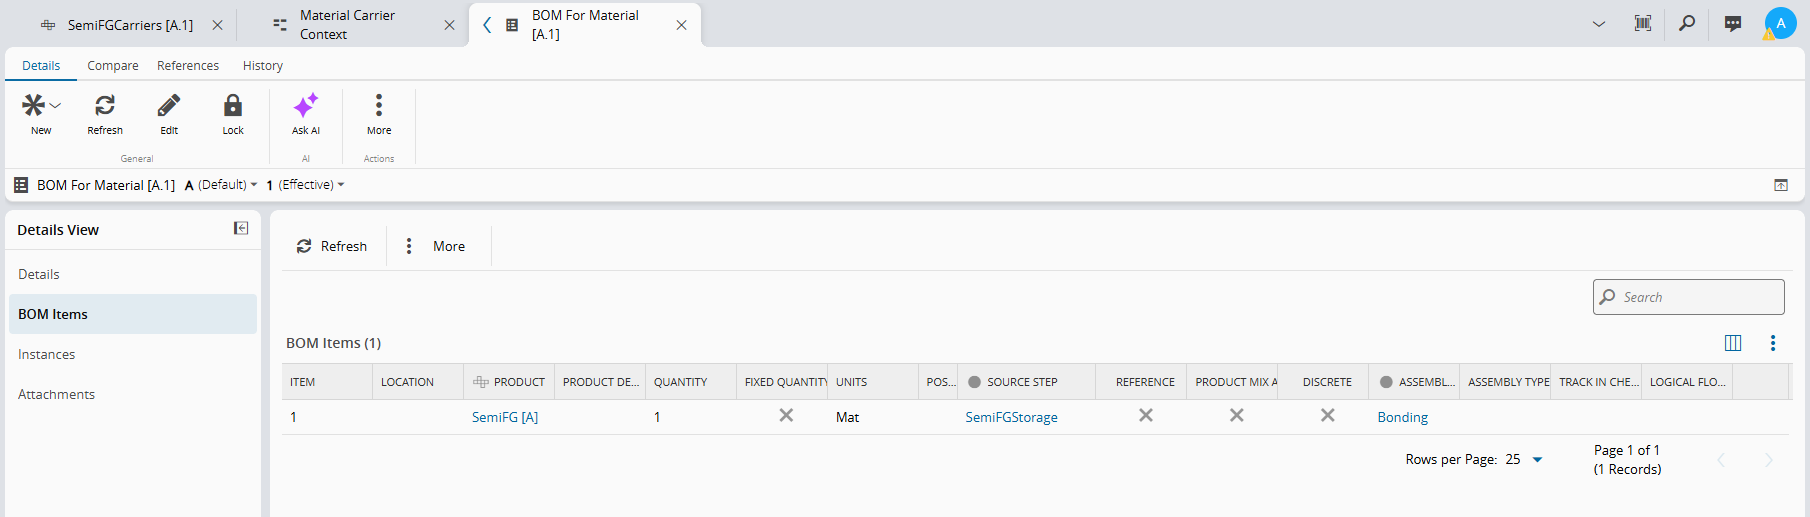
-
Select the Carrier Material Verification Mode, which defines when the system checks that the Material has the correct Carrier. For example,
At Move NextorAt Track Out.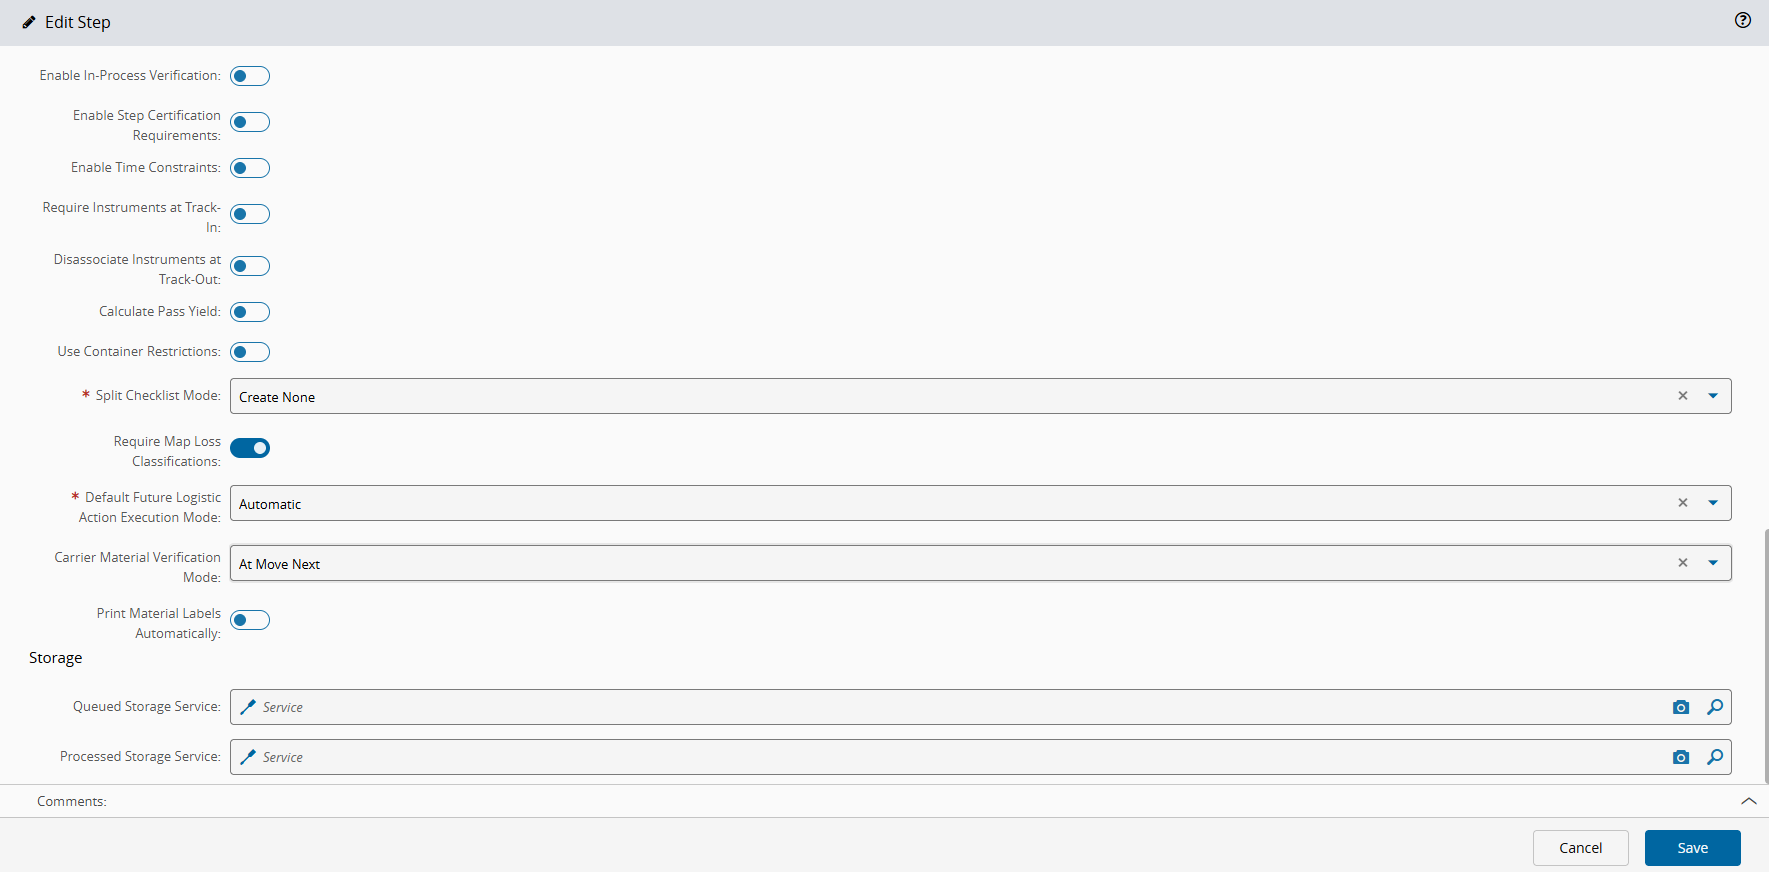
Material and Carrier flows#
In this configuration, the system creates a lot of SemiFG. Then, the Material of Product SemiFG:
- Picks up a SemiFG Carrier.
- Obtains a Frame at
Laminationthat carries two Carriers simultaneously. - Finally loses the SemiFG Carrier at
Delamination, while the Frame continues with the Material onward.
This illustrates the multi-carrier and multi-step persistence behavior that the previous section described.
The system automatically removes the second Carrier, Frames, when it consumes and terminates SemiFG at the Bonding Step.